


Courtship Quilt Tutorial
Jenny Doan
Courtship Quilt Tutorial
- 1 Pack x 10" Precut Fabric Squares (Layer Cakes) - Background
- 1 Pack x 10" Precut Fabric Squares (Layer Cakes) - Print
- 1 Yard x Accent Fabric
- 3/4 Yard x Quilt Fabric for Inner Border
- 1 1/2 Yards x Quilt Fabric for Outer Border
- 3/4 Yard x Quilt Fabric for Binding
- 2 3/4 Yards x Quilt Backing - 108" Wide
Featured products Get the Supplies Featured in this Tutorial


Finish your masterpiece and let us give it the finishing touch it deserves.
Subscribe to MSQC on YouTube
Hundreds of FREE tutorials and a new one from Jenny launches every Friday.
video transcript
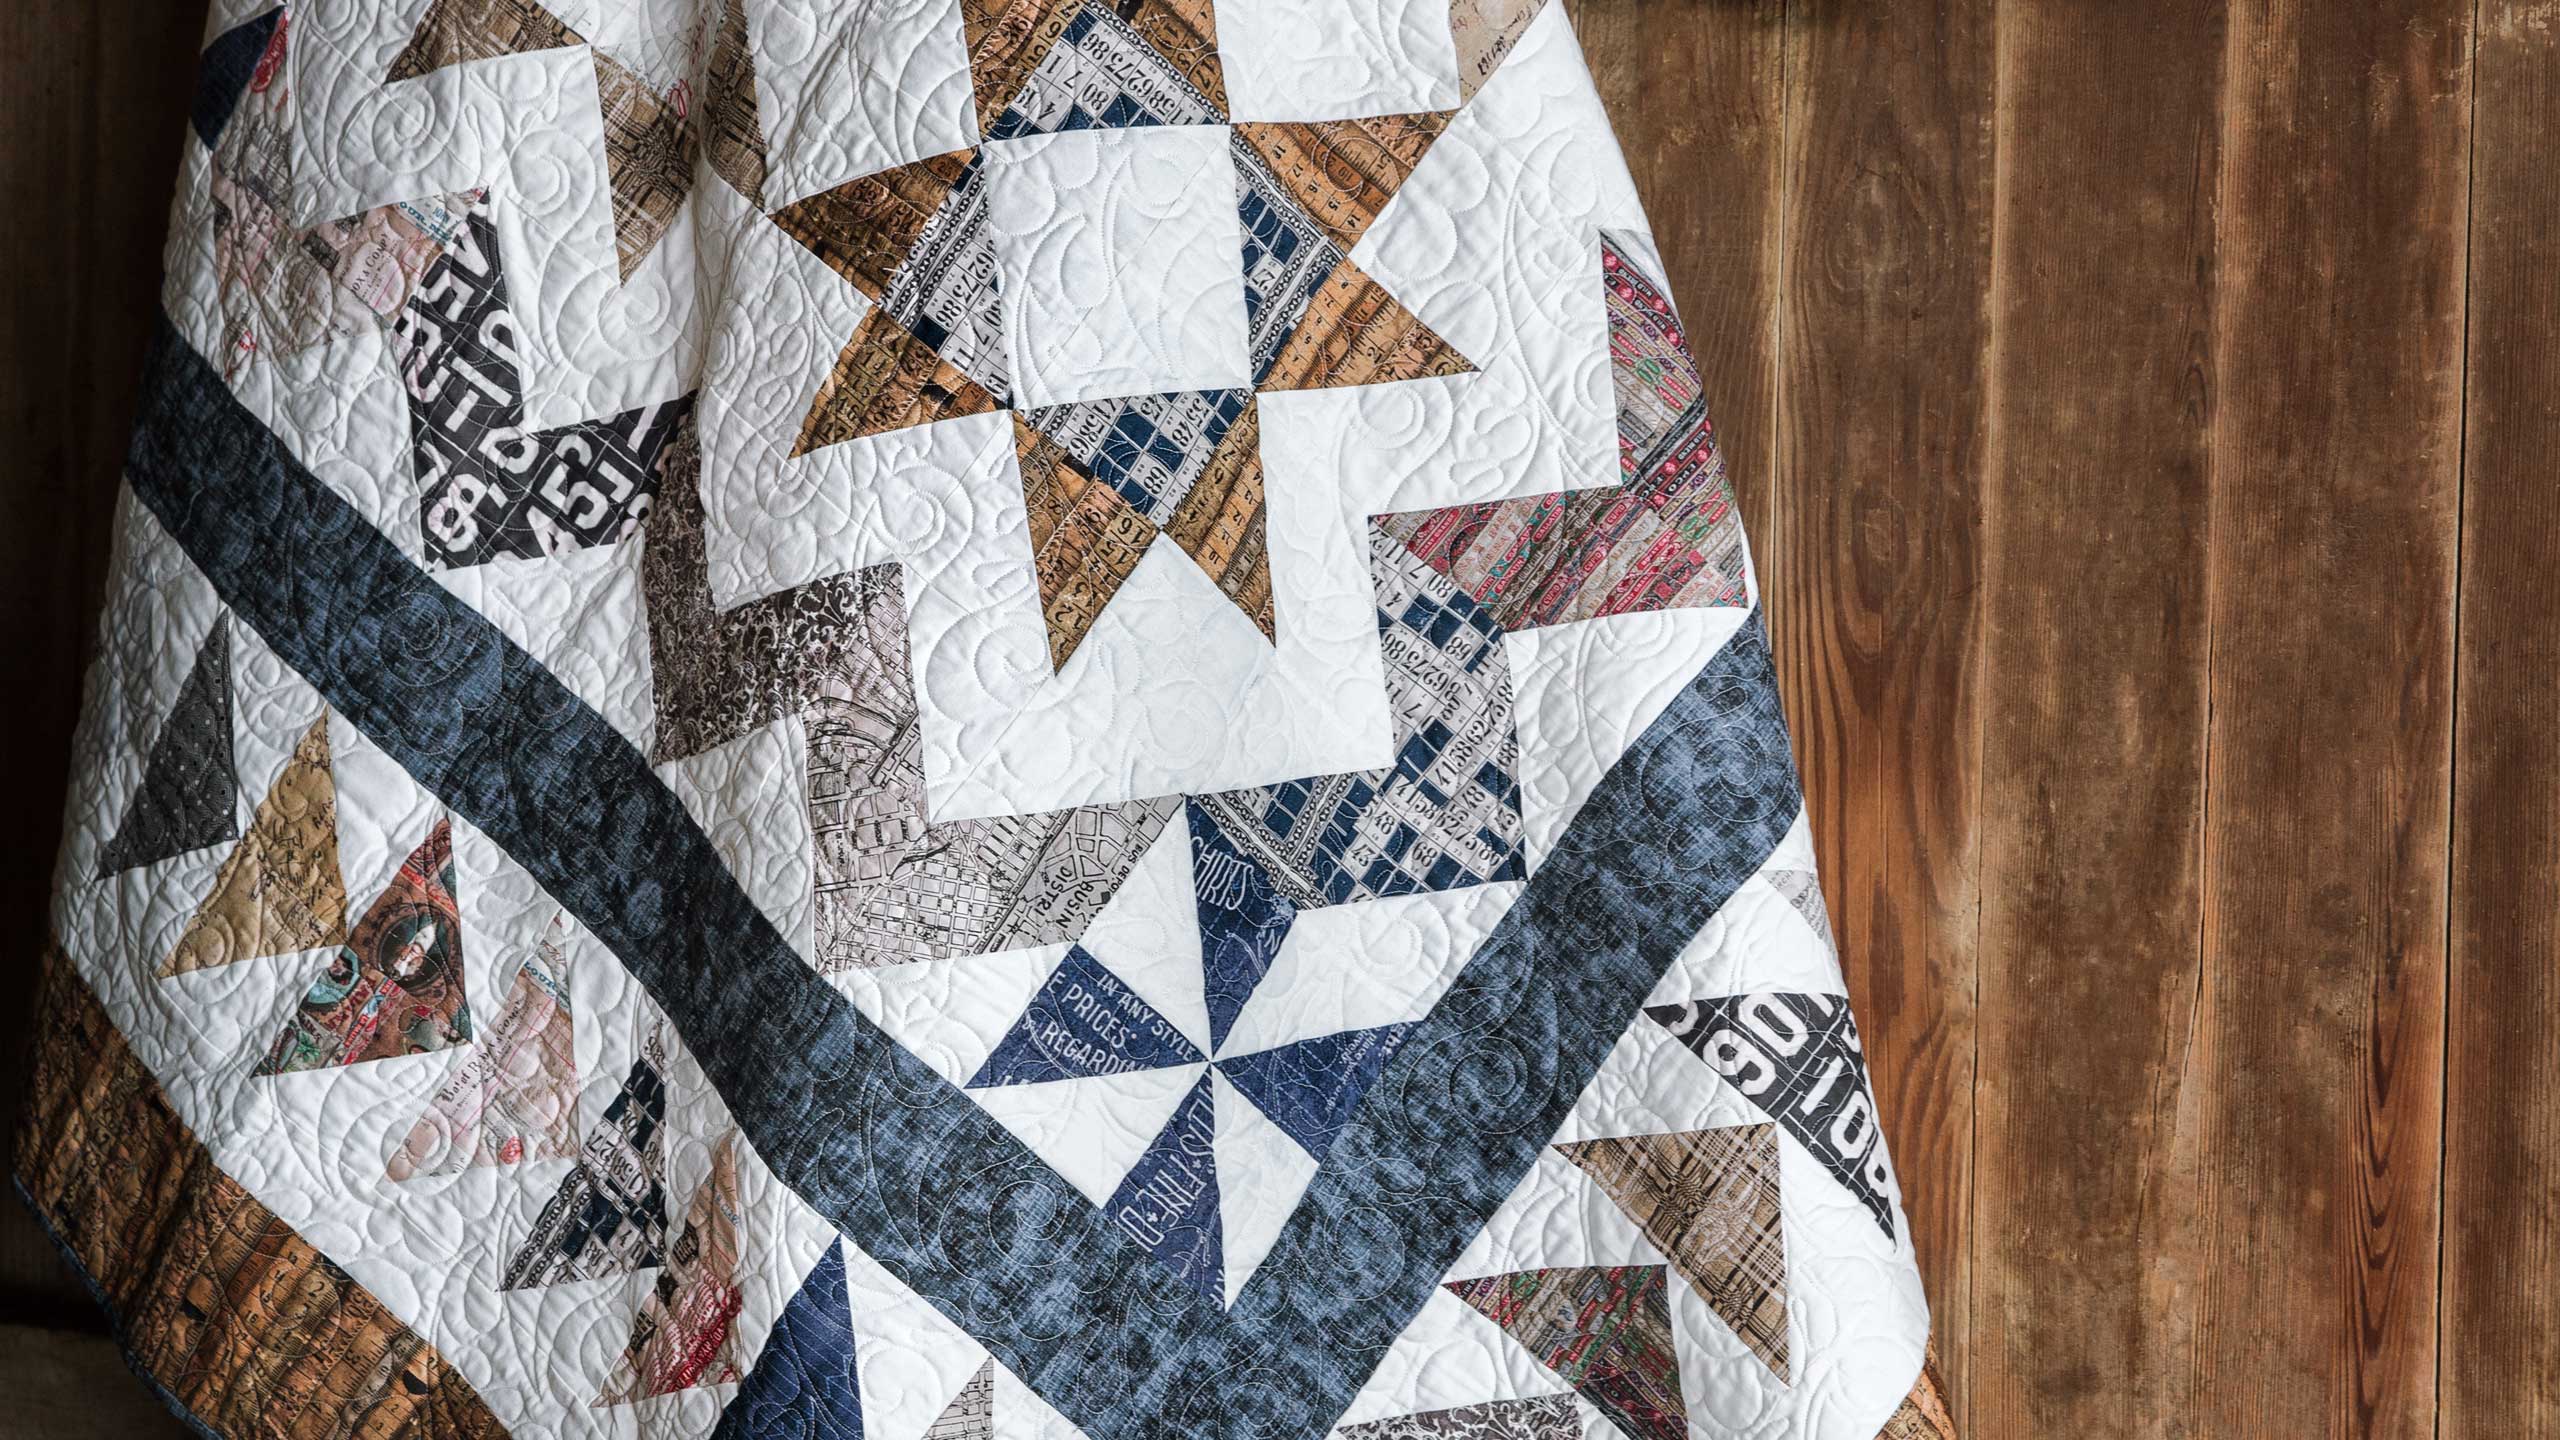
Hi everybody, it’s Jenny from the MSQC. And I’ve got such a fun project for you today. So all this year in Block magazine in the back of it, there is a story about Ingrid and Gustof. It’s about their courtship. But the fun thing is that every single block is tied to a quilt block and once you finish making all those quilt blocks then you get a quilt. Now at the very end I’m going to show you the quilt we made with Block. But for right now I’m going to show you how to do this one. I actually, we made the quilt for Block out of solids. But this one I wanted to choose a line of fabric and see what it looked like in fabric so, isn’t it gorgeous? So let me tell you about this. This is so much fun. All these blocks are different blocks. They’re all made from the same block and that is a half square triangle. And so you’re going to need one packet of ten inch squares. And we have used Eclectic Elements by Tim Holtz for Freespirit Fabrics. And can I just say that I love fabrics that have numbers and signs and letters. I just love those kind of fabrics. I just think it’s gorgeous. You’re going to need a little bit of other fabric, this accent fabric right here. This is a border fabric and you’re going to need a yard of that. Your outer border out here is going to be 1 ¾ yards. And this inner border right here is ¾ yard of fabric. For your back, now this is, we’re fortunate with this quilt because the backing comes in 108. And look at that, all those numbers and things, it’s so darling. And you’re going to need 2 ¾ yards for the backing and that’s just because it comes in that 108. This is going to make a quilt that is 87 by 87 so this is a pretty big quilt. So let me show you how to do this.
Alright, first thing you’re going to do is you’re going to take a ten inch square of print and a ten inch square of background. You’re going to need 42 of each. We’re going to lay those right sides together just like this, nice and even. And we’re going to flip those over and we’re going to draw the line. We’re going to do this with the easy eight. And so we’re going to draw the line corner to corner and take our ruler and just draw the line. It doesn’t matter if you use a pen or, I mean you can use anything to mark a line because this is going to be our cut line and so it won’t show in the quilt at all. Alright, so we’re drawing a line corner to corner. And then we’re going to sew a quarter of an inch on either side of that line. So come with me to the sewing machine and we’ll do that. Alright, right here I am going to set my presser foot up so it lines right along the line and we’re going to sew down and then flip that around. We’re going to do this on both lines. Alrighty, here we go, one more side and one more over here. Alright then what we’re going to do is we’re going to cut this. And we are going to cut this sideways, up and down, sideways and diagonally both directions. So I’m going to start with the horizontal cut. Here we go, almost lost my rotary cutter there. The reason I lost it is because I put it away. Do you guys ever do that? I’m forever hunting for my glasses up here and they’re not there, they’re put away. Alright, here we go. We’re cutting this way and we’re cutting this way. One of the reasons I love this ruler, you can lay it right on the edge. Be careful when you make those other cuts. You want to, you want to make sure that you’re, you know nothing gets cut besides fabric. No wounds in this quilt. No fingers were harmed in the making of this quilt.
Alright now what you’re going to do is as you can see we get eight of these from that little thing. And apparently I need to clip this a little more. There we go. Alright now we’re going to turn these all over so the dark side is up. And we’re going to press these open and then we’re going to square them. Alright here we go now we’re going to go to our ironing board over here. I’m just going to move this off of here, lay our squares out because I’ve kind of staggered them I can just take my iron and just set all the seams at once. And then I’m just going to roll these back. You’re going to do this to all eight of yours. And I have some already cut so I’m going to go ahead and show you how to square this up and then we’re going to start putting some blocks together. This is, this is a really fun quilt something quick. So what I’m using is a block lock ruler and the block lock ruler has this little shaved edge in here so it butts up against that seam and it doesn’t move. It makes it easier for cutting. I always, because I iron to the dark side I always put my words on my background side. So then we’re just going to trim this up here. And I’m going to, this is a 4 ½ inch one and we want to square them to 4 ½. And you don’t really have to cut much off. See those little tiny pieces. And then I’m going to turn this so I can get the other side. This is where it’s handy for a rotating mat too. There we go. Oop a little clip here. Alright so you’re going to do this to all the squares in your pack, all 42 of them. Sew them diagonally both directions and then cut them and then you’ll have eight of these from each square. So you’re going to do that to your pack, iron them. Sew them, iron them, and square them up. And then we get to start making blocks.
Now in Block magazine you get to make a block every time the issue comes out. So the first block they have you make is a pinwheel. And it’s these right over here. See these in the corner. You’re going to make four of those. There’s one on each corner. And to do that we’re just going to lay them like this. Now I have a little mantra that I say when I put pinwheels together because I get so turned about. And it’s light, dark, light, dark, light, dark, light, dark. All seams to the center. And I promise you I say that every time I put one together or I’ll be all turned around like that. Alright so that makes your pinwheel. You’re going to make four of those. And this you’re just going to lay over here, sew these in a quarter of an inch seam and sew the four together and press them open and you’re going to make four of those.
Then we’re going to make some stars for the middle. To make your stars these are our stars that I’m talking about right here. And they have eight legs and four for the center. And you want those to be contrasting. So I’m going to pull four, four of my, let me see, oh here they are. Four of these together. And we’re going to, these are going to be our middle so we put these together so that the background comes together like this. And then we’re going to make the legs on it. So the legs are put together like this. You’re going to sew your white together. So what I do is I just take four of these and sew the two together, always with my whites together like this. And if I remember that it’s the whites that get sewn together then it makes it much easier for me to put it together. So you can see the star is beginning to form like that. And then because these blocks are 4 ½ inches and you want cornerstones you’re going to have some solids as well which I have in here. You’re going to have four solid squares that you’re going to put together like this right in the corner like this. Just like that. And that makes your star block. Isn’t that cool? So you’re going to make four of those for the middle, one, two, three, four. And then you’re going to make this chevron block out here.
The chevron block is so cool because it’s just, let’s move this out of the way, it’s just two blocks of color where you sew the color together. And two blocks where you sew the white together like this. And that makes our chevron block. Isn’t that awesome? And then we’re to the flying geese out here, these flying geese. And those are just color together, color together. And you just keep doing that and you’re going to sew them together in long rows like this. And you make that border out here. And so what I think is so fun about this quilt is it just looks so amazing but it’s all made with exactly the same block.
Now I promised you at the end that we would show you what the Block magazine quilt looks like. So Misty if you’ll come over here and help me hold this up, that’d be great. So this is our Block one and we did it with a blue layer cake that is solids, a packet of ten inch squares. Alright, let’s come right over here. Isn’t that fun? Isn’t it fun if you just change the fabric to just a little bit you get a whole different quilt. So you can see these are all shades of blue but it just makes a beautiful, beautiful quilt. Again one more time let’s look at this one right here. I just think this is so much fun. So many different options with just one block. So we hope you enjoyed the Courtship quilt from the MSQC.
& Progress on Social