


Royal Wedding Quilt Tutorial
Jenny Doan
Royal Wedding Quilt Tutorial
- 1 pack x 10" Precut Fabric Quilt Squares (Layer Cakes) - Print
- 1/2 yard x White Fabric
- 2 yards x Border Fabric (incl. sashing strips and block pieces)
- 3/4 yard x Binding Fabric
- 4-1/4 yards x Backing fabric


Finish your masterpiece and let us give it the finishing touch it deserves.
Subscribe to MSQC on YouTube
Hundreds of FREE tutorials and a new one from Jenny launches every Friday.
video transcript
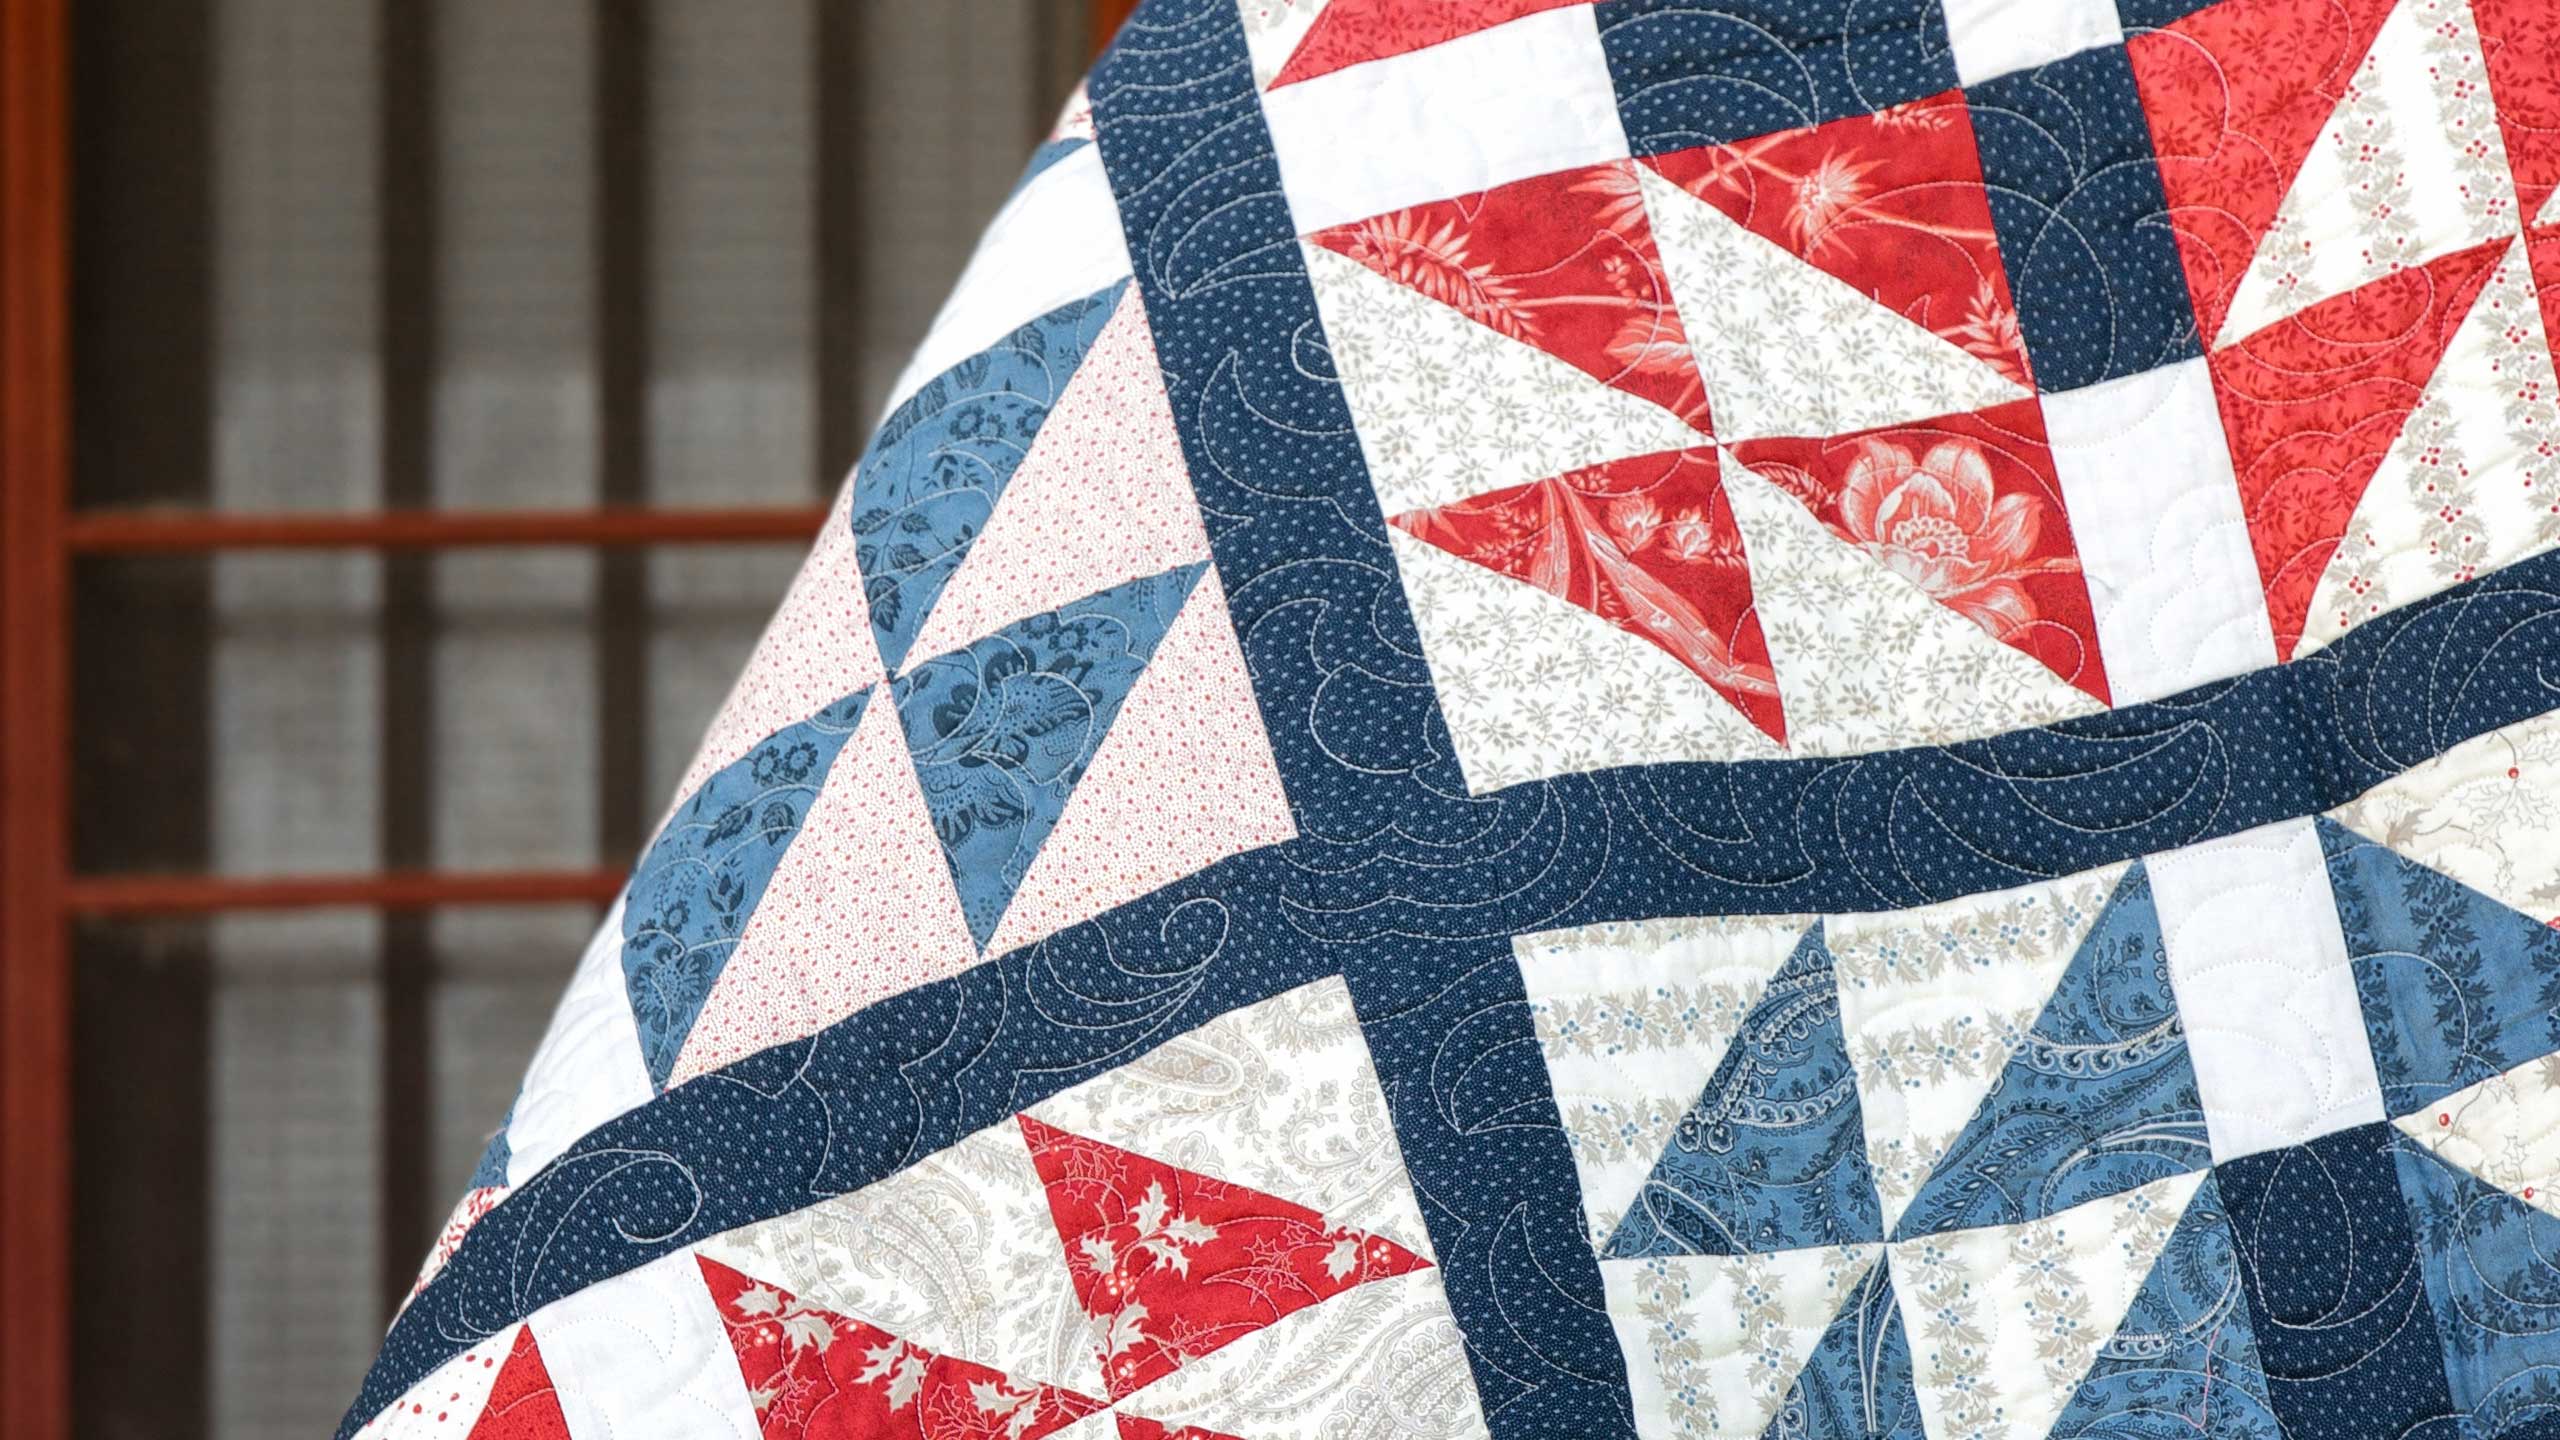
Hi everybody, it’s Jenny from the MSQC. And I’ve got a really fun project for you today. So this quilt behind me, this is an old antique block called English Wedding Ring. And since we had a wonderful event this year, the Royal Wedding, we decided to make this quilt using the English Wedding Ring. And I can hardly wait to show you how to do it. So to make this quilt what you’re going to need is one packet of ten inch squares. And we have used Hollywoods by Three Sisters for Moda. You’re also going to need this background, you’re going to need a half a yard of this white for this right here, these little sashing pieces. And you’re going to need a half a yard for this blue. But we are actually including that in the border yardage because we put the border yardage out here, a nice big border. And so you’ll need two yards all toll for that. On your background right here, see look at this backing, isn’t it pretty? On that backing what you’re going to need is 4 ¼ yards of backing and that just takes care of your whole quilt. It’s going to make a quilt that’s 69 by 69 so it’s a great size and super easy to make.
So basically this block is a half square triangle block. You’ll see we have four here and we’re going to make them the easy eight. So let’s get to that. I’m going to take two squares right here. And it takes two sets of two squares to make one block. That will make more sense in a minute. Right now what we’re going to do is we’re going to take our background square right here and we’re going to draw a line corner to corner on both sides, a diagonal line. Just like this. And then we’re going to pair it right sides together with our darker colors. So you want to match your lights and darks. You want to get those together in this packet. And we’re going to sew a quarter of an inch on either side of this, of this block right here, either side of the line and sew a quarter of an inch. So we’ll come over here and we’ll do that. And we’re going to zip right down the side and just flip it around and come right back the other side. Alright now what we’re going to do is we’re going to come right down the other side of the diagonal line. And this is going to give us eight half square triangles so it’s a lot of half square triangles all at once. Now what we’re going to do, once you have your X sewn like that we’re going to cut our block. And we’re going to lay our ruler right along the edge. We’re going to cut this directly in half. So just like this. Then I’m going to turn my ruler this way and cut this in half as well. Because this is a five inch ruler I can lay it right on the edge and just cut right through the middle. And then we’re going to lay it on our diagonal lines and cut there as well, just like this. And one more this way. And I moved mine. I got them kind of squirrely so I’m just going to do them one at a time. So here’s this one and then this one. Now if you don’t touch those and you know you keep your fabric all together you’re able to just do this all at once.
Alright so now what we need to do is trim these up. These have to be squared to 4 ½ . So we’re going to take our squaring tool here. I’m using this, the Clearly Perfect Slotted Trimmer. And we line with this trimming tool, we line our stitch line up with their stitch line. And so we’re going for the 4 ½ right here. I’m lining my stitch line with their stitch line. And then we’re just going to trim like this. On both sides. And just lay this over here and we’ll press those open all at once. So I’ll show you how to do that again. Again you put your line, their stitch line on your stitch line and come up. Sometimes we are close enough we don’t even have to trim that other side. So I’m going to go ahead and trim all of these up and I’ll meet you right back here. So now I”ve got these all cut, they’re all trimmed up and we’re ready to put them together in a block.
Now each one of these, when you sew two to these together, each one is going to make a half a block. So it’s going to take four ten inch squares to make our whole big wedding ring block. So we’re going to set these together in two blocks, four in each block just like this. And they’re all going the same way. Our half square triangles are all going the same way. And so we’re going to, we are going to lay these right on top of each other like this. And this is one of those things where when I start sewing them together, literally I sew the same thing over and over again because if I’m going to make a mistake I’m going to make it 42 times. So we just want to make sure we’re doing it right and it’s all going right. So a quarter of an inch down the side. And see I’m looking to make sure that this fabric is still going the same direction. And then we’ll put these other ones over here the same way. And this one and then these two I’m just going to lay them right sides together. Make sure that that fabric is still going up. Alright so now I have all these sewn in twos and I’m going to sew them in fours. So they should be able to be just opened up and put right together. I don’t even have to clip that thread. That’s chain sewing. And so I’m going to take a few stitches and then I’m going to line up this middle seam with one seam going one way and one seam going the other. And the same for this one. Alrighty. Now alright so now we’re just going to go ahead and sew a quarter of an inch right down the side. And we’re going to press these open. And this makes half our block. So we want to do two contrasting fabrics for our block so I chose this light blue and a background block. And for the other two I chose a more dark blue. So I’ll show you that one in a second. And it’s ready to go.
Alright so now we’re going to turn these so that the color comes into the middle and I have two more over here, right here that I’ve already done. Just like this it’s going to come like this. But you can see like here on the quilt right here we have a sashing in here. Well when you go ahead and do this, your half square triangles like this, they’re going to measure 4 ½ so we know your sashing strip needs to be 4 ½ and 4 ½. So let me show you how I did that one. What I did was I made a strip set. So I cut a 4 ½ inch strip of the background fabric right here and of the border fabric. So see I have, I have those two 4 ½ inch strips and I sewed one seam on one side. And I want them 2 ½ inches wide so now I’m just going to go along here. And I’m going to cut some 2 ½ inches wide. Now of course you can do it the other way where you cut 2 ½ inch strips but this way you’re going to get, you’re going to get a lot more little pieces out of it. And we need four for each block. And one more just like that. And then we need one more 2 ½ inch square of the background for, for your center square. And so I’m going to come over here and cut me a little center square. And I’m just going to cut it right out of this one right here. And I’m going to lay my ruler on here, go to the half mark on both sides and just cut me a little 2 ½ inch center square. Alright. And you’ll probably want to do that out of a strip. It makes more sense to do it out of a strip. I just don’t have one here.
Alright so now I”m going to press these open. And I’m going to go ahead and put the dark side to the top and then just roll them back. It’s always, always nice to have nice flat pieces to put your block together. It just makes it go together so nice. And since this is a royal block you know it’s got to be even better. Alright so let me show you how we put this together. So we’re going to take our blocks like this and we’re going to put two different blocks. The color is going to point toward the middle. One sash will go here like this. And see how nicely that’s going to fit in there. And then we’re going to have these, oh opposites, we’re going to do opposites like this. And one sash is going to go in here like this. And so let’s go ahead and sew these sashings to these blocks. Again we’re just going to do a quarter of an inch along the edge. And you can trim your dog ears if you like. Actually if you use the little slots on the ruler those dog ears will be gone and you won’t even have them. Alright so then this one is going to go over here. You always put the color on the top to match the color. That’s how I remember in my brain where I’m going with this. And now we’re going to do the bottom half of our block right here. Same thing, attach our little sashing color to color. And then attach our other side over here. Alright. Let me make this match up. The nice part about it being 4 ½ the same as the block is that I love how it enables you just to go from, you know, from piece to piece because you know it’s going to match up. Alright now I want to show you something here. So see right here people get really crazy over the ironing thing. See right here how this goes this way and that goes that way. That’s going to drive some people crazy. What I’m going to do is just clip that seam and let it lay down. It’s not ever going to make any difference and the quilters are going to quilt that down with lots of stitches and it’s not going to go anywhere. So I pressed this one. Now I”m pressing this one.
Alright so now we have to add this middle sashing. So what we’re going to do for that is we’re going to take our two pieces right here. And we’re going to lay them right here like this and attach that little square right in the center right there. So let’s go do that. And then we’re going to sew it to both sides of the blocks. And that finishes our blocks so it’s real, it’s much quicker and easier than it looks. Alright so that side and this side. Alright now I”m going to press this one. And I’m going to press this so that these colors go toward the dark block. And that’s just because I want to hide that darker fabric. I don’t want it showing through on my seam. Let me clip this little thread right here. Alright so now what we’re going to do is we’re going to put this together a quarter of an inch and sew these together like this right down the middle. And this block right here you just want to make sure these lines match up. When you’re putting that together you want to make sure these lines match up. So I”m going to do that as I go along. I”ll start right here. And here’s my, my every 4 ½ inches you have another block that lines up so it makes it really nice. And it keeps everything so nice and square. Alright now let’s add our other side on here. And again I want to make sure that opposite colors, you know, before you sew that last seam in there you want to make sure that you’ve got it all going right because there’s nothing worse than getting it together and going Oh man I should have looked at that. Alright so now this one, these go out and that goes in. And again and one more piece up here. There we go.
Alright so let’s press this open. This was such a fun block to make. And it’s one of those great old ones that just comes together so pretty. And the color really matters in this block. For instance if all your little corner triangles here were the same color this would look like a whole big square right there. And so there’s lots of things you can do with this color wise to make it really fun. So this is our block. And this is the English Wedding Ring. So let me show you how it fits in here. So it goes right here and right here, and right here. We’ve put a 2 ½ inch sashing right in between them. Super easy, just straight pieces of the, of the same fabric that we used on our border, this same fabric. And so we cut 2 ½ inch strips for this and then this big border. Let me see how big this one is. Oh this is a, this is a six inch strip right out here. So a nice big border. And so it’s just super easy to put together. It’s nine blocks total so you won’t use all your squares. Not all of them had a lot of contrast so we didn’t use all of the squares. But it’s really easy. It takes four squares to make one of these blocks. And it’s just a great, fun, quick quilt. And we hope you enjoyed this tutorial on the English Wedding Ring from the MSQC.
& Progress on Social