


Winter Star Quilt Tutorial
Jenny Doan
Winter Star Quilt Tutorial
On cold winter nights, the sky is an icy blanket of twinkling stars. The truth is … I rarely take notice. It’s just too cold for stargazing!
But if you are willing to bundle up and brave the winter chill, you will be treated to a glittering show far brighter than any summertime stars.
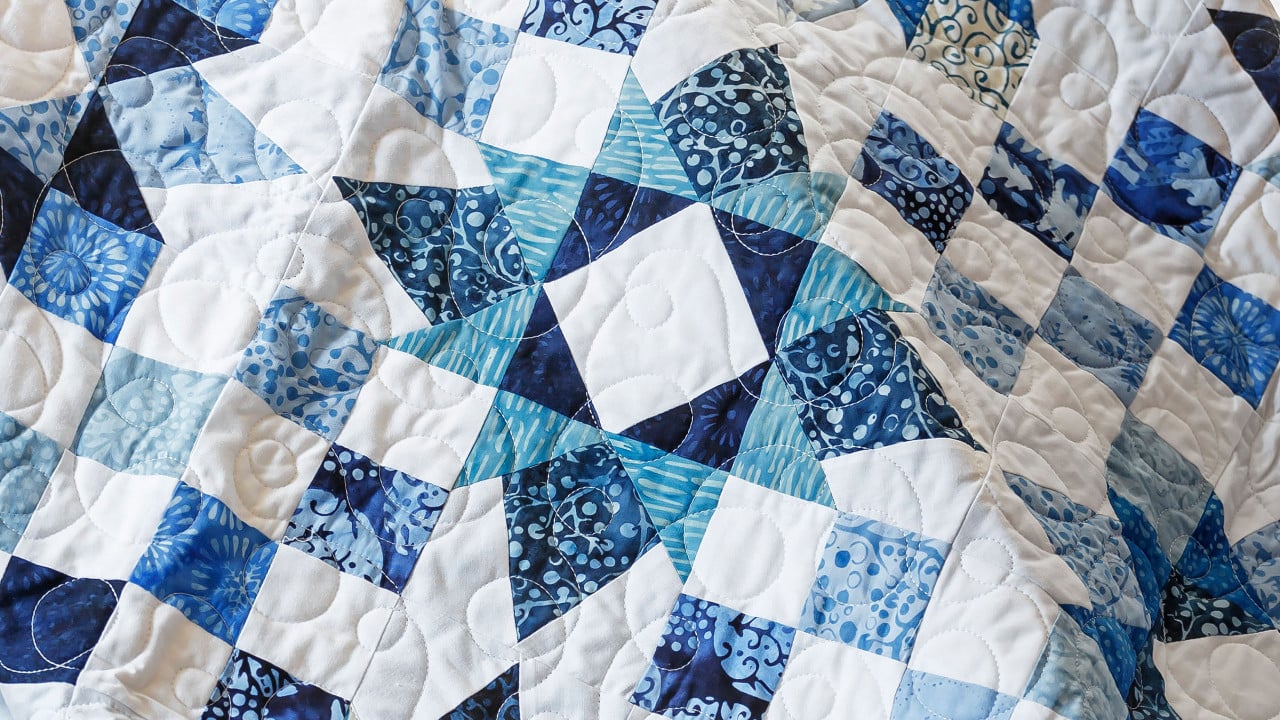
This week Jenny is whipping up a Winter Star quilt in icy shades of blue and white. This quick and easy layer cake pattern is perfect as a lap quilt or winter wall hanging.
- 1 Pack x 10" Precut Fabric Squares (Layer Cakes) - Print
- 1 Pack x 10" Precut Fabric Squares (Layer Cakes) - Background
- 0.5 Yards x Quilt Fabric for Inner Border
- 1.25 Yards x Quilt Fabric for Outer Border
- 0.75 Yards x Quilt Fabric for Binding
- 4 Yards x Quilt Backing Fabric
Featured products Get the Supplies Featured in this Tutorial


Finish your masterpiece and let us give it the finishing touch it deserves.
Subscribe to MSQC on YouTube
Hundreds of FREE tutorials and a new one from Jenny launches every Friday.
video transcript
Hi everybody, it’s Jenny from the MSQC. And what a great quilt this is. Look at this quilt behind me. Isn’t this gorgeous? I love the colors, first of all, I love the layout. I even love the size. This is a great size for your porch; a great size for my stair wall which you can bet it’s going to go on. So to make this quilt you’re going to need one packet of ten inch squares. And this packet is called Winter Frost. And it’s by Kathy Engle for Island Batiks. And I love how they pack their packs because you can see all the colors. You’re going to use 36 of those prints and you’re going to need some background squares. And you’re going to use 28 of those. And then you need a little yardage to match that background and so you need a half a yard for this first outer border. It’s a 2 ½ inch outer border. This is a yard and a quarter. It’s a nice big six inch border. You’re going to end up with a quilt that’s 63 by 63 because we have 16 blocks involved. And this is the back of the quilt. That beautiful, soft blue is so pretty . And you’re going to need four yards for that. So I love this size of quilt because it’s great for hanging on your porch. It’s great for my stair wall. You know, it’s just a great size of quilt. Remember if you want to make it bigger, say you love this and you want to make it for your bed, you’re just going to double up or triple up on your packs and then you’ll have enough. So just remember you’re just going to go twice as big.
Alright, so let’s look at this block. Now this block is made up of three different blocks. And this block comes to us courtesy of one of our pattern writers, Kim and it’s just a darling block and really fun to make. The first block we’re going to make is we’re going to start with this center square right here. And what you’re going to do is you’re going to take one of your background squares and you’re going to cut a 4 ½ inch square. What I’m going to do is I’m going to cut my whole strip, let me flip this over. And I’m going to cut a 4 ½ inch strip and then cut that into 4 ½ inch squares because I know I’m making more than one block. So now I have this 4 ½ inch block right here. And then what you’re going to do is you’re going to take one of your background squares, I mean your print squares, and you’re going to cut a 2 ½ inch strip and cut four 2 ½ inch squares for that. So I have this one already ready for you with the center block and my four corner squares. Now if you’re following the pattern you’ll get all the cutting instructions and you’ll have all these cute little piles and you’ll have everything ready to go. I’m just going to show you how to make one block so I know you can do it. So on this one what we’re going to do is we are going to lay two blocks diagonally from each other. We’re going to line them up exactly in the corners, just make sure they’re right snug in there. And then we’re going to sew diagonally across here like this. And then trim those off and add two more. Now you can draw your line, iron your line. You can also use the diagonal seam tape like I’m using right here. And it just, I’m going to line up the very first part of my needle and then make sure that the point of my block lines up on my red line, that’s my center line. And I can just sew straight across. This diagonal seam tape saves me so much time. Alright so now we’re coming over here to the other. Realign the square and make sure it lines up exactly in the corner and then we’re going to sew corner to corner. And again I just take a few little anchoring stitches and then I just line up my corner with the red line and we go all the way.
Alright so then what we’re going to do is we’re going to trim these off and press them back. Because the block is actually a half an inch smaller, it’s a 4 ½ inch block, you can’t put all four corners on at once. You have to do them two at a time. And it’s easiest to do opposites. And so now what we’re going to do is we are going to add our other blocks to the other side like this. And again this one, line them up. And they’re going to cross over which you want them to do. So they’re going to cross over a little bit. Alright so now we’re going to sew corner to corner. And again make sure you’re lined up and your point of your fabric is on the red line. Ya and please don’t hesitate, if you just want to draw that line, do it. I used to tend to eyeball these and this is one of those where you want to get it pretty close on. When you’re eyeballing it doesn’t always work out so well. Once you get those two on we’re going to trim them off and press them back. And our little center block will be finished. So I’m going to make sure and catch these threads when I’m trimming. And cut this one off here. And then we’ll press it back. And it should still measure a 4 ½ inch square. So this is our center block.
So the next block we’re going to do are these four patches right here. Now you want to make sure you have a little bit of contrast or at least two different colors to make these. You’re going to take a ten inch square of print and background, cut them both directions so you have four five inch squares. And we are going to just line them up together. So I have a five inch square of print and a five inch background square. We’re going to sew two seams a quarter of an inch right down both sides. Alright. So we’re just going to sew this side and I am going to flip this around and sew the other side. Now there are lots of ways to make four patches. This is just one of my favorites. What we’re going to do is I’m just going to take my two blocks right here. So if your seams are pretty consistent you can actually stack these up and cut two at a time. So you lay your 2 ½ inch ruler right along the edge you’re going to make that cut. And then we’re going to want to take these and press them open. So we have this one here. You want to press to the dark side. And this lighter blue, we have a dark blue and a lighter blue. And we’re pressing away from the white on both of these. So here we go. With the blue and the dark blue and the light blue. Now we just put two five inch squares together and sewed right down the sides. We are going to do the same thing again. But what we’re going to do is we’re going to put these opposite colors. And because we pressed to the print they will meet up in the middle . The seams will lay opposite. You can see how they’re opposite. You want to make sure that these nest up really nice and tight and feel those with your fingers. And then we’re going to sew a quarter of an inch right down the side on these. Alright so line them up, get a few stitches, make sure that you are just like tucked in there nice and tight. Your seams are nested. They’re going in opposite directions and we’re going to do that on this one as well. Make sure that your middle seam is nested. It’s that center seam you want to watch. Now if you have any trouble with this method at all, because there’s a ton of ways to make four patches, you can actually cut out the little 2 ½ inch squares and sew four of them together. You can actually, at this point, you could cut them straight down the center and just turn them and put those two little pieces. So don’t be afraid to use your favorite method in making four patches. That’s what it’s all about. It’s just being comfortable enough to, you know, it’s a four patch so do it however you are most comfortable. This is just a little way that I do it. Then what we’re going to do is we are going to again lay our ruler so it comes. This is 2 ½ half of five is 2 ½ so you don’t even have to think about measuring on the mat or the ruler. We’re just laying our ruler on the edge and we’re going to cut right up that middle. We’re going to do that on both of our pieces and that will give us, two pieces will give us four four patches. And look at that. They look great. Alright let me press these open. Just like that. And I’m just rolling them back. And I’m going to set the seam and roll it back. Alright.
So here’s our little four patches and we need four of those for the corners. So we have those right here. Now let’s talk about these star legs. They look a little daunting but don’t you worry. What you’re going to do is you’re going to cut your star leg at 4 ½ so a 4 ½ inch square on there. And then you’re going to take a five inch square like this and just cut it in half so that you have two 2 ½ by five inch rectangles. So we’re going to start with our center square and this is our center square. It is cut at 4 ½. And what we’re going to do is we’re going to kind of wonky star this but it’s going to be pretty much the same. So first thing I want to do is find my middle right here. I finger pressed it so I have a little crease. I’m going to make sure that this piece, I’m going to use the straight edge, crosses over that line. And I’m going to bring it down as far as I can on this side. So we’re going to do this wonky leg on both sides. And I’m just going to sew right along that edge. And honestly I’m not even a quarter of an inch in on, you know my seam isn’t even a quarter inch in on part of that so don’t stress about that. And then I’m going to take this other one, let me show you here. I’m going to take this other one and I’m going to cross it over again, making sure it’s over and then I’m going to sew right up here. Now just so you can see on this side right here. Do you see I didn’t even, like part of it, it’s not even really a quarter of an inch. It’s just got to hold on there and cover up that corner. So I tend to be kind of sparse on that seam because I want to make sure that that corner gets covered. Alright so then we’re going to lay this one down here. I’m going to cross it over this top right here. And I’m going to make sure that this part is going down as far as it can go. And then we’re going to sew that side. And if you sew a fat quarter of an inch it might be too big.
So now what we’re going to do is I am going to press these back like this. And it makes this funny shaped piece but on the back, this block is our pattern. So we’re going to use this block to square up so that it looks like star legs. So we’re trimming off these parts right here and trim off the top, taking it right back to a five inch square. Now I don’t normally trim these back pieces off. I just don’t. I’m not hand quilting this and so I just don’t worry about it. If I were hand quilting it I would probably pull this back and trim this part off. But you don’t have to do that.
Alright so now what we’re going to do to finish off our little star leg block is we have these little pieces right here, two 2 ½ inch squares. And they are going to go down here on the pointed part. So we’re going to lay them in here, just snug them in there and we’re going to snowball it corner to corner. And I’m going to use my diagonal seam tape for that. And again you can draw that line. But we’re going to go corner to corner on here. So regardless of how far down you get this point, we’re going to cover it up so it’s going to be fine. No worries. Alright. And because we can only put one on at a time because it is a 2 ½ inch square on a 4 ½ inch block. So I like to trim and then press it back. And then I’m going to put that other corner on that other side, line it right up with that corner like this. And then we’re going to sew corner to corner. And so it’s a lot easier than it looks. But it has that great wow factor. And I just think these blocks look like they’re sparkling, they’re just so pretty. Alright so let me just trim this edge off and we’ll press it back and I will show you how to put this block together. Alrighty.
So here is our star leg. Now I have all the components done to make this block. And what I have is this center block right here and I’m going to put star legs on both sides like this. And that’s going to make the center of my block. Now on this one I’m going to put my star leg in the center and my four patches are going to go in the corners. So I’m going to decide, I want good contrast and I want to decide if I want this one in the center or this one in the center. And that’s personal preference, whatever you want. I think I’m going to go with this one. And I’m going to put these in the center corners like this, just like that. And then we’ll just sew these three rows together and it will make our block. Now that being said, that’s this block right here. And this block goes right here. But this next block these corner patches are just a little different.
So what we did with those was we took these corner patches and we turned them this way so the white came in. So we have one block where the color is in, one block where the white comes in. Now what that does when you lay them together, well it does this. It does this. It gives it that extra sparkle. It gives it this extra little secondary thing that happens up here. And it just comes together so cute. So see how this one has the block into the center and this one has the white into the center. And so just by changing up that one corner block, we got a whole new look. Obviously, you know, if you put the quilt together with just these it’s going to be super fun. These actually kind of circle out. You put a block up with these and it’s going to be a great quilt that will. We combined them together and we thought it just made it really sparkle. So we hope you enjoyed this tutorial on the Winter Star quilt from the MSQC.
We hope you enjoyed watching this video. If you’re not already part of the Missouri Star quilt family you can hit the subscribe button below so you won’t miss a thing. And if you click that bell it will notify you every time a new tutorial comes out. See you next Friday.
& Progress on Social