


May Day Basket Quilt Tutorial
Jenny Doan
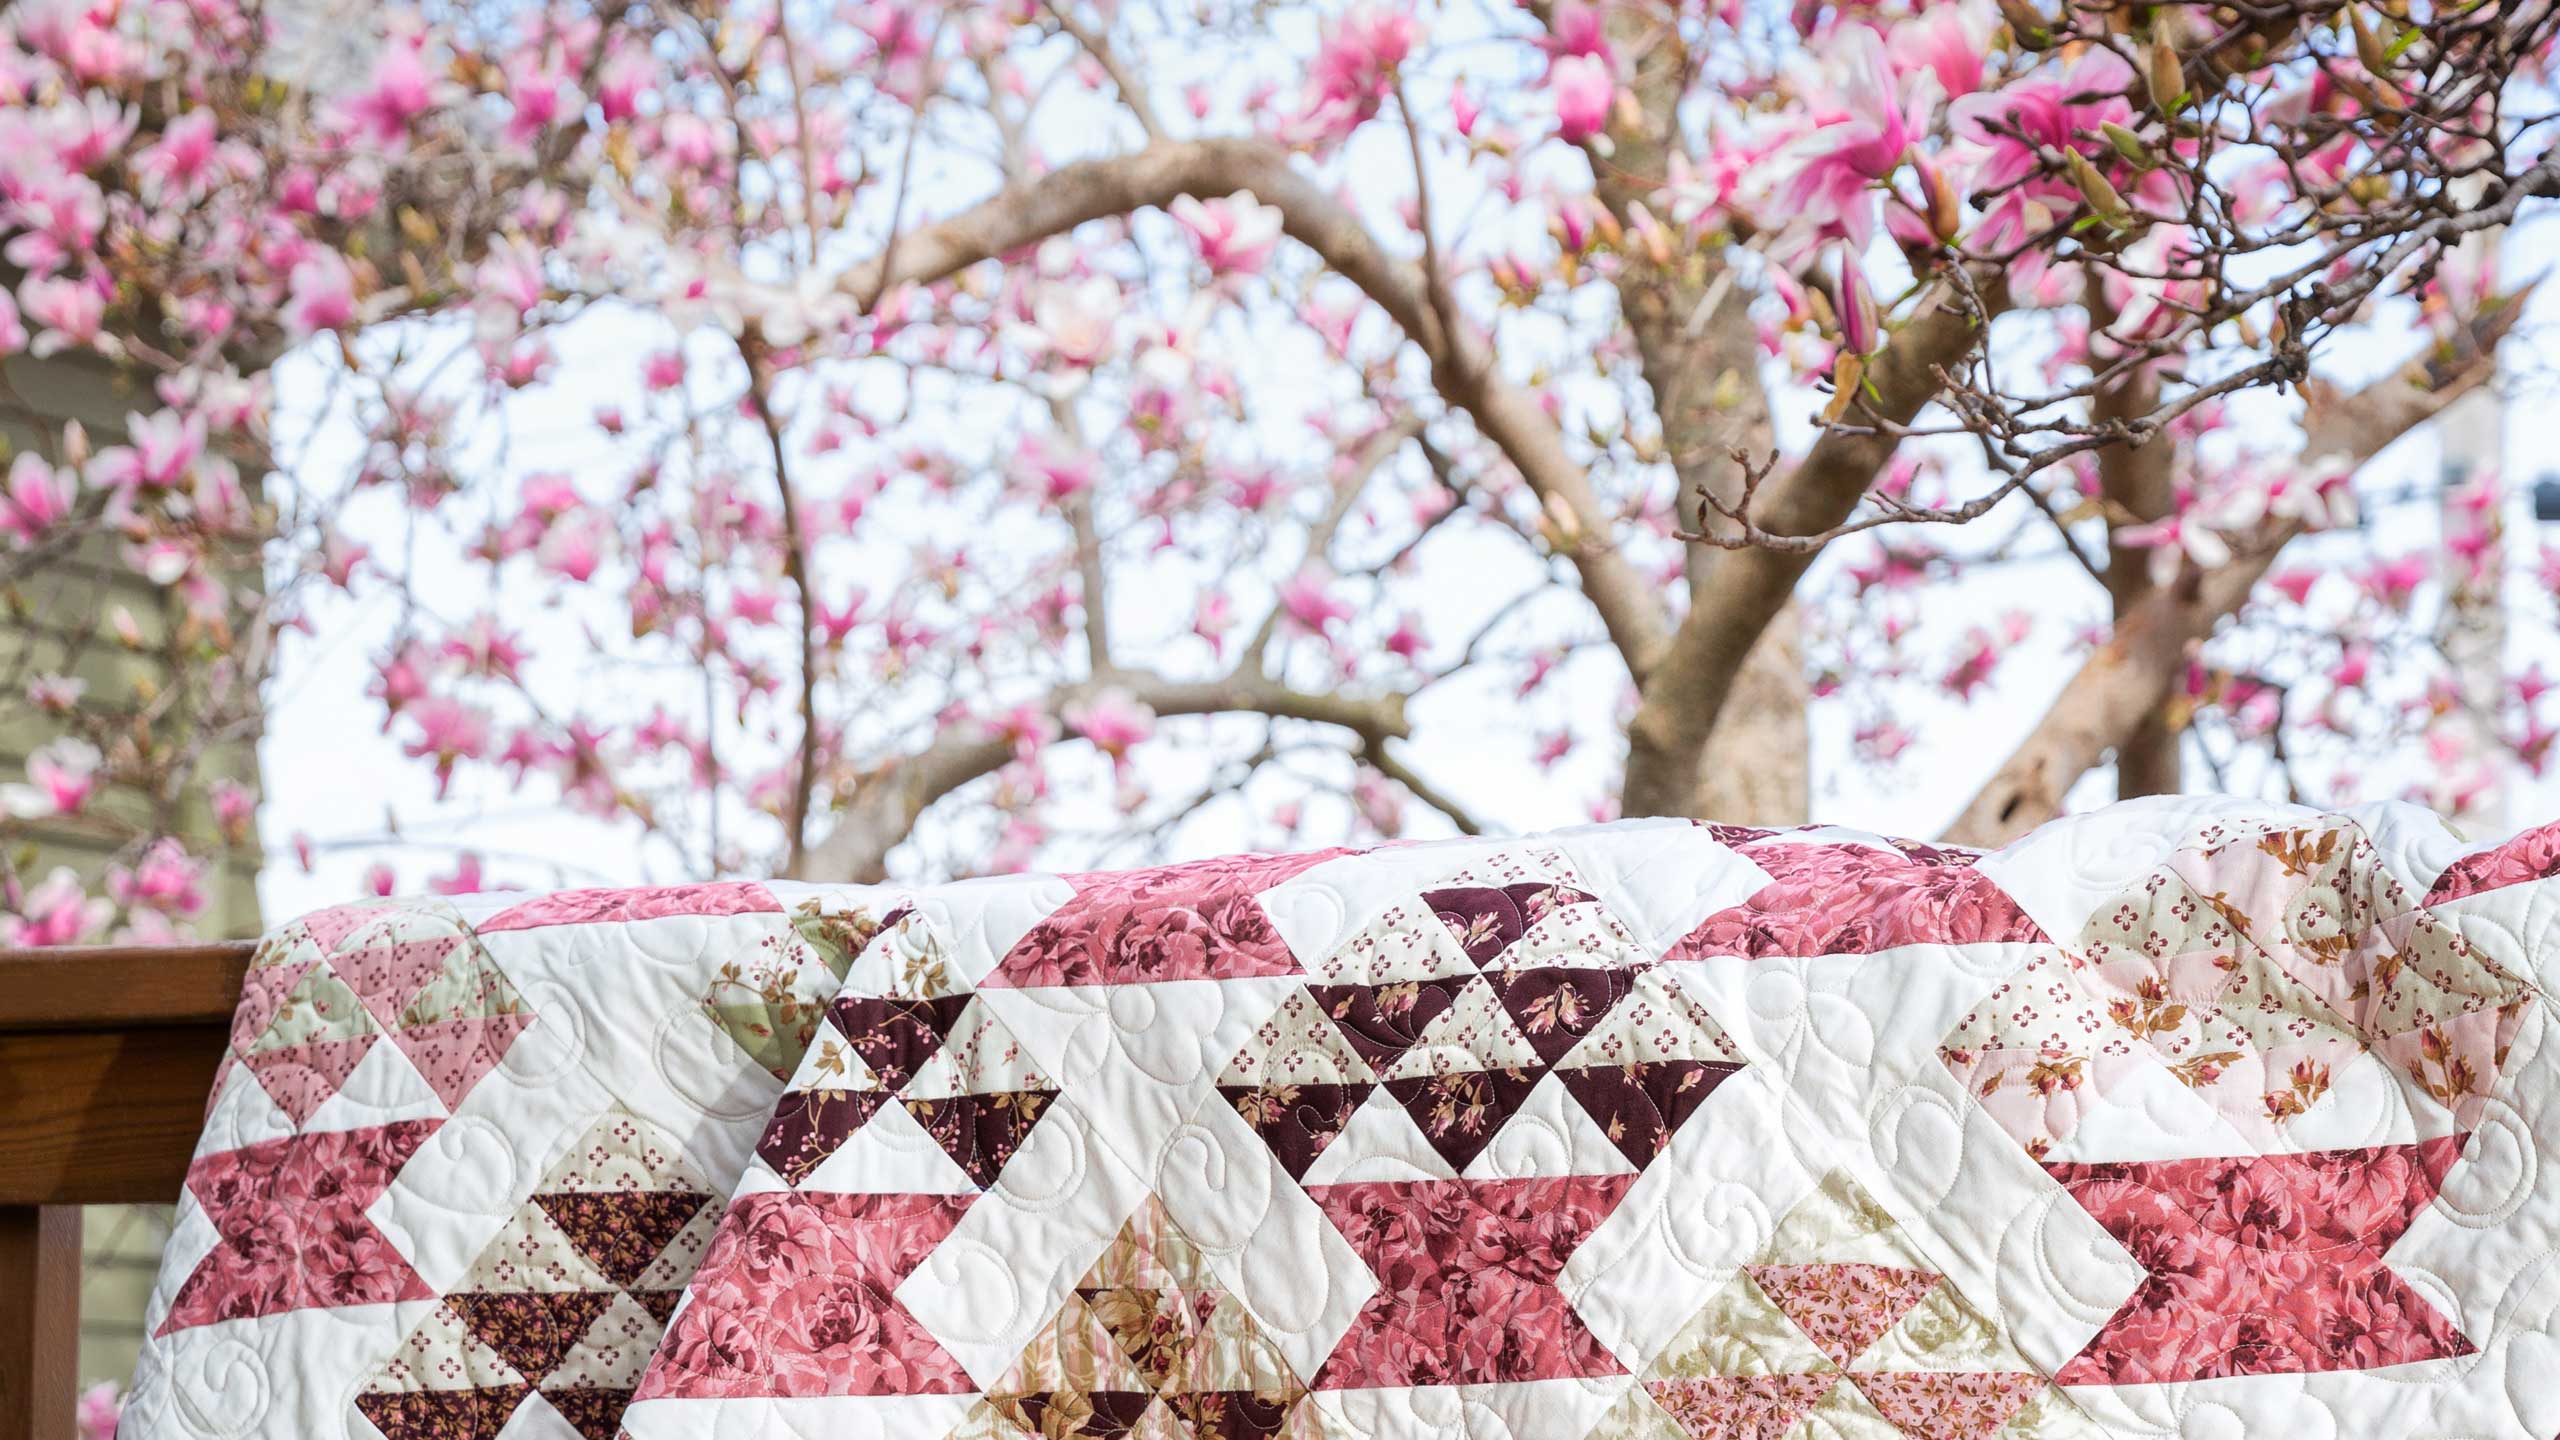
May Day Basket Quilt Tutorial
- 1 roll x 2.5" Strips (Jelly Rolls) - Print
- 2½ yards x Background Fabric (incl. Inner Border)
- 1 yard x Complementary Quilt Fabric
- 1¼ yards x Outer Border Quilt Fabric
- ¾ yard x Quilt Fabric for Binding
- 4½ yards x Quilt Backing Fabric
Featured products Get the Supplies Featured in this Tutorial


Finish your masterpiece and let us give it the finishing touch it deserves.
Subscribe to MSQC on YouTube
Hundreds of FREE tutorials and a new one from Jenny launches every Friday.
video transcript
Hi everybody, it’s Jenny from the MSQC. And I’ve got a great project for you today. It’s a basket. I love that I finally was able to figure out an easy way to do a basket. We’re calling this May Day baskets of course. And it’s just darling, isn’t it? I can’t wait to show you how to do it because it’s super easy. So to make this quilt what you’re going to need is one roll of 2 ½ inch strips. And we have used this beautiful Burgundy and Blush for Maywood Studios. You’re going to need some background fabric. That’s this right here. And you are going to need, let’s see, oh 2 ½ yards. That includes your first little border out here. This second border out here is a nice five inch border. And you’re going to need 1 ¼ yards for that. For your backing here, look we’ve used the same rose fabric that we used in the baskets. Makes it really pretty. And for your backing you’re going to need 4 ½ yards. You’re also going to need some complimentary fabric. Now this is the fabric that we used for our baskets. And you’re going to want to pull out something, you know, even a solid you could use. But something that makes that basket pop. And that, for that you’re going to need one yard of fabric, of complimentary fabric. You’re also going to need these clearly perfect slotted trimmer. You’re going to use both the A ruler and the B ruler, so that will help you. Alright let me show you how to make this because this is really fun.
So we’re going to take two strips and we’re going to sew them together. So we have a dark strip and a light strip. And this is a great packet to go through because I don’t know if you noticed but there’s a lot of darks and there’s a lot of lights and you can just put them together darks and lights. And sew a quarter of an inch on both sides, both sides. This enables us to cut our half square triangles from both sides so that they work. So we’re going to take the clearly perfect slotted trimmer B and we are going to make, cut three inch half square triangles. And so what we’re going to do is we’re going to lay their stitch line on our stitch line, just like this. And match it right up. And then we’re just going to cut side to side like this. And once you’ve cut one, I’ve already cut one. Once you cut one you can really just cut from one side. So flip it around and match it up, match up your seam line with their seam line just like that. Match it up. And make a cut. And you’re going to do this to your whole strip. Now you’ll get two basket blocks out of each strip. And but for each basket block, let’s see where’s my basket? Here it is. Alright for each basket block you’re going to need one, two, three, four, five, six, of the little three inch half square triangles. This is the block we’re talking about. Ok so I have some over here. I’ve cut some here. Let’s press those open. Just like this. And we’re pressing to the dark side. Now to make your basket shape you are also going to need some of the same size triangles, half square triangles with your basket fabric. So you’ll take a 2 ½ inch strip of your basket fabric and you’ll sew it right sides together a 2 ½ inch strip to your background strip. Sew on both sides and you’re going to cut out three inch half square triangles with that one as well. So let me show you how this starts because we’re going to start laying it out before we get onto the next part.
So what we’re going to do is we are going to put all of our half square triangles out like this so you can see where we’re going. And we’re going to put three in a row just like that. The next one we’re going to put two. Oop let me turn that around. One more. And then down here we’re going to put one like this. Now these two pieces in here are made with the basket fabric and that gives our basket the shape. And so those are going to go in here like this. Alright so the next thing we need to do is we need to sew these together. And we’re going to sew a three inch by 5 ½ inch strip here. And then we’re going to sew one of those strips on here. And we need to make a half square triangle, see this basket block in the corner is just a half square triangle. So we need to make one of those for our center piece that makes our basket. So let me show you what I’ve got here. You’re going to cut your complimentary fabric and some of your background into six inch strips. We’re going to take, let me move this over, make sure you can see everything here. That will, don’t worry I can put it back. There we go. Alright. So we’re going to go ahead and make our basket now. And what we’re going to do is we’re going to take this and we’re going to draw a line side to side right here with our six inch, let me use my bigger ruler. And we’re going to draw corner to corner like that. We’re going to sew a quarter of an inch on both sides of that line. And that’s going to give us two half square triangles for our baskets. Alright now I’m just going to flip this around and sew down the other side. There we go. And now we’re going to take this and cut it in half. And then what we’re going to do is we’re going to take our trimmer B, I’m sorry A, our A trimmer and we are going to make these 5 ½ inches. So we’re going to line our seam line with their seam line. We’re going to match it up as good as we can and then we’re going to trim this. And it should just be a little bit of trimming that you’re doing. Just like that. And that’s going to make our basket for one block and this is going to make our basket for another block. So again, 5 ½ line your seam line with theirs. So see it doesn’t matter really where you cut because you’re lining up your seam lines just like that. So these squares are 5 ½, remember you start with a six inch strip of color, of print and a six inch strip of background. You’re going to sub cut those into six inch squares. We’re going to put two of those together. And we’re going to get two half square triangles out of each one. And so I’m just going to press this to the dark side like that. And I”ll go ahead and press both even though I only need one per block. Once you start making these little half square triangles though they go together so quickly.
Alright so let’s put our basket together again one more time so you can actually see how this goes. Again we’re going to sew, we’re going to have three of these in one row. Let me make sure we get it right on here. Two in the next row. So we have two and a basket block. Then we have one right here and a basket half square triangle. And then our basket block goes in here like that. And it makes the pretty basket. So we’re going to sew these together and then we’re going to attach a three by 5 ½ inch rectangle on here. And to do that what I do is I just sew them by rows. So I just make sure they’re going to the same direction. I sew a quarter of an inch down the seam. And I do a row at a time. And I do that because so I don’t get confused so I don’t sew the wrong thing to the wrong thing going the wrong way because you know I can do that so here’s my one row right here. And then here’s my next row. And I’m going to put these two together. Now I’m going to add my little basket one on there. And they all, the dark part all points the same direction. And now I’m going to sew these two rows together. So I’ve got them here. I’m just going to lay them right sides together and then I’m just going to sew them together. And I’m going to match up at every single seam, at every junction I’m going to match up. So we’re going to start right here and we’re going to sew a few. And then I’m going to lift this up and I”m going to feel where those seams come together. And then I’m going to sew to that point and I’m going to do the same thing in every little seam so that they line up just perfectly. Now I’m going to go ahead and sew these little two bottom ones next so I’ve got a basket one and the and the flowers from the basket, whatever we’re calling those up at the top. Just like that. And now we’re going to go to the ironing board. And this way you can just sit and sew and go to the ironing board one time, well more than one time you’ll need to go but. We’re just, we’re just going to iron these right here. And we’re going to iron these right here.
Now to make these fit with our basket block we have to add some setting blocks. These are our side blocks right here and right here. So what we’re going to do is we’re going to add one piece, this one goes this way. And again these are three inches by 5 ½. And we’re going to add one on this end right here. And we’re going to add one to the bottom right here. So this one goes on this end. Let’s go ahead and do that. And then just sew a quarter of an inch right down the side. And then this one that we’re going to sew just like that. So just how this is right here with the, just like that. We’re going to sew those together a quarter of an inch. Alright now let’s press those open. I’m going to go ahead and just roll this back right here because there’s a lot of seams on the other side and we’re just going to want to roll it back. Alright so this top side of our basket is finished. And we’re going to take this bottom one now and sew it to the half square triangle just like that. So right sides together and we’re going to stitch this down. And we’re going to stitch this down right here. And then we’re going to open this up and we’ll go ahead and give it a little press. And then this goes to this one to make the whole basket. So let’s go ahead and do that right here. Sewing a quarter of an inch . There is a matching seam right here where you can line up your two seams and make sure they stay right together. I love, I love when we have those little seams where you can just stop and make sure your block stays square because I used to just kind of sew off the end and you’d end with a piece sticking out and now I know that there’s all these little checkpoints along the way. And so that really helps me keep my block lined up and nice. Alright now let’s press this open. You guys these are so fun because it’s like a little present every time you open one you’re just like, oh my gosh that’s so cute.
Alright here’s our little block. Let me clip this little thread right here. Look at our little block. How cute is that. Then really this is the whole quilt. So let’s look how this goes in there. So what we, see how this comes in here right here. And you just sew your blocks right together. So we’ve got one, two, three, four, five, six, across by one, two, three, four, five, six, down. The reason it ended up six by six is we had only 40 strips and you know it doesn’t make the right number of baskets to make the right number of quilt. I generally go six by seven but this one ended up six by six. It’s really cute. Again let me tell you the size, 73 by 73. So a great little size quilt. A darling basket. Perfect for May Day. And we hope you enjoyed this tutorial on the May Day Basket from the MSQC.
& Progress on Social