


Pinwheel Picnic Quilt
Jenny Doan
Pinwheel Picnic Quilt
- 1 pack x 10" Precut Fabric Squares (Layer Cakes) - Print
- 1 pack x 10" Precut Fabric Squares (Layer Cakes) - Background
- 1 yard x Background Fabric (incl. inner border)
- ¾ yard x Fabric for Binding
- 8 yards x Quilt Backing Fabric
Featured products Get the Supplies Featured in this Tutorial


Finish your masterpiece and let us give it the finishing touch it deserves.
Subscribe to MSQC on YouTube
Hundreds of FREE tutorials and a new one from Jenny launches every Friday.
video transcript
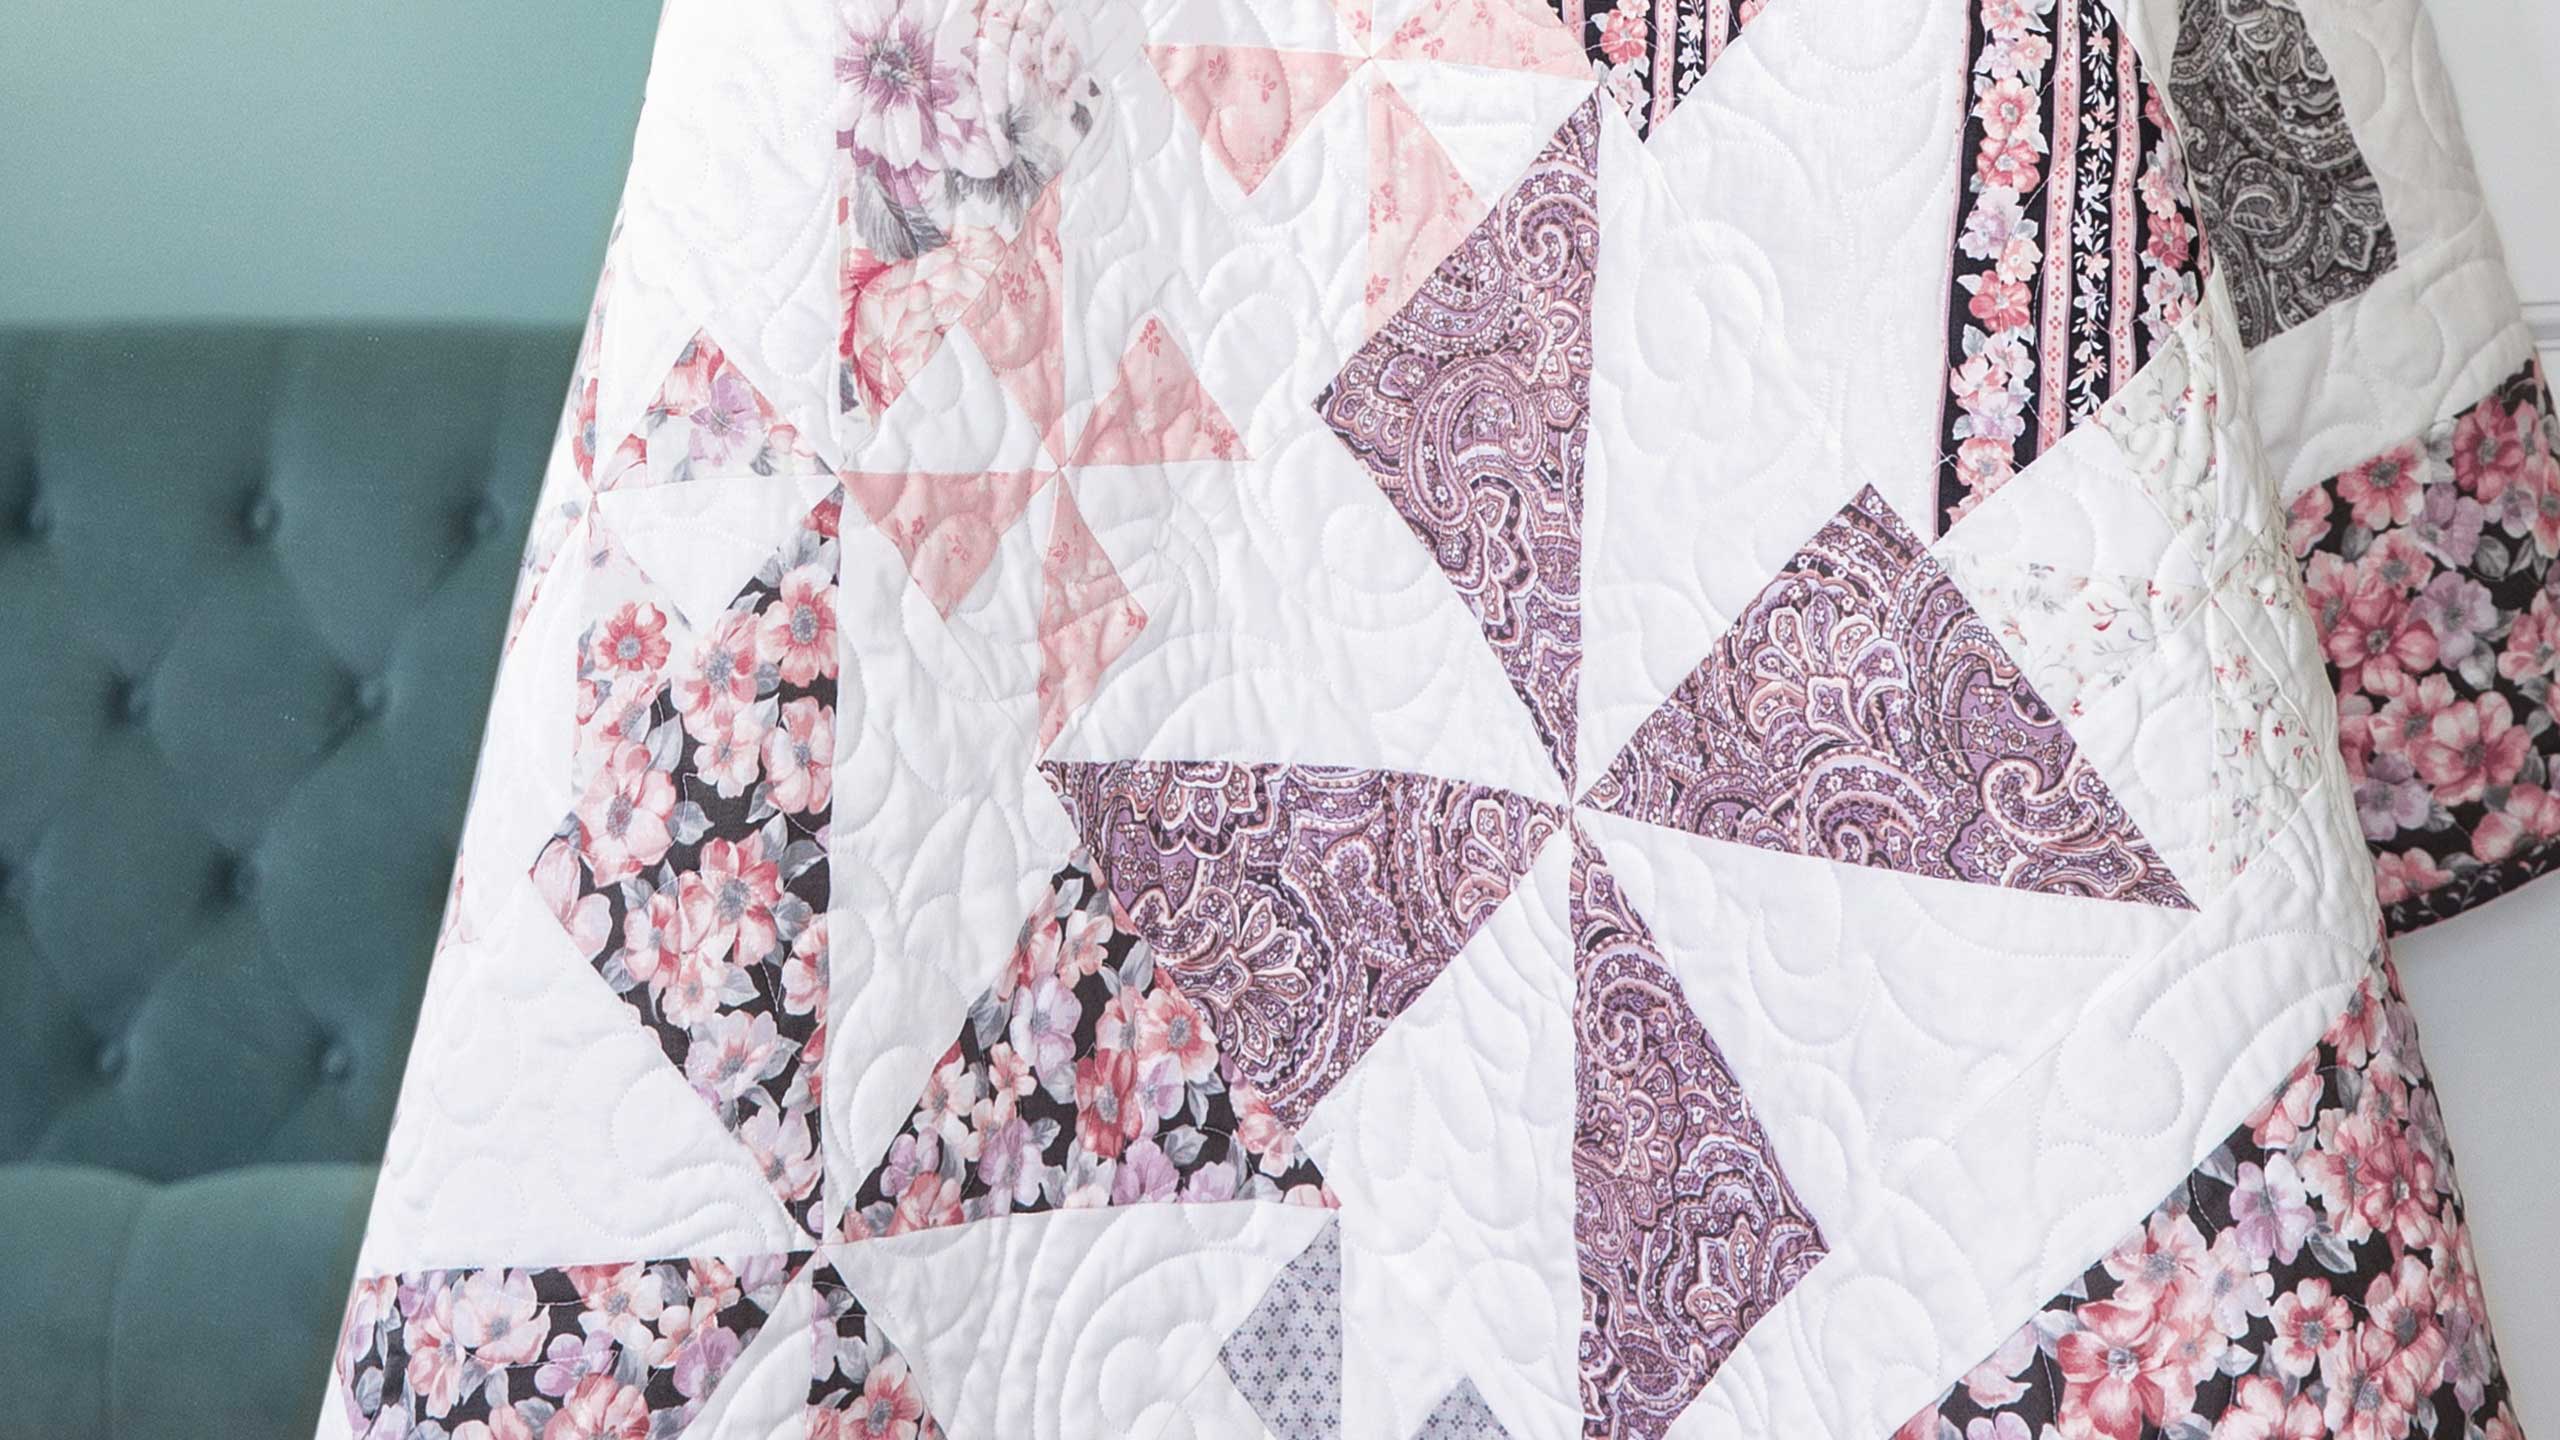
Hi everybody, it’s Jenny from the MSQC. And I’ve got a great project for you today. Let’s take a look at this quilt. Isn’t this fun? So we’re calling this quilt Pinwheel Picnic. We have the large pinwheel and two small pinwheels. And this makes our main block. But this fabric, it’s just so soft and sweet isn’t it beautiful? Well to make this quilt what you’re going to need is one packet of ten inch squares. And we have used Woodside Blossom for Robert Kaufman. And you can see it’s just a delicate, sweet line. You’re also going to need one packet of a background color to match up with all of your squares. And then you’re going to need an additional half yard of background. And that’s going to be for this inner border right here and these little sashing pieces right here. For your outer border here you’re going to have a big six inch border and you’re going to need a yard and a half for this outer border. Your backing back here, look how pretty that is. We just chose one of the prints to put on the back. And if you make a backing with 45 fabric on this, 45 inches wide, you’re going to need eight yards and it’s vertical seams because this is a pretty big quilt. So the quilt actually is 83 by 87. So if I were actually going to put a backing on this then I would use a 108 backing. And then you’re only going to need 2 ¾ yards and then it’s not too much. So let me show you how to make this because it’s really easy. I’m just going to set that down here.
Alright so we’re going to take a background square and we’re going to take a color square. And the first one we’re going to make is we’re going to make our big pinwheel. So I”m going to put my two sides right together like this. And we’re just going to sew a quarter of an inch all the way around this. So let’s go over here and do that. And I’m just going to zoom down the side. When you sew this, because we’re making four half square triangles, but when you make them this way, it doesn’t matter that your quarter of an inch is perfect. It matters that it’s the same on all four sides. But on this particular quilt we’re actually going to square them so even that doesn’t really matter. Alright so down this side and one more. Alright so we’ve sewed a quarter of an inch all the way around this. Then what we’re going to do is we are going to take our ruler and one of the reasons I love this ruler is because it goes corner to corner. And we’re going to cut through it. Sometimes I did not on this one, but sometimes you’ll get a little pleat right here. That won’t matter either because we’re cutting right through it. So we’re going to go corner to corner. And just cut this in half this way. And then move our ruler and come this way. I love pinwheels. It’s one of my favorite blocks. They’re just so easy. And they just have, they just look really cool. And I just think they’re fun.
So now I’m going to iron, actually no. I’m going to actually cut these first. I’m going to, I”m going to square these up first. And I have a new trimmer that I have to use before they’re ironed. So let’s go ahead and do this. So these are going to be trimmed to 6 ½ . So I lay my seam right on the edge of my, this seam line follows my seam line. Put it on the edge like this. And then we’re just going to trim this off right here. And we cut that. And we’re going to do that to all four of these. And again the size we’re trimming to is 6 ½. So square your blocks to 6 ½. Now this ruler has little things where you can cut your dog ears off if you want. I’m not worried about that particularly but it has this neat little thing where you can do that if you want to. And one more here. Alrighty now that I’m done with this, now we go to the ironing board. Alright so now we’re going to press these open. And I’m just going to set the seam right here. Get a little shot of steam and then I’m just going to roll them back. I’m making sure my seam lays on the dark side of my little square or my half square triangle I mean. And one more.
Now we’re going to sew these together like a pinwheel. And this is how we do that. We’re going to put, I have a little mantra that I say because I get these so turned around in my head. And my mantra is light, dark, light, dark, light, dark, light, dark all seams to the center. So when all your seams are going to the center you know it’s going to work. So we’re going to put these together and these together. I’m going to sew straight down here leaving them connected. Then I’m going to open it up and sew across the other way. So let’s do that. This is a great way to chain piece your blocks. It keeps them right together. And the next one. You’ll want to make sure, you’ll be able to feel right here how you have these laid together. See they make that, they lay on either side of that seam and you will be able to feel if those are matched up for you or not. So make sure there’s no, no lift in there. It’s all just nice and flat. Alright now we’re going to open these up and we’re going to make sure they still look like a pinwheel. And they do. And then we’re going to lay these over here and sew our block together. Now when you sew down this side of a pinwheel, the center seam, there’s going to be a little bit of bulk so you really want to watch to make sure half of your seam goes one way and half goes the other. And then you also want to make sure that you’re sewing you don’t cut off your point when you’re sewing. So watch for where your threads cross and I’ll show you that in just a minute. But watch for where those threads cross and stay in the cross or on the other side to keep your point. Alright so right here, see right here, see where these two threads cross like this and then my seam comes across here. So it comes right where they come together and you’ll be able to see that and and it will save your point. So we should have pretty good points. And we do. Alright let me press this. There we go. So this is our large block right here. And now we’re going to make two small pinwheels to go along side it.
To make that we’re going to take our same layer cake square, to make that we’re going to take our same ten inch square and put it with a white background square on top and we’re going to cut this into four five inch squares. And I”m going to cut them at the same time like this and like this. So out of each one of these you’ll have enough pinwheels for two blocks. That’s why you pull out 12 for your, for your big ones, I’m sorry 12 for the little ones and the rest of them are all made make these big ones. So now we have four of these. You need two for each block. And I actually kept my two the same. You can scrap them up if you want. See how whenever I have a block here these two are the same. Maybe I should go to one you can see better. Here we go. Like these two. But you could scrap them up if you want. But I kept mine the same. So what we’re going to do on these little fives is we’re going to sew again all the way around, all the way around the square, a quarter of an inch and cut them diagonally. And that’s going to make our little pinwheels. So I’ll just meet you right back here when I get these sewn all the way around. Alrighty so I have both mine done now. I’m going to clip them apart. And I”m going to set these over here. And then we’re going to cut these diagonally side to side as well. So again we can put our ruler corner to corner like this and like this. And then this way and this way. And remember again you need two for each block. Then what we’re going to do is we’re going to square these to three inches. So the other one was 6 ½, this one is three. And so I”m going to lay my three inch line on the three inch line. Most of these you can slide right over to the side and just make one cut to square them. And so I”m going to square this whole pile of them just the same way I did the others, matching up my, their stitch line matches up to my stitch line. We’re going to do this. And I”m going to do the whole pile and I’ll see you right back.
Alright here I am at my last one. And I”m just going to be able to come up here and slice that off. And now we’re going to press them open. These are going to make our tiny pinwheels and they’re just so cute. Now one of the things with pinwheels is that there’s a lot of things that you get to do over and over and over again. So the best part about that is that when I get one block done I literally set it right there and make all my blocks the same because if I’m going to make a mistake I’m going to make the same mistake 40 times. But I don’t want to make a mistake so I want to do them the same. So again I’m going to assemble these as pinwheels so I’m going to make my pinwheels so they make pinwheels, wait for it, wait for it. All seams to the center. Hang on. There we go. Whew I had a little angle moment right there. Alright so then this one goes this way. And I really do have to do that mantra because my brain sometimes goes hmm, that didn’t look right. But once I get it done then I can do them all, one right after the other. So we’re going to put these together. And I”m going to sew a quarter of an inch right down and add my next two. And then we’re going to do the same thing with these two, add them to the bottom. And then I’m going to look to make sure I have mine going the right way. So one down and one up and these seams have to go into the center. There we go, like that. Alright now I’ll sew these in. And then when I take these apart I take them apart in pairs so they stay in, my pinwheels stay together, the ones that I want them to stay together even though they’re identical I like to keep them together as little pairs. And this is what I mean by that. So I”m going to cut right here so I have two. And I know these I’m just going to open and sew together as a block right here.And then I’ll do the same thing to the other one. That chain piecing helps me keep everything in order so that I don’t lose my place. And when I actually sew this quilt together, what I do is I do all the big pinwheels at once and all the small pinwheels at once so I don’t lose my spot. Now you may want to trim off these dog ears. It adds some extra bulk for me. I do know that it, the quilting needle can go through fingers so it can go through layers of fabric as well. Alright now I”m actually going to trim off a couple of these, oh I left my rotary cutter open. Oh no. So sorry. I’m teaching you bad habits. I try not to do that. And closing. Alright. So let me press these open. Oh my points look so nice. Alright here’s one more. Again this is a pretty fail safe way to do pinwheels. I mean they just come together so great.
So this side block then we’re going to put these two together like this. And we’re going to put a little 2 ½ inch piece right in here. So you can cut it the size of your pinwheel. Your pinwheel should be, let’s see, one, two, three, four, five, and a half inches. And you can cut these that way or you can just attach these to your pinwheel. Like I like to do, I like to just sew this down like this. And then I’m going to trim it off. And then I’m going to add my other pinwheel to the other side. There’s that one. Trim off my little selvedge over here. And then I’m going to press that up. And then I can add my other pinwheel right on here. And I’ll just lay this right on here and do that. Now one of the things is sometimes one side will be just a hair bigger or smaller than the other. If that ever happens to you put your big side on the bottom because the feed dogs will take in more fabric than the top side. So that will help you make up any difference in size. That’s just one of those really handy little tips because sometimes things get a little wonky. Alright pressed.
And now what we’re going to do is we’re going to take our big pinwheel right here and we’re going to add it to the side. We’re just going to sew it straight to the side of that block. So we’re going to put that on here and sew that a quarter of an inch right down the side. And this makes our whole big block. There we go, now it’s even caught. There we are. Alright, whew. Now this little, this little bar that’s right here, the sashing in between the pinwheels that falls directly the center of that sashing should fall directly on the center of the seam of your pinwheel, your big pinwheel. So watch that. I like those little things that help you measure, you know, make sure you get to the right place at the right time. Alright. So now we’re going to press this open and this is our block. Alright so here we go. And I’ve added no sashing to this at all.
So what I want to do is I want to show you how I put these together. And literally I put them together all the same way. So one row with my, all my rows went just like this. And I sewed my rows together. Then the next row I just flipped over. So this one starts with the pinwheels and comes across. This one ends with the pinwheels and comes across. And so every other row is just flipped over but they’re all sewn identically. So just like this you’re going to sew them together. And then the next row you’ll just flip and it just makes this great quilt. We’ve got one, two, three, four, big blocks across the top and one, two, three, four, five, six, down. So this makes a pretty good size quilt. It is 83 by 87. And once we get the center of our quilt together we’re going to add that little 2 ½ inner border and our little six inch outer border and it just makes a great quilt. And we hope you enjoyed this tutorial on the Pinwheel Picnic from the MSQC.
& Progress on Social