


Signature Quilt Tutorial
Jenny Doan
Signature Quilt Tutorial
- 1 x Roll of 2½" Print Strips
- 1 yd. x Print Fabric for Center Squares
- ¼ yd. x Print Fabric for Cornerstones
- 3½ yds. x Background Fabric - Includes Sashing and Inner Border
- 1¼ yds. x Outer Border
- 4½ yds. x Backing Fabric
- 1 x Permanent Marker
Featured products Get the Supplies Featured in this Tutorial


Finish your masterpiece and let us give it the finishing touch it deserves.
Subscribe to MSQC on YouTube
Hundreds of FREE tutorials and a new one from Jenny launches every Friday.
video transcript
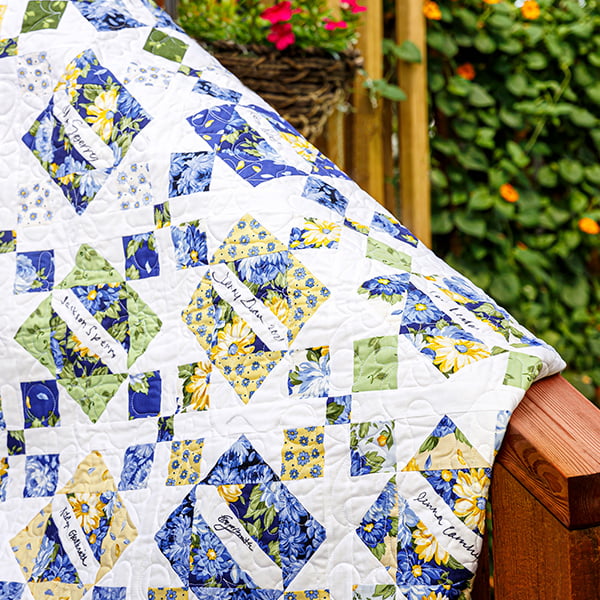
Hi everybody, it’s Jenny from the Missouri Star Quilt Company. And gosh I’m excited about today’s project. Let’s take a look at it. This is a Signature quilt and this is the block. And you can see the signatures are right here. Here’s my darling husband, Ron and here’s mine. This is actually a family signature quilt and so we have all of the family by groups. So here’s Darrell’s and Natalie’s and Sarah’s and Hillary’s. And they’re all on in little groups in the quilt. And it’s just so fun to have these signatures. Also, just in case, you know, somebody has a baby, I have some blank ones so that they can put them on there. And I just think this is really fun. So if you have a guild and you want to do a signature quilt with your guild or quilt group or your friends and you want everybody to make a block, this is a great idea to do it. So let me show you how to make this block. So to make this quilt you’re going to need one roll of 2 ½ inch strips. And we have used Flower House Sunshine by Debbie Bevis for Robert Kaufman. You’re going to need 1 ¼ yards for an accent fabric. You’re going to need 3 ½ yards of background fabric and that will include your sashing and your inner border. You’re going to need 1 ¼ yards for your outer border. For your backing you’re going to need 4 ½ yards of 45 fabric or two yards of a 108 wide print. Also helpful on making this quilt will be a permanent marker and a squaring tool.
Alright so this is the block we’re talking about right here and we got most of it out of these 2 ½ inch strips. Now you’ll notice the center block on all of these is the same fabric. So I took that fabric out of the border fabric. I cut a 4 ½ inch strip and cut it into 4 ½ inch squares like this. And then we cut them on the diagonal one time. Now in order to have a signature block you’ve got to have signatures. So what we did was we took these inch and a half strips and I’m going to cut off the selvedge and the fold right here. And we cut seven inch strips, so just like this. And we sent them out to all of the families with a marking pen, a permanent sharpie or you could use this microtec or something like that. Now one of the things that, we sent some instructions, you know, and one of the things was to keep about an inch in on either side. And then also we told them that if you want to sign something, it’s easier if you sign on something soft. And so we’re just going to go on here and you don’t press down too hard and you just sign your name and it will go right in the middle of that signature block. So what I did once I got the signatures back, and honestly it was so fun to get them back because some of the little kids, they put their ages which I think is really fun. One of my granddaughters wrote I love you, well I had to include that one, you know, and so we gave them extras in case they made a mistake. Like here is Ezra who is ten. And I love that they put an age on there. And I think for most of the kids, the little kids anyway, I’ll probably go through and just put that age in there so I remember exactly when I made it. On mine I think I put 2021 so I know the year that it was done and that’s pretty fun.
So what I’m going to do with this little signature now is I’m going to fold it in half so it has crease lines. And then I’m going to fold my block in half so it also has crease lines so I have something to match it up to like this. And then I’m going to take this and I’m going to put it right sides together to the block and match that little block and then I’m going to just sew this down a quarter of an inch like this. And you should be about a quarter of an inch or a little bit more from each end. It gives you a little bit of wiggle room. And because we’re going to square this to 4 ½ and we’ve added this big piece, you know, it makes it, it’s very forgiving. Just very forgiving. Alright so I matched up my middles again and then I’m just going to sew down this side. And now what I’m going to do is I’m going to press this open like this, press my sides back. And then I’m going to take my block and I’m going to fold it directly in half, matching my points, matching this center strip so it lines up because I need something to put the corner of my ruler to. So I’m going to put that on there like that. And then all of these are going to get squared to 4 ½. So I’m just going to grab any ruler that has this nice 45 on it. And I’m going to come from this side so I can see my 4 ½. I’m going to lay this 45 line on the line. And I’m going to watch. Now I’m way over the 4 ½ on here so I know I’m going to have to cut from both sides. But what I want to make sure is that this lines up with the point so it stays square. And that signature block stays right in the middle . So we’re going to cut this like this and then I’m going to flip this around. Alright so I’m just going to line this up on the 4 ½ and we’re going to trim off this other side making sure right here that the point of my ruler is in that fold. And that this line runs right down that crease. We’re going to take that off and take that off. Now if it’s off a hair, it’s not going to really matter but, you know, just to show you guys that we want to keep it a 4 ½ inch square. And now we’ve made our middle block.
So the outside of the block right here, you can see, this is a finished block waiting for someone to sign it. But we’ve got four flying geese here. And because our center is 4 ½ these blocks are going to be 4 ½. And then we have four corner squares and those are 2 ½. So what you can do is you can take your strip. And I’m just going to take two different strips here because I like them scrappy and I like to, you know, cut a bunch at the same time. And what I’m going to do is I’m actually going to trim off my selvedge right here. And then I’m going to trim, I’m going to cut two of these 2 ½ inch blocks because you need four for each block like this. And then we’re going to cut two 4 ½. And when I cut them, when I cut 4 ½ with my 2 ½ inch ruler I like to lay it the long way like this so that my line, my 4 ½ inch line lines right up and then I’m cutting two of those as well. So then you have enough of these pieces to make your block. We need four of these, one, two, three, four. And we’ve actually cut enough for two blocks. So we have, these will go on the next block and we’ll set those over here. And then I’m going to put the greens on the outside of this block right here. And then on this one over here it will be the blues in the corner. And so that will make it really nice and good.
Alright so first thing we’re going to do is we are going to take our 2 ½ inch squares here and we are going to put them on the corner of our block and we’re going to sew diagonally corner to corner. Now you can draw the line, iron a line. I’m going to use my diagonal seam tape right here. And I have some that are already started. And they’re actually the opposite colors, so the green is going to be around it for this one. So here’s three of them. And then we’re going to do the same thing. So this is our 4 ½ by 2 ½ inch rectangle right here. And we’re going to lay one square on the corner here. This is a 2 ½ inch square of background fabric. And we’re going to sew corner to corner. And I’m going to line it up with my diagonal seam tape and then I don’t have to draw the line or iron the line. It’s so fast. So I’m going to put my presser foot down and going to make sure that this corner is lined up with this corner and it’s on that red line. And I’m just going to sew straight across. And then what I’m going to do is I’m to clip this off right here, just trim this up. And then we’re going to press this back like this. And then we’re going to add our square to the other side like this and again we’re going to sew corner to corner. So we’ll come over here and sew corner to corner. Again let me get it on there nice and straight. And then we’re going to sew here and line up our little corner with our red line or just draw the line. It’s really easy to draw the line. It’s all personal preference in what you get used to. I can actually eyeball it because I’ve sewn so many of these. So whatever you want to do for that, it’s fine. Alright so then we make four of those and that’s our four right here.
Then we need our cornerstones out here and because I have the green I’m going to choose some blue cornerstones for my corner. And then we’re ready to assemble our block. So let’s find our signature block, here it is. And we’re going to put this together. So what we’re going to do is we’re going to put our flying geese blocks all around the outside like this. Then we’re going to put our blocks in the corner out here like this. And that’s how your block goes together. So it’s very simple, very easy. But we’re going to go ahead and sew these two together and put them on either side and I’m going to show you how to make the whole block. And then we’re going to talk a little bit about this fabric. So let’s go ahead and sew these on. And you want to make sure your quarter inches are pretty accurate so that everything lines up. Then this one I’m going to sew a flying geese on either side. And just make sure that’s on there right. I’m going to flip this around and put it on the other side like this. And then our last row here we’re going to do the same thing we did on the top row, we’re just going to sew a blue corner to either side. And you can’t get this wrong. It can’t go upside down or anything. It just has to go right on the edge. Alright now let’s press these and we’ll put the block together. I’m going to press my top and bottom row so my seams go to the outside like this. And seams will generally tell you which way they want to go. They kind of lay that way already. So this is the top and bottom row. Our center row, they’re going to want to go toward the middle and so we’re just going to make that happen. And we’re going to press this this way. And we’re going to flip this and press it this way. And we’re going to lay it in here and then we’re going to put this piece on top of here like this and sew it together. And then we’ll add this one to the bottom. And I have a little mantra for this, I like to remember that it’s color to the color because sometimes our flying geese go the other direction and I wanted this to, you know, I was putting so many of these together that I developed those little mantras in my head. And so this one goes in here like this. And we’re going to make sure the seams nest up. You don’t have to match anything in the center. Keep that on there nice and straight. Now we’re going to sew the other side on. So line that up, make sure these two seams are nesting. And you can hear the sewing machine when it goes across it. Line up your flying geese with the edge. And then there’s our little block. And we’re going to press this open. And I love how the flying geese make it look like it’s set in a square. It looks like you did so much work but it’s really doable.
So here’s our little block right here. Now let’s go to the quilt and let’s look at how we put this together. So to be honest I finished all the signature blocks and I put them all together. And because there isn’t a lot of variation in fabric and colors, it just kind of all mushed. You lost the block and so I had to use sashing to frame up the blocks to set those blocks apart because I wanted each block to, you know, be its star of its own space. And so what we did was we added sashing. I knew this was going to be a pretty big quilt because of all the, you know, all the blocks that you can make in it and so I used an inch and a half sashing. And these blocks should finish right around 8 ½. And so we’re going to look and see how we did here. We have an 8 ½ cut and we’re just about perfect. Out of the border fabric, I took a 1 ½ inch strip and I cut all these cornerstones. For me, if I were to try to line this up without the cornerstones I don’t know what is wrong. I can pin, I can look, I can measure. They just don’t line up for me. I mean it’s just really a difficult thing for me. I don’t know what the deal is. I used the horseshoe pins, I’ve used the things. It just really doesn’t work. But if I have a cornerstone then I have something to line it up with. So these are little inch and a half cornerstones.
So what we’re going to do is we’re going to sew a sashing strip to both sides like this. So right now I’m sewing a sashing strip on both sides because this one is going to be at the beginning of the row. You’re going to want to, you know, lay out your blocks ahead of time and just put a sashing strip right in between every block. So this is the way this is going to look. Let me show you here. I’ll iron these back. Now one of the things you want to watch is how you have your signature in here matters. And so you know, you don’t want to have your signatures, you know, one going this way, you know, I wanted all of mine to go this way. And so if that matters to you watch that. And so these would all be going this way. So this one has a beginning sashing and then it has this sashing here. And then you’re going to sew this block to it, add a sashing, sew the next block, add a sashing, sew the next block. Then this row right here is the same size as the block, 8 ½ but you’re going to have a sashing and a tiny cornerstone, sashing, tiny cornerstone. This is its own row right here. So then out on the outside, what we did was we just added a little tiny 1 ½ inner border. And our outer border was a nice big six inch border. And we, this is so pretty right here. So on the back here you can see this cute stitching pattern. It’s called Hearts and Flowers and it’s just darling. It makes a nice little edge to edge pattern. Now remember however many signatures you have, this quilt can be any size that you want it to be.
So out of a jelly roll you can get 51 blocks. I used 49 for this quilt right here so it’s seven by seven. And I have some extra spaces in case we have more people. But the bottom line is this is my family’s signatures from the year 2021. And I just think it’s really special and I’m super glad that we did it. So if you happen to need a signature quilt in your life we hope that this gives you an idea. And we hope you enjoyed this tutorial on the Signature quilt from the Missouri Star Quilt Company.
We hope you enjoyed watching this video. If you’re not already part of the Missouri Star quilt family you can hit the subscribe button below so you won’t miss a thing. And if you click that bell it will notify you every time a new tutorial comes out. See you next Friday.
...& Progress on Social