


Simple Squares On Point Quilt Tutorial
Jenny Doan
Simple Squares On Point Quilt Tutorial
- 1 packs x 10" Precut Fabric Squares (Layer Cakes) - Print
- 1 roll x 2.5" Precut Fabric Strips (Jelly Rolls) - Solids
- ¾ yard x Inner Border Fabric
- 1¾ yard x Outer Border Fabric
- ¾ yard x Quilt Fabric for Binding
- 8¾ yards x Quilt Backing Fabric
Featured products Get the Supplies Featured in this Tutorial


Finish your masterpiece and let us give it the finishing touch it deserves.
Subscribe to MSQC on YouTube
Hundreds of FREE tutorials and a new one from Jenny launches every Friday.
video transcript
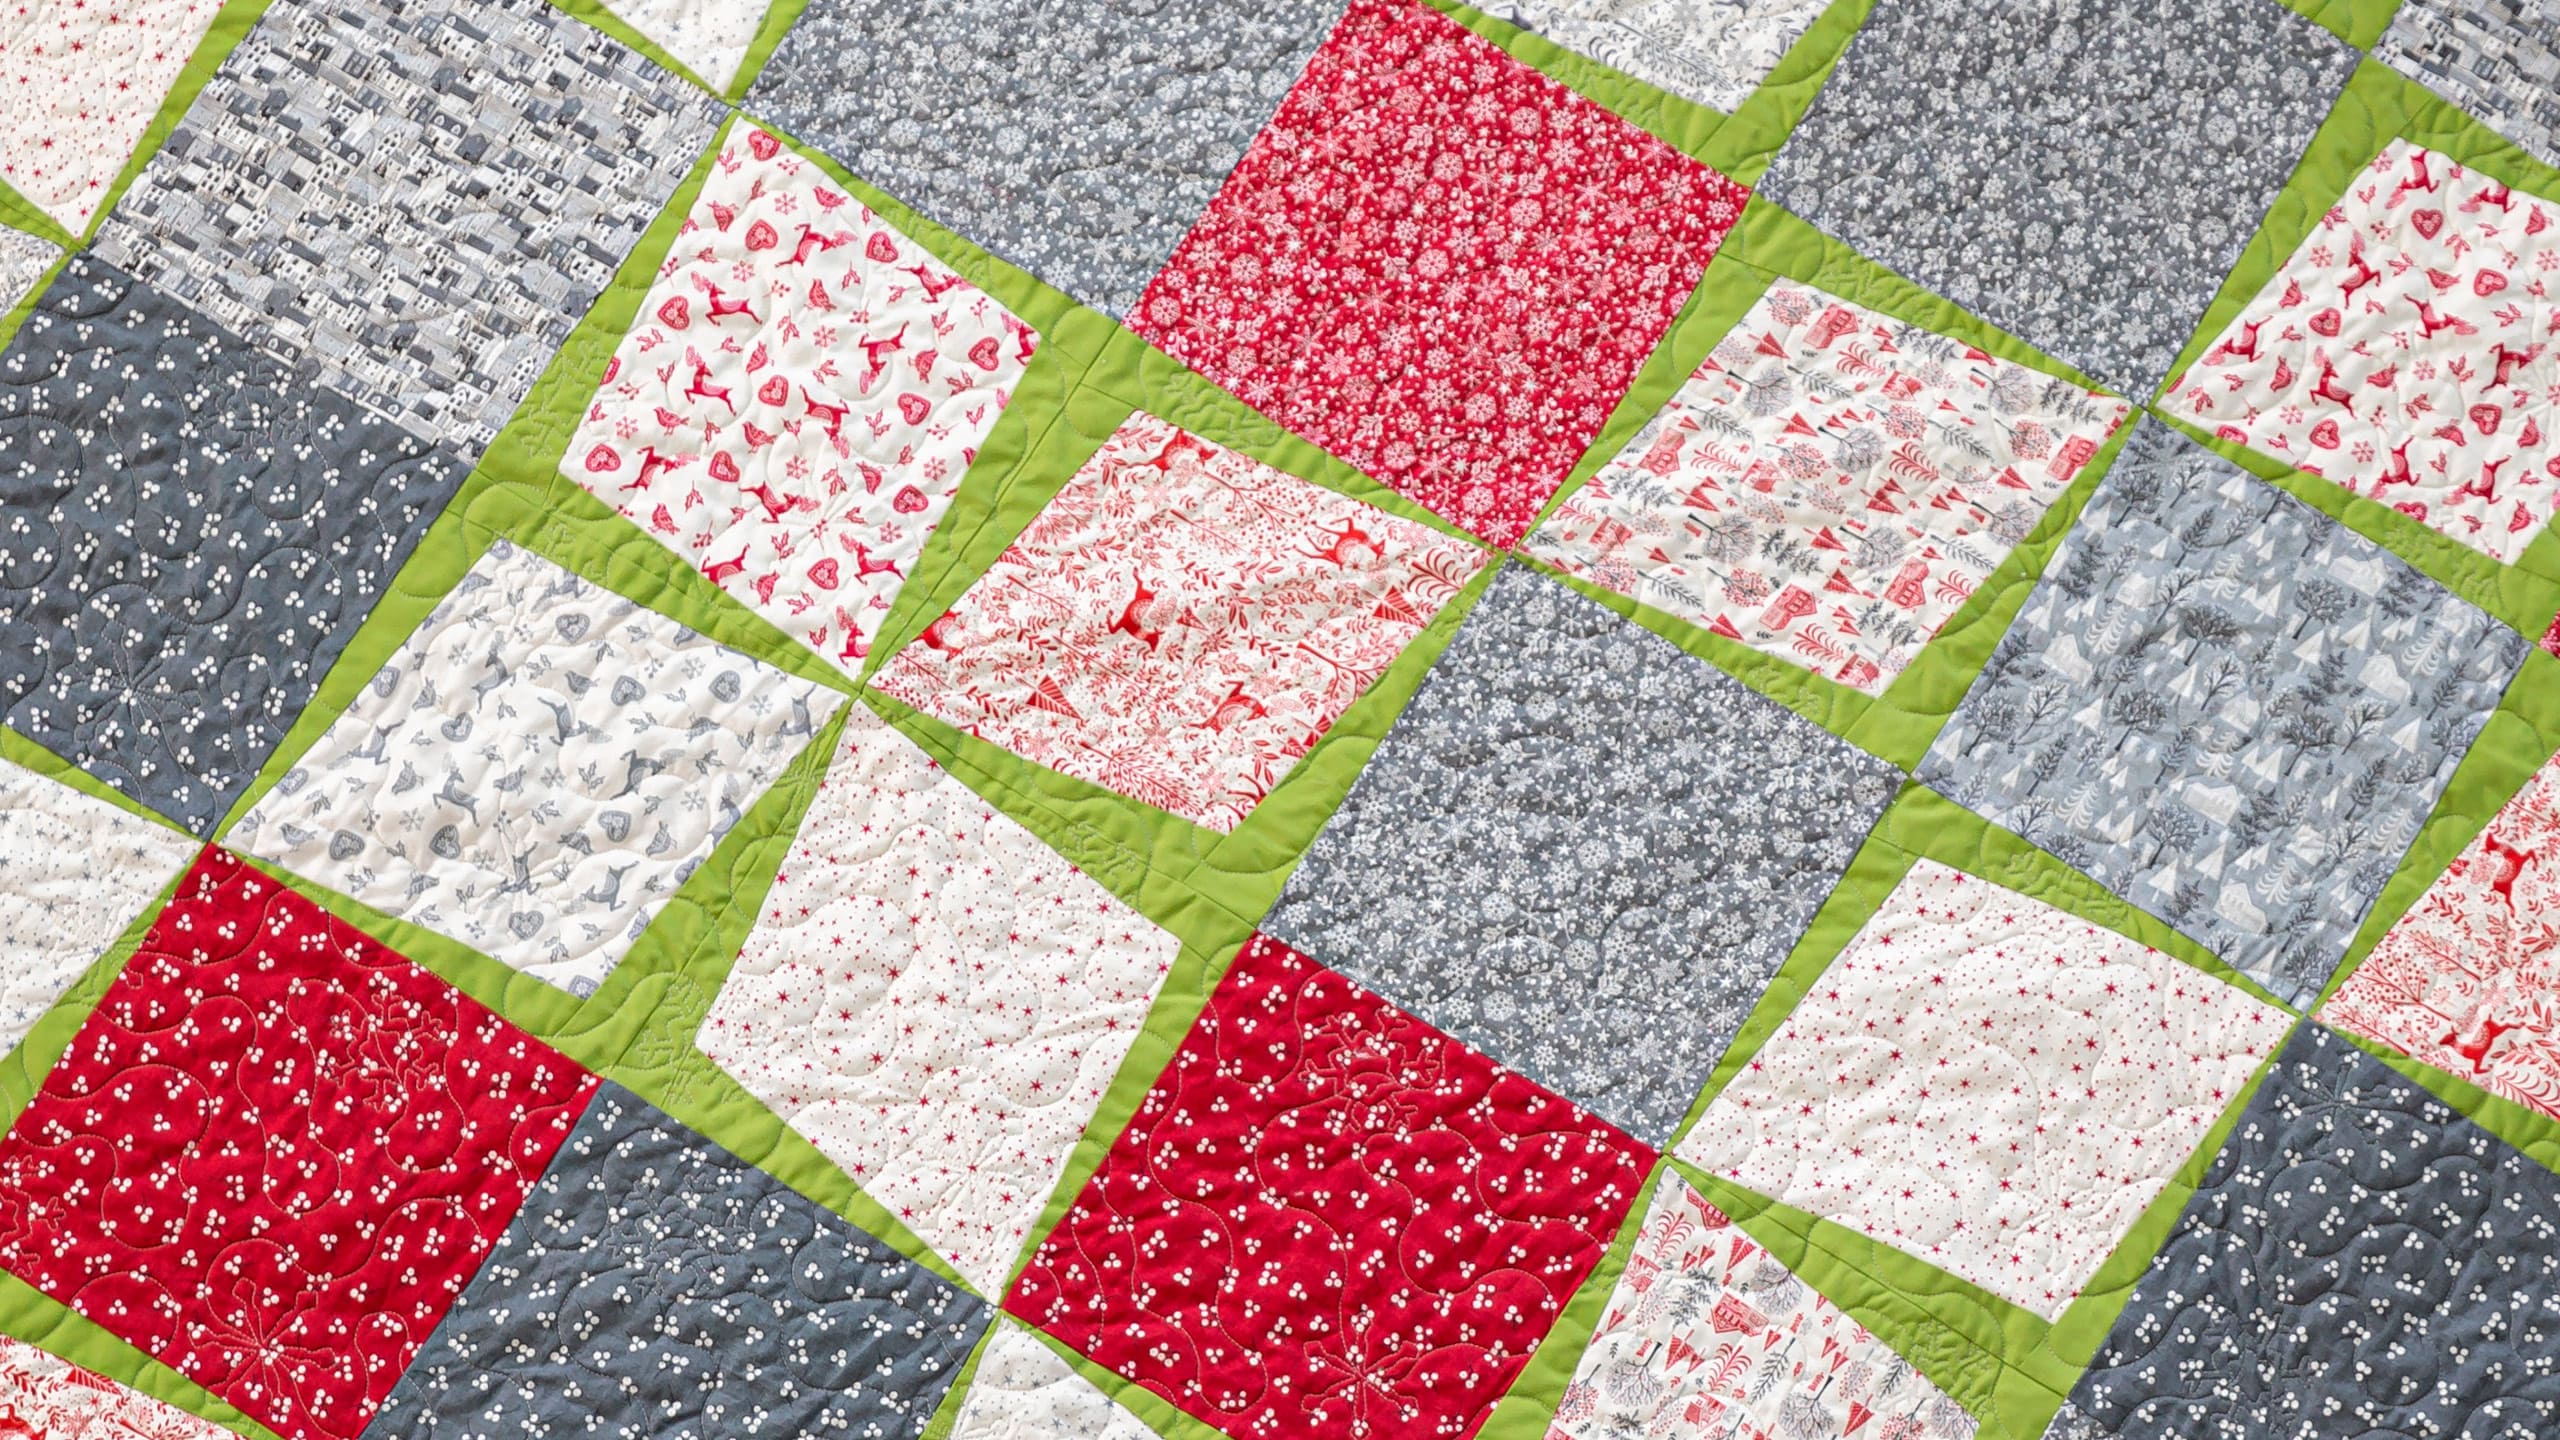
Hi everybody, it’s Jenny from the Missouri Star Quilt Company. And a few years ago I did a quilt called Charm Pack on Point where we took little five inch squares and just by virtue of how you sewed them together, you could cut it twice and then flip those pieces and then it set all the squares on point. It’s just a really cool project. Well one day our producer Liz came in and she had done that quilt but she had used layer cake squares which opened up a whole new world for me. So this is Liz’s quilt and it’s made with one of the Holiday Flourish lines by Robert Kaufman. And it’s just gorgeous. So when we saw how cool this was I just got thinking what happens if, and what happens if we add a block in there like an actual block, not just a ten inch square of fabric but an actual block. But we gave you a diagram and showed you where to cut that quilt so that as you turn it it flips all those blocks on point. And so I can’t wait to show you how to do this because it’s just like magic. So take a look at this quilt behind me. Isn’t this fun? Now we have used the diamond pavers block in here but really it could be any block you wanted to use.
So to make this quilt you’re going to need two packs of ten inch squares or 72 ten inch squares. And we have used this beautiful Scandi line by Makower UK for Andover. You’re going to need, if you put the pavers in here, if you put the diamond pavers in here, you’re going to need 2 ¾ yards of an accent fabric. Now you can make this just like Liz did, just with the squares. For our first border out here, it’s ¾ of a yard and it’s a little 2 ½ inch border. And our outer border is a nice big six inch border and it is 1 ¾ yards. Now let’s look at the back because these prints are darling. Now look at these tiny little houses. Are these not the cutest thing that you’ve ever seen? I don’t know if you can see this but these are tiny little houses and they’re so cute. Anyway I love this fabric line. It’s just darling, speaks to my Scandinavian heritage and I just really love it.
So basically what we’re going to do is we’re going to put a quilt top together. But first I want to give you a quick refresher on the diamond pavers block. This is the block right here that we’re talking about. So this is the diamond paver block and that’s what I’m going to show you how to do. And you’ll notice that it has the two wide ends together and the two narrow ends together. And let me show you how we’re going to make this. So we’ve taken our 2 ½ inch strip and we’ve cut it into, let’s see, we’ve cut it into about ten inch pieces. And what we’re going to do is we’re going to lay it corner to corner like this. And I’m going to bring this in just about two inches and I’m going to sew down and just sew right on this. Now I’m going to let the edge of the strip be my guide, my sewing guide. Let me get this back here so you can see. So we’re just going to do that. It wants to just hang on. Alright. And we’re going to go all the way around this block. So I’m going to press this back. And then I’m going to grab another strip and I’m going to come over here. Now I’m going to go from my wide parts right here so here’s my wide strip. So I’m going to go narrow to wide because I know that this is where I pulled it in the two inches. So this one also has to go in about two inches. And I’m just going to lay this on the corner and sew up. So you probably just want to make sure that you press these as you go because you want to make sure, first that they cover and second you just want to make sure that you don’t have one folded down when you sew.
Alright so our wide end is here. Our other wide end is going to be over here. So again I’m going to come over and I’m going to pull that in about two inches and sew down this side. And iron back. And I’m noticing where my fat ends are and this one is the wide part so I’m going to put another one wide here, another little strip. Come in about that far and sew down the side. Now I said earlier let your, you know, let your strip be the guide where you’re sewing along. But mine weren’t always perfect but it doesn’t really matter on this because there’s no have to. You know, there’s nothing about this block where you have to be exactly the same as the other one.
Alright so now I’m pressing this all down. And it looks pretty wonky, doesn’t it? But when we flip it over our square is still there and the square becomes your pattern. So let’s go ahead and trim this up. And I’m just using my ten inch square as my pattern. And I’m going to trim that and turn. You’re going to trim on all four sides. And this is such, this is really a cool block and a cool quilt because just those four little seams and you have this completely different look. Alright so here is our little diamond paver block. So for the quilt behind me, out of your 72 blocks, 36 of those are going to be diamond paver blocks or whatever block you choose. I can’t wait to see what you do. So 36 of those are going to be diamond paver blocks. And then you’re going to sew your quilt together.
Now we have a great diagram for you right here. And it shows you exactly where to put your blocks so that when you cut it which is a big deal for all of us who have ever made a quilt and now I’m asking you to cut it in half. It’s a big deal. But on here you can see that this is, you know, we have six across by 12 down. So this is the rule of thumb for anything you’re going to cut this way, it’s half as wide as it is long. So that’s just the rule of thumb. So this little diagram tells you exactly where to put your diamond paver blocks so that you know exactly how to sew them together. And you’re going to sew those together in a big quilt like this. Now this quilt is just squares and we did it just squares so that we could show you how to cut these so that you can actually put any block that you want in there and that’s just how it works.
So once you get your area all cleared off and your quilt spread out, it’s not as daunting as it looks because it’s literally you’re cutting one square at a time. So even if you have a small mat and you have to move that along as you’re cutting, this will work. The trick again is six across by 12. So we’re making two cuts from this first corner over, and you’ll run right off the edge if you’ve done it right, you know. So you’re starting at this first corner right here. And we’re just going to line it up this one square corner to corner right here. And we’re just going to make this cut right here. Alright now I’m going to scoot my ruler, you want to get probably, you really want to have a fairly good size long ruler for this. And we’re going to scoot it again. And I’m going to pull these back toward me a little bit because you always want to be safe when cutting. Now a charm pack well is a piece of cake because it’s a little quilt. But these big squares, you know, we’ve got, we’ve just got to make sure everybody stays safe. Alright so corner to corner. And another corner to corner, here we go. Now this takes some courage, you guys. You’ve got to have some courage to do this. Now over here you can see we’re almost at the end. But keep your quilt nice and smooth, nice and flat. And then we’re going to come over here and we’re going to cut corner to corner. And then we’re at the end. Look at this.
Ok so we’ve cut this first big triangle wedge off. We’re going to set that over here. Now we’re going to come back and we’re going to cut it the other direction literally, whoops, literally you can go the same direction. You can flip it around. You just want to make sure when you cut that you cut this way and this way. And so we’re going to have to pull this up here and we’ll do it from the opposite side over here. So what I’m going to do is I’m going to pull mine around like so my middle is right here and I’m going back out the same way I came. You want to make sure that you’re, you know, you’re cutting it going the right direction. Make sure your quilt isn’t folded underneath. This is kind of a big wrestle, you guys, especially with layer cakes but just go slow and you’ll be fine. Alright so now I’m going to start here and I’m coming the opposite way. So I cut this way now I’m cutting back down this way. And so we’re just going to go over here, one diagonal square, there’s two. Move it closer. Ope and we’ve got a fold. Let’s get that out of there. Alright let’s lay this nice and straight. Here’s another corner to corner. And then up here corner to corner. And then pull it back towards you. And just look at how magic this is. And then one more. Right on the corner. Alright.
So now here’s our other big triangle piece which we are going to put here. Now what we’re going to do is this side right here, the straight edge, this now becomes the middle. So here is how the diagram looks. You can see here we’ve cut six in and six in. And this is our big triangle right here. And what we’re going to do now is we’re going to bring these out and we are going to sew our two small triangles together right here down the middle and then sew it across to make the giant on point square. It’s so easy. So here’s our triangles right here. And literally what we’re going to do is our edges, these wherever you have half square triangles those are our edges. And we’re going to sew these together like this. So on this particular ten inch square we have a little bit of pinking so that to me was always where you can tell. So now as you’re lining this up together to sew, I see there are two blending. But no worries, you’ve got two options to fold this. So we can actually do this the other direction, which is this way. It just has to be on one of these straight edges. So let’s turn this and see if this one actually works better. And just so you know if I couldn’t get the right edge on mine I would probably move the square. But here we go. Ok so they’re all different. So we’re going to sew this side. And then this big middle piece right here that we have going on in the middle, that’s where we’re going to sew this piece right here, this straight edge right here. So then this one is going to go on here. And we are going to sew this together right here. And it’s going to make a giant quilt. Like 96 by 96. It’s a great big quilt. And it’s super easy and all of a sudden the whole thing is turned and set on point. Just like this.
So you can see on this quilt right here, not all of these squares are pavers. Some of them are just plain squares like this and some are pavers. And we give you the diagram to show you exactly where to put the pavers if you want to flip your blocks on point. If you just want to make a giant ten inch square quilt then you can just sew six by 12, cut six to six diagonally on both directions. And then flip them around and sew them together and you get this awesome big quilt.
So I hope you enjoyed this tutorial on the Simple Squares on Point from the Missouri Star Quilt Company.
& Progress on Social