


Stars and Stripes Quilt Tutorial
Jenny Doan
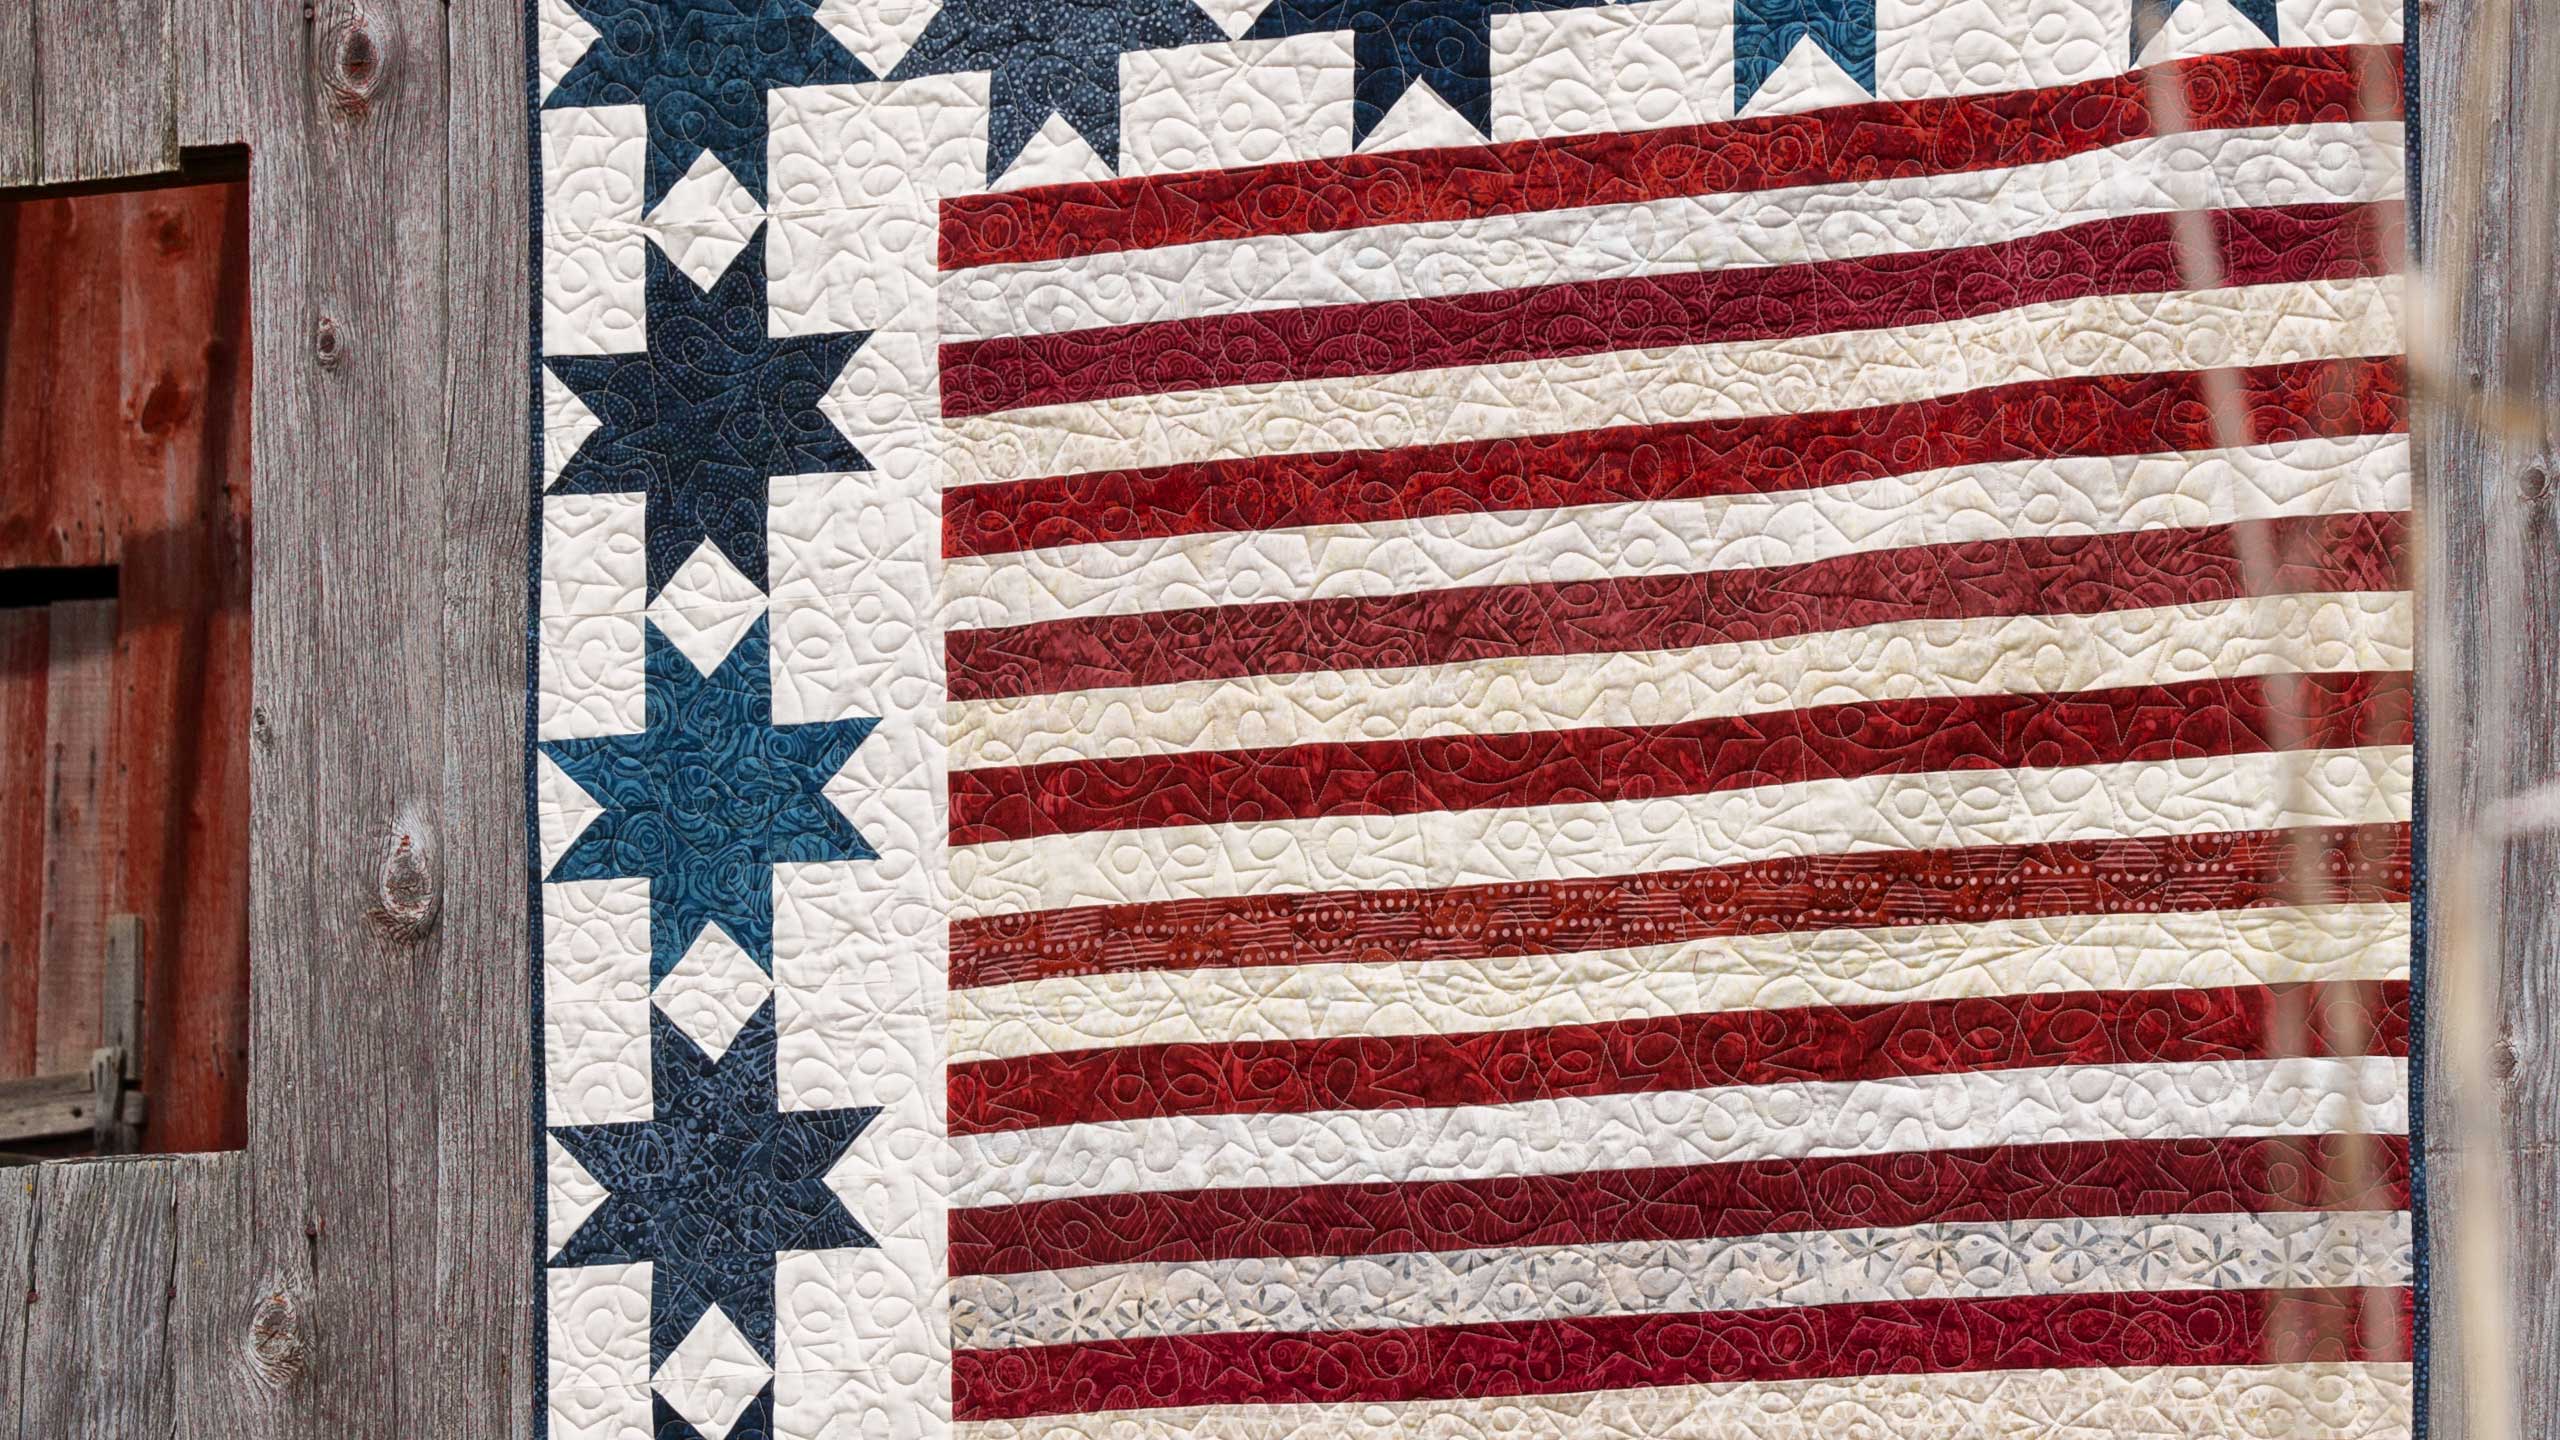
Stars and Stripes Quilt Tutorial
- 1 roll x 2.5" Strips (Jelly Rolls) - Print
- 1 yard x Background Fabric
- ¾ yard x Fabric for Binding
- 3½ yards x Quilt Backing Fabric
Featured products Get the Supplies Featured in this Tutorial


Finish your masterpiece and let us give it the finishing touch it deserves.
Subscribe to MSQC on YouTube
Hundreds of FREE tutorials and a new one from Jenny launches every Friday.
video transcript
Hi everybody, it’s Jenny from the MSQC. And I’ve got a fun project for you today. And this one came together because of the fabric. The fabric we used is called United. And it’s by Timeless Treasures and look at this quilt. Isn’t this great? This right here, these are all the strips in the roll. It came together and with the blue we made the stars. And I can’t wait to show you how. So to make this quilt what you’re going to need is one roll of 2 ½ inch strips and again we’ve used this United by Timeless Treasures. It’s a Tonga Batik, Tonga Treat. And you’re also going to need a yard of background fabric. And that’s going to do these four inch squares and this little strip right here, this little sashing strip. And then we just bound it. I didn’t put a border on it, so I just bound it. And the binding is ¾ of a yard. And your backing right here is 3 ½ yards. And I don’t know if you can see this but we used this, even this cute, our quilting is a little star motif and it’s just so cute. So anyway let me show you how to make this.
Now literally when you undo your roll, you know, and you’re going to undo your roll and when you do that there’s the exact right number of red and whites. So I sewed them together. All the red and whites like this. I even threw in these ones that were a little bit, kind of had a little bit of blue to them. And I just made sure that I started with a red and I ended with a beige. And I mean I just sewed them. Now when you sew straight strips together, which is what I did, you’re going to want to sew some this way and some this way. Otherwise you get that kind of bowing effect. So just make sure you start from different ends when you’re sewing your strip set together. And basically what we’re going to focus on today is these stars because there was again just enough blue in there for me to make the stars. And I did the strip star which we’ve done in several tutorials. But I thought I would go over again here for you. So the other thing I used on this is, you may or may not have heard about these but, I lobbied hard to get these little 2 ½ inch squares cut because I use pre cuts and I do a lot of snowballing the corner. This is a Kona mini charm. And they’re 2 ½ inches and there’s 84 in here. So a charm pack has 42 and they doubled the amount for these little packs. And I used these for my stars as well and I’ll show you how we did that.
Alright so to make your star what you’re going to do is you’re going to take your 2 ½ inch strip and we’re going to cut it in four, 4 inch pieces. And I’m going to cut off my selvedge right here. And I’m going to count over here four, one, two, three, four, so there’s two. My strip is folded in half. So I have two four of those. My four four inch pieces. And we’re going to have four six inch pieces as well so let me count. One, two, three, four, five, six. Sometimes my brain gets a little crazy. Alright we move this over and again we’re going to count six, one, two, three, four, five, six. Do you see how, I love this pattern because it uses just everything but this tiny little piece right here. Alright so you have four six inch pieces and four four inch pieces. Now the four inch pieces, well first we have to dog ear all the corners. And when I say dog ear what I mean by that is we’re going to take a 2 ½ inch square and we’re going to sew it to the top of every strip. And the only thing you have to do on this is, let me show you how this goes, is you have to make sure that when you dog ear that your short ones go one direction. And actually when I say dog ear what I mean is snowball. Snowball or dog ear, they’re kind of interchangeable. And so we’re going to sew this on here. Sew on the line, trim this off and that’s going to go over here like this. And you just want to make sure that all your short ones go the same way and then all your long ones go opposite. So let me go ahead and crease some of these little squares right here because I’m going to go do this over at the sewing machine and I’m going to chain piece these. So this makes a great, you know, I mean 4th of July is coming and we might need something like this. The stars themselves will make an awesome table runner. If you even just took a section of strips like this and did a star at either end, that would be an awesome table runner. So you know, be sure that you look at things with a, with a different eye so you can see more ways to do things. Alright, just a few more and then I’m going to head to my sewing machine and sew these down.
Alright so I’m going to take all my short ones. And the reason I like to chain piece these is because I want to make sure they’re all going the same direction. And so we’re going to start here and I’m going to lay this on here. And I’m going to sew right on the line that I just creased. So you can draw the line or crease the line, either one. It’s whatever works best for you. You do have to make sure that your needle is threaded. That’s helpful. Alright, here we go. Alright I’m just going to set this on here and we’re going to sew right on the line. And then we’re just going to add another one in and we’re going to do this to all four of these. I just thought this was so cool because it was the exact right amount of fabric for this project. It’s just so cool. And one more and we’ve got them all going the same direction. . Alright now the tall guys we want to make sure are going the other way. So now that I have these in here I know that if I want to make sure that this goes this direction. And so you want to make sure that they’re going to opposite direction. It doesn’t matter which way they go, it matters that they’re opposite. And so you can see how this is coming through the machine. Now it’s coming through, I’m sewing the opposite direction. And let me just make sure that I am. Let’s see here, yep, they’re opposite. It’s always a good idea to check. Alright here’s one more. And I’ll show you how they look in just a minute as soon as I get done piecing all these. And one more. Alrighty.
Alright now let’s take a look at this. So I’ve got these four and I’m just going to clip them apart. And you can see on the seam line, they should all be going from the left to the right as I sew down. And then over here these long ones, they should be just the opposite. So they’re going from the right to the left. See how that works? Now what we’re going to do is we’re going to trim off this outer side right here, this outer corner, and we’re going to iron all these back. And I suggest doing this one at a time. I mean you can do it with your rotary cutter too. I just picked up a scissor because it’s easiest. But one time I did two at a time thinking I would just like speed it up and it worked but I was dangerously close to that seam. So you just want to be careful that you’re not dangerously close. Alright now we’re going to come over here, we’re going to go ahead and iron all these back. So we’re going to come here and I’m just going to roll these back. So we aren’t exactly pressing to the dark side and that’s ok because I just want to roll these back. And then the same thing with the shorts. Alright and one more.
Alright now let me show you how this goes together because you’re going to make these in quadrants. And so our little, we’re going to take a four inch background square and we’re going to sew our little guy to him, just like that. And I”m going to turn this a little bit so I can show you what we’re going to do here. So we’re going to go through and chain piece and sew four of these on. And then we’re going to add this guy. So this is a quarter of our star. And we’re going to do that to four of them. So I”m going to lay this right on here. And how I remember this that makes it easy for me is that I sew the color, most of the color is what attaches to the background. And so that’s my little mantra that I use to remember. So I’m going to lay my little piece on the bottom and my four inch square on the top so I can start on the straight, flat edge. And I’m going to just sew down here. And then I’m going to add this background square to four of these, just like this. This is such a great star and it’s a great use of a 2 ½ inch strip. You know it just looks, we tend to look at 2 ½ inch strips and go that’s just a strip. And really it is, it is so much more. And I love the strips. I think they’re very, very, I use them in a lot of different things. Very, very useful. Alright now we have four of these and we’re going to chain piece these and attach the long to the side. But what I’m going to do is I’m going to press them open. And this time I am going to keep them to the dark side. So I’m going to start with my dark piece on top and just roll that back. Oops this one just a little crazy right there. Alright. One more and one more. Alright.
Now what I’m going to do is I’m going to take these and I’m going to add my other dark, my six inch one to the side. Again most of my color, the side with the most color on it is going to attach to this piece over here. And so now I”m going to put my, my little four inch piece on the bottom and send my 2 ½ inch strip, send that through the machine on top. And we’re just going to sew those down. And I’m just going to chain sew those as well. Alright. Now let’s press these open. And then we can assemble our star. Again I’m just going to kind of set this. Somebody asked me the other day, what does the setting do? Basically it just relaxes the threads, that’s basically what it does. And I don’t always remember to do it but I think my blocks are a little, they lay a little nicer when I do.
Alright so now we’re just going to put this together like a four patch. So here’s our star right here. See how cute that came together and how quick. So this is our block right here and we’re just going to put this together. So I’m going to sew these two and these two and then sew it together in the middle. Now we’re just doing a quarter of an inch. And on these I’m starting from the, from the top and making sure that I’m lined up at the, where the white fabrics V. And then this one I am doing the same thing and making sure these are nice and, nice and lined up. Now we’re going to open these up and if I’ve done this right I shouldn’t even have to trim my threads. Yep so I can just lay that over and just sew that together as well. Alright here we go a quarter of an inch. Make one seam go one way and one the other. And although with this kind of thing it doesn’t matter too much because the fabric is the same in the middle so you’re not going to notice if that doesn’t match up. You will notice a little bit on these star points so try to get those pretty good. Alright let’s go press this open, see what we got. Oh I love these stars. They’re just so quick and easy. Alright look at that, isn’t that great? Now you’re going to do this to all your blue strips and I want to show you. I didn’t know if my stars if I just sewed them together because this is really how I come up with these patterns. I actually just see what fits and see what works because as I go along. And so I sewed four of these together right here and it was just stuck over a little bit right here so I decided to add just a piece of sashing just to the side. And so I added my sashing here and then this outer stars fit perfectly all the way down to the bottom. And so we’ve got one, two, three, four, five, six, seven, eight, nine, ten stars.
So I just thought this was really fun. It was really fun to me that it all came together in the same pack and I could just take my strips out and sew up. I just needed a yard of background fabric. I mean it just came together so cute. So this is another one of those, excuse me, another one of those quick and easy projects. And, and you know, don’t hesitate to use the stars on a table runner or the stripes or chunk it up however you want to do it. Anyway I hope you enjoyed this tutorial on the Star Spangled Quilt from the MSQC.
& Progress on Social