



Scrappy 4 Patch Quilt Tutorial: Jenny Doan's Easy Charm Pack Quilt
If you've ever looked at a charm pack and thought "I wish I could turn this into something amazing without spending all weekend on it," Jenny Doan has exactly the project for you. The Scrappy 4 Patch quilt takes a single charm pack and transforms it into a stunning quilt full of movement and scrappy charm — and the technique is refreshingly simple.
With over 870,000 views, this is one of Jenny's most beloved charm pack tutorials. The secret? You sew pairs of charm squares together, cut them apart, reassemble them into four-patch blocks, then cut them diagonally for a dramatic on-point effect. It's clever, it's fast, and the results look far more complex than the process. Let's get started!
What Is a Scrappy 4 Patch Quilt?
A traditional four-patch block is one of the simplest quilt blocks — just four squares sewn together. But Jenny takes it to the next level by making the four-patch blocks scrappy (every block uses different fabric combinations) and then cutting them diagonally to create triangular half-blocks. When you reassemble those triangles with lattice sashing strips, the result is a dynamic, on-point design that dances across the quilt.
What makes this method special is how efficiently it uses a charm pack. You sew two contrasting 5" squares together, cut them in half, press them open, then sew the halves into four-patch blocks. One charm pack yields plenty of blocks for a beautiful throw-size quilt. It's chain-piecing heaven!

Jenny shows how charm pack squares become beautiful scrappy four-patch blocks
What You'll Need
🧵 1 Charm Pack (42 squares, 5" × 5")
Choose a pack with good contrast between lights and darks — the scrappy effect depends on it! Shop precut fabrics.
🎨 Lattice sashing fabric — about ½ yard
You'll cut 1½" strips for the sashing between the diagonal blocks. A solid or subtle print in a coordinating color works beautifully. Shop fabric.
🔲 Border fabric — about 1½ yards
A 2½" inner border plus a 6" outer border frames the design perfectly.
✂️ Rotary cutter, ruler & mat
Shop rotary cutters.
📌 Pins or clips — Shop pins & clips
🪡 Sewing machine
🔥 Iron & ironing board
Step-by-Step Instructions
Step 1: Pair Up Your Charm Squares

Go through your charm pack and pair up squares with contrasting colors — a light with a dark, a bold print with a subtle one. You want each pair to have visual contrast so the four-patch blocks pop.
Place each pair right sides together and sew down both long sides with a quarter-inch seam allowance. You can chain piece these through your machine for speed — just feed one pair right after another without cutting the thread.
Step 2: Cut Pairs in Half
Clip your chain-pieced pairs apart. Now take your ruler and cut each sewn pair right in half — line up the 2½" mark with the edge and cut straight through. You'll end up with two identical rectangles from each pair, each showing both fabrics.
Each rectangle will be approximately 2½" × 5" with a seam running down the middle.

Step 3: Press Open and Stack
Press all your rectangles open — set the seam first, then fold the top fabric back. Generally in quilting you'd press to the dark side, but for this project Jenny recommends just pressing them all open since they'll be going in different directions when assembled.
Stack up your pressed pieces. You should have a nice big pile of two-toned rectangles ready for assembly!
Step 4: Sew the Four-Patch Blocks
Now the fun begins! Take two different rectangles and sew them together along the long edge. Then take two more and sew them together the same way. Press seams in opposite directions so they'll nest when you join the pairs.
Place your two sewn pairs right sides together, making sure the seams nest up — you can feel it with your fingers when there's no gap between them. Sew a quarter-inch seam down the side, and you have a four-patch block!
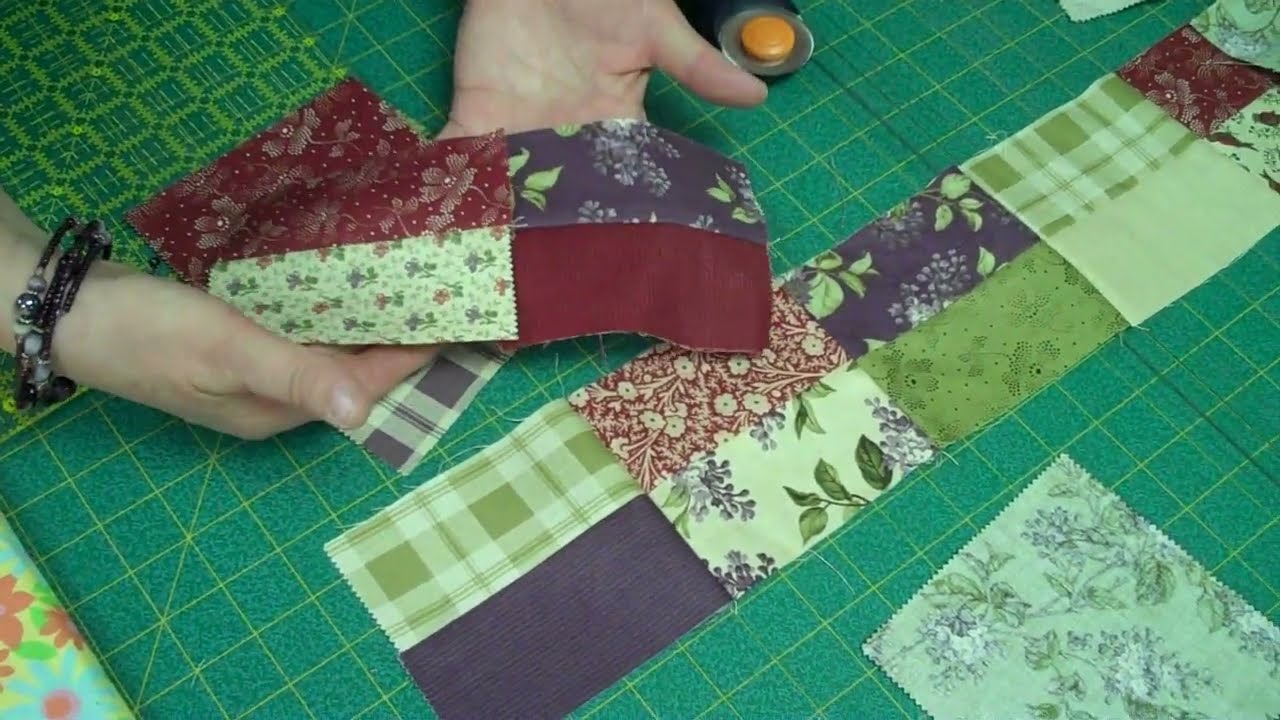
Watch how the scrappy four-patch blocks come together with perfect nested seams
Step 5: Cut the Blocks Diagonally
Here's where the magic happens! Take each completed four-patch block and cut it diagonally once — corner to corner. This gives you two triangles from each block, and when you reassemble them, they create that gorgeous on-point scrappy design.
This is the technique that makes this quilt look so much more sophisticated than a basic four-patch layout.
Step 6: Add Lattice Sashing
Cut your sashing fabric into 1½" strips, then cut each strip into pieces about 14" long (you'll get three per strip). Fold each sashing piece in half and finger-press a center crease — this center mark needs to line up with the point where your four-patch seams meet.
Sew a sashing strip to one side of each triangle, lining up the center crease with the center seam. Press, then add the other side. Trim the excess sashing that extends past the triangle edges.
Step 7: Assemble and Add Borders
Arrange your sashed triangles into rows, alternating the direction of the triangles. Some blocks will point up, some will point down — and the next row goes the opposite way. Sew rows together, pressing as you go.
Once your quilt top is assembled, add a 2½" inner border followed by a 6" outer border to frame the design beautifully.
Pro Tips for a Perfect Scrappy 4 Patch
🎨 Contrast is king: The scrappy effect depends on pairing lights with darks. If all your fabrics are medium-value, the blocks will look muddy.
📐 Nest your seams: This is a seam-heavy project. Take the time to nest opposing seams for crisp intersections — you'll see the difference in the finished quilt.
✂️ Trim as you go: After adding lattice strips, use your ruler to trim the little points that extend past the triangle edges. Clean edges make assembly much easier.
🧵 Mix up the arrangement: When laying out your blocks, step back and look at the overall balance. Move blocks around until you have a nice mix of colors and values across the quilt.
🔄 Chain piece everything: This quilt has lots of repetitive sewing — use chain piecing for each step to save time and thread.

More Charm Pack Ideas
Got another charm pack in your stash? Start with 15 Free Charm Pack Quilt Patterns for Beginners — our full roundup of free patterns, video tutorials, and how many packs each quilt size needs.