Minky Self Binding Lap Blanket Written Tutorial
How to Make a Larger Throw with Just Two Cuts of Fabric
by Liz Gubernatis
Working with cuddle and minky soft fabrics can seem like a slippery project to tackle, if you’ll pardon the pun, but you cannot deny the soft, silky texture of Shannon Cuddle Fabrics is SEW worth it! At Missouri Star, we have bolts of many different colors and textures of Shannon Cuddle Fabrics and we LOVE putting them on the backs of quilts and using Shannon Cuddle minky prints and solids to make reversible, self-binding baby blankets. That got us thinking….
What happens if we use that larger cut of Cuddle minky fabric to make ourselves some big, tall, blankets? So, with our 6 foot tall babies in mind, we got to work on how to make a larger version. With a little ingenuity, a tiny bit of bravery, and a whole lot of love, here’s how to make a Cozy Cuddle Bigger Blanket with just two cuts of fabric! Let’s get started!
Supplies Needed
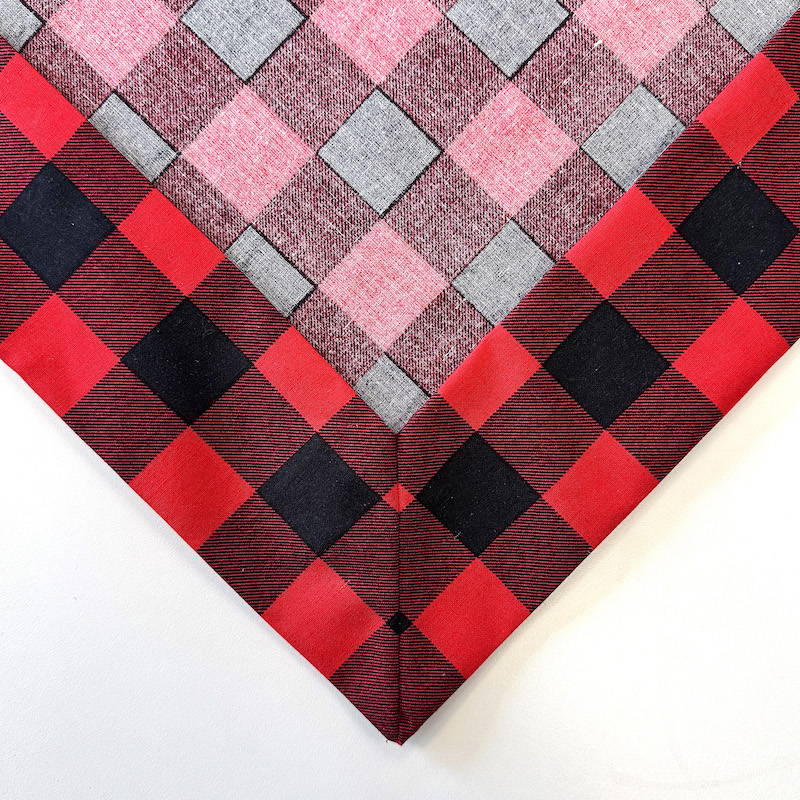
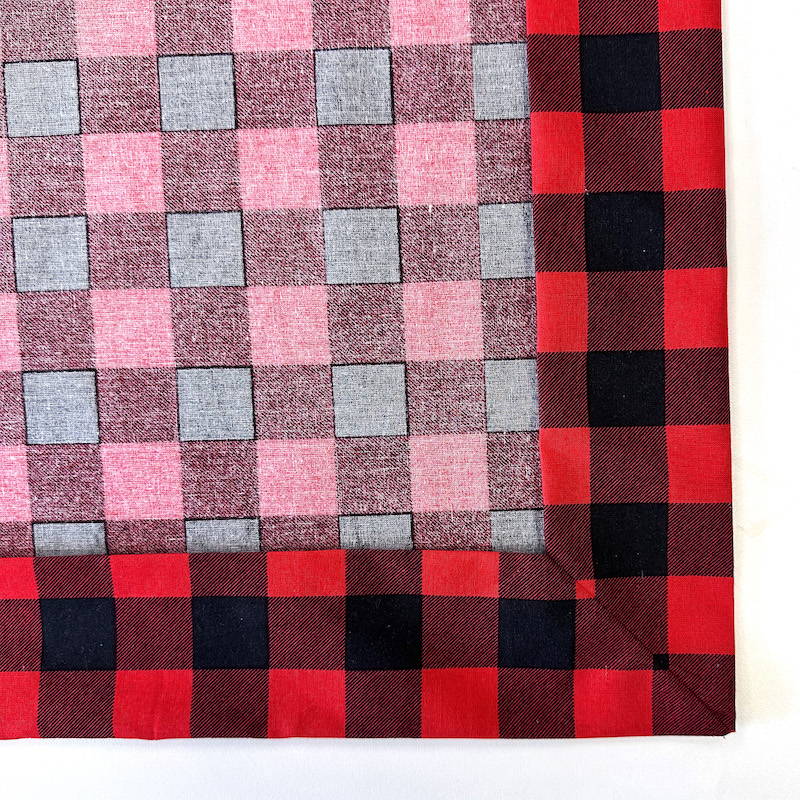
3 yards of a 108” wide backing (we used this beautiful red buffalo plaid)
2.5 yards of Cuddle® Extra Wide - Black 90" Minky Yardage (we used this super-soft black to coordinate)
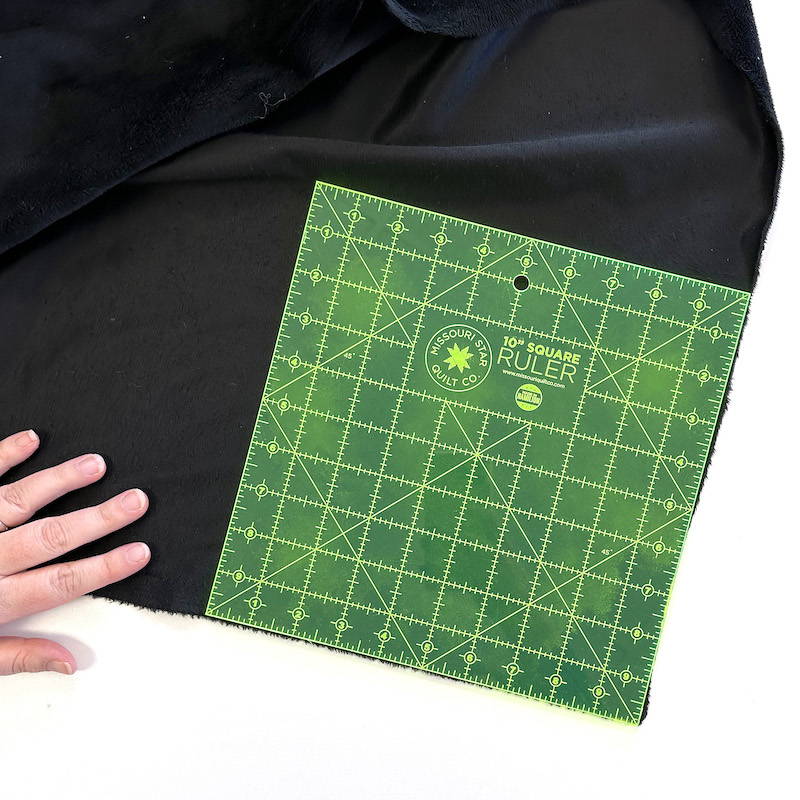
A ruler at least 6 inches (we used this 10” square Missouri Star ruler)
Coordinating thread (we used Black Aurifil thread)
Project Instructions
Step 1
Square up your fabrics, trimming to size if necessary.
We used a 90” extra wide cuddle minky, and cut it at 2.5 yards. In theory, this is a 90” square. In practice, it might be a tiny bit larger (we like to be a little generous with our cuts). More important than measuring it exactly is that the corners are square. So take your square ruler and trim the corners slightly if need be.
*TIP: Beware the “Cuddle Confetti” - To minimize the fluff of “Cuddle Confetti” cut from the back side of the fabric, using a scalpel-style seam ripper. We used scissors and definitely had fluff, but we then took Shannon Fabrics’ advice - after cutting, pop the fabric in the dryer on a no-heat setting. A few minutes later, the lint catcher had all the fluff and we were ready to sew!

Next, square up the 108” wide backing and trim down to 100” square. At a three yard cut, in theory this is already a square, but it’s 108” and we want 100” - so first, take off one selvedge edge. Then, measuring over 100” mark and trim off the other selvedge and several inches.. Using this buffalo plaid made this step SUPER easy - we could just follow along a line of the plaid with a pair of scissors and a little patience.
Once selvedge edges are removed, measure cut edge to cut edge and repeat trimming down to 100” - again, the buffalo plaid print made this step very easy. A different print might need to be marked and trimmed square with a little help from your rulers. Again, be sure that corners are nice and square.

Step 2
Make the Frame with the Backing Fabric
With a 90” square center and a 100” square backing, we’re going to make a 3” rolled hem with mitered corners to frame the Cuddle minky (and tuck it into, making this blanket SUPER easy to sew!)
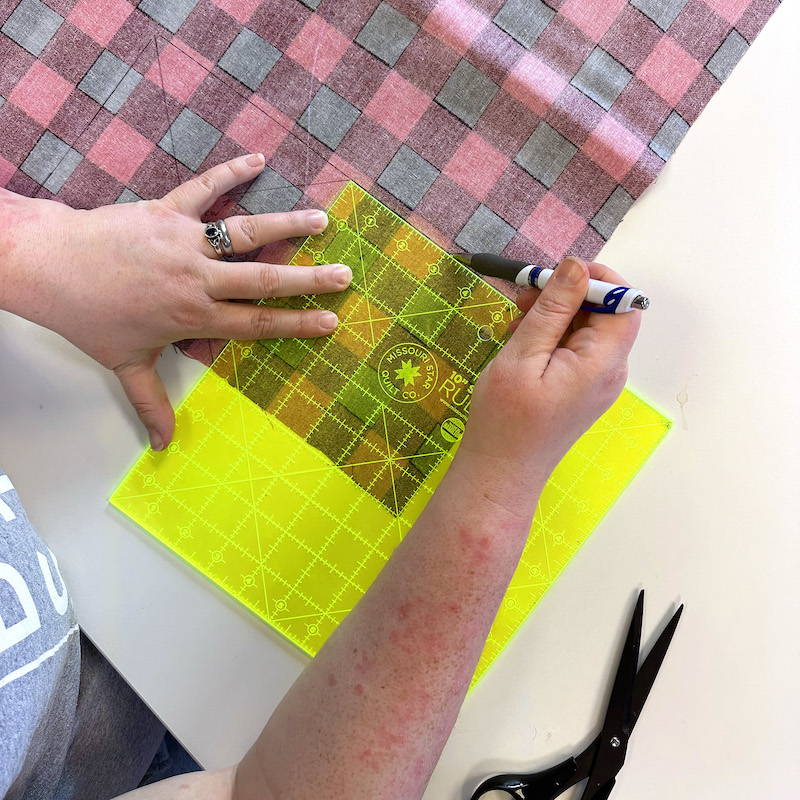
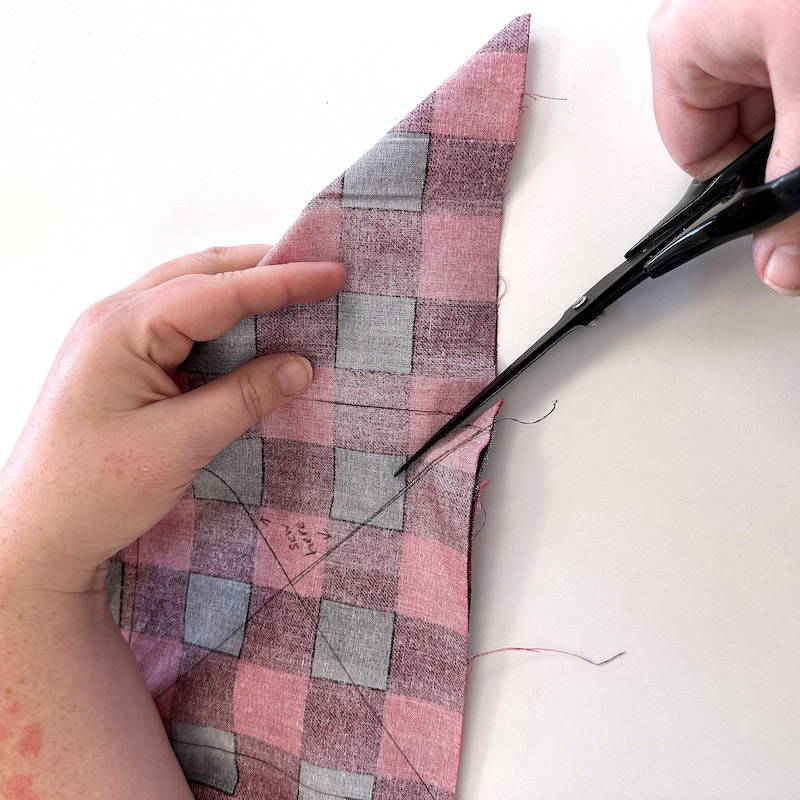
To do this, we start by drawing in the corners. Grab your square ruler (we used this 10” Missouri Star ruler) and draw a 6” box in the corner on the wrong side of the fabric. Now draw a second six-inch box to the left of the corner box.
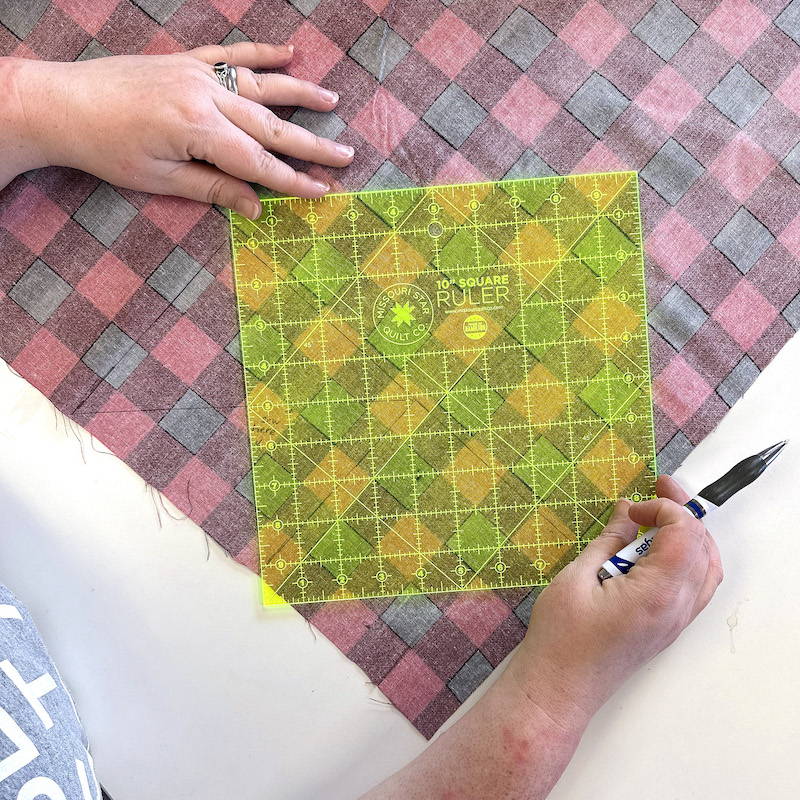
Next, draw an X in the second box, like this.

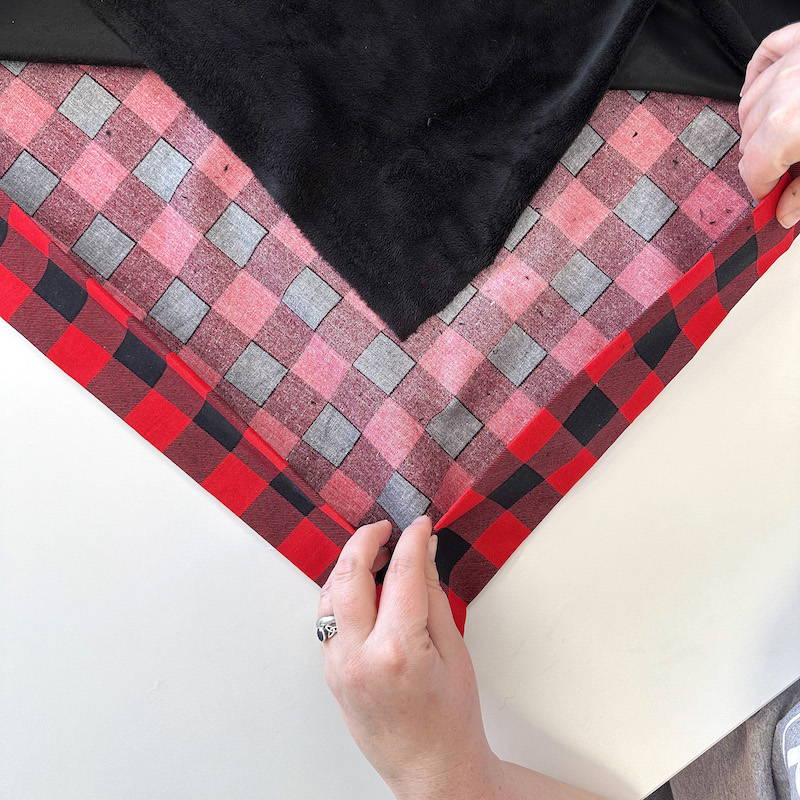
Now fold the corner so the edges meet, forming a 45 degree triangle point at the corner. You may want to pin to hold this in place.

We’re going to sew along the right angles of the “X” as shown here. Start at the fold and back stitch, then sew to the point of the X. With your needle down, pivot and sew to the edge of fabrics, sewing right off the edge.
Next we cut away the excess in the corners. Trim a ¼ inch away from the stitch line. Clip into but not through the stitch line in the inner corner. Trim away the extra bulk at beginning and ending stitches.
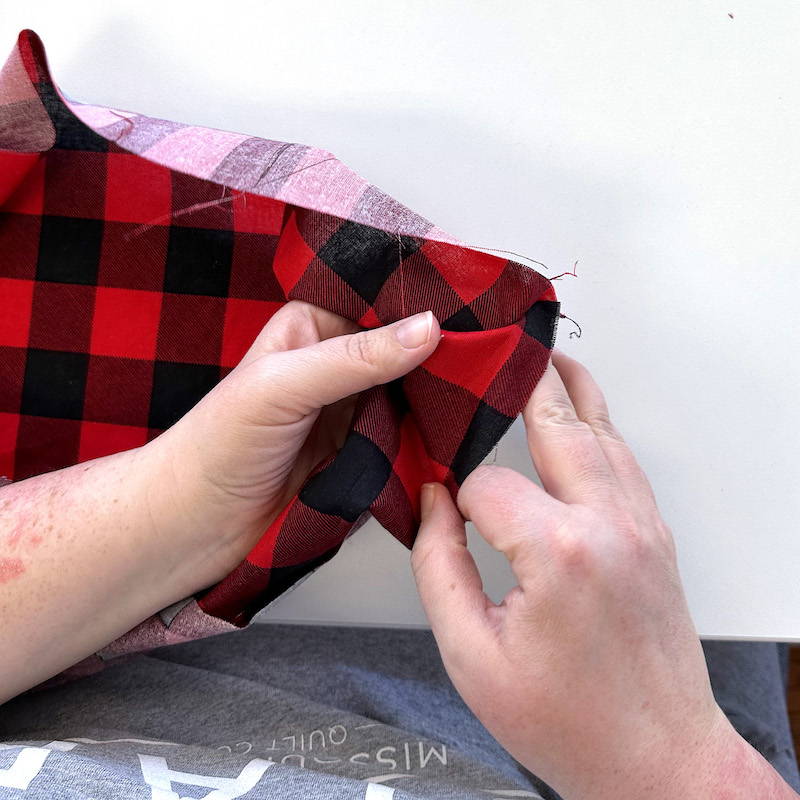
Now we flip and the magic miter happens! Line the two halves of this seam up, and with the clipped inner corner, next one side to the left and one side to the right.
Now flip it in, using your finger tip to push the mitered corner out.
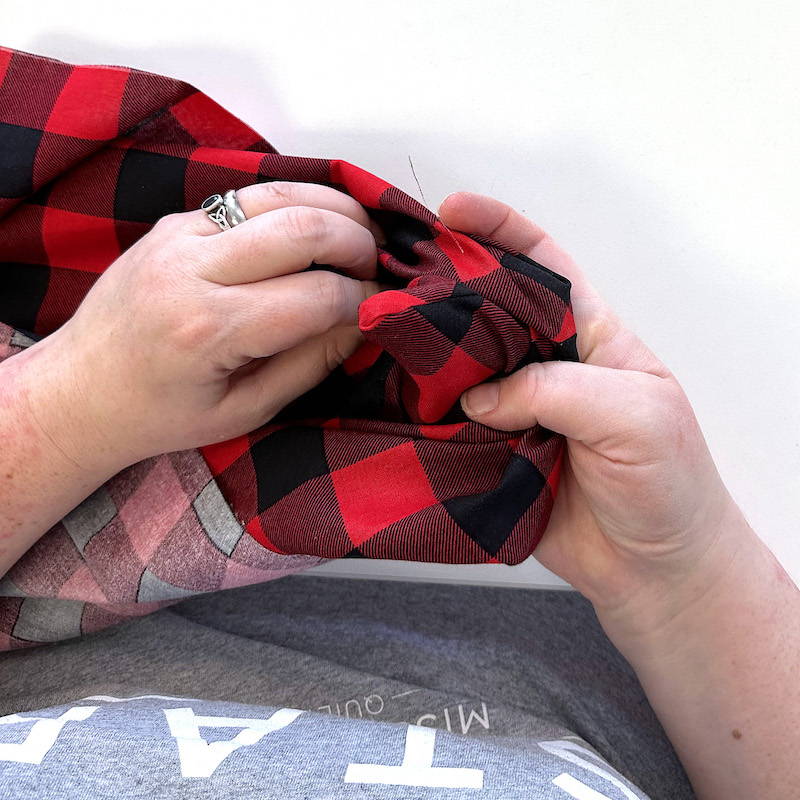

Smooth down the edges and press - this creates a three inch “pocket” with mitered corners called a rolled hem. We’ll be able to slide our Cuddle minky into this pocket. Repeat on all 4 corners.
Once all 4 corners have been made, carefully fold and press the frame along each side of the backing. You may want to use a ruler to make sure it’s a consistent 3” folded once and again and pressed with steam into a clean frame. Again, the buffalo check plaid was a huge help here, as lining up the pattern along all 4 sides was an easy hack.
Step 3
You’re going to want a LOT of pins for this part. Find a nice big flat space and layout your backing frame side up. Spread out the Cuddle Minky center and tuck deep into the edge of the frame “pocket” and smooth it out.
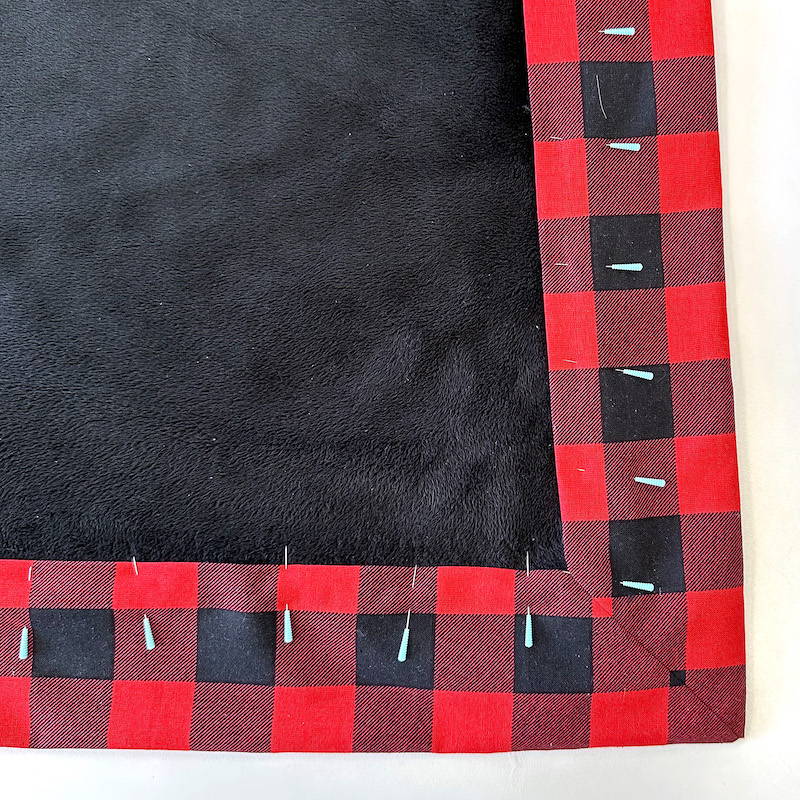
When you’re happy with the placement, pin all the way around the blanket, through the frame, minky, and backing layers.
Step 4
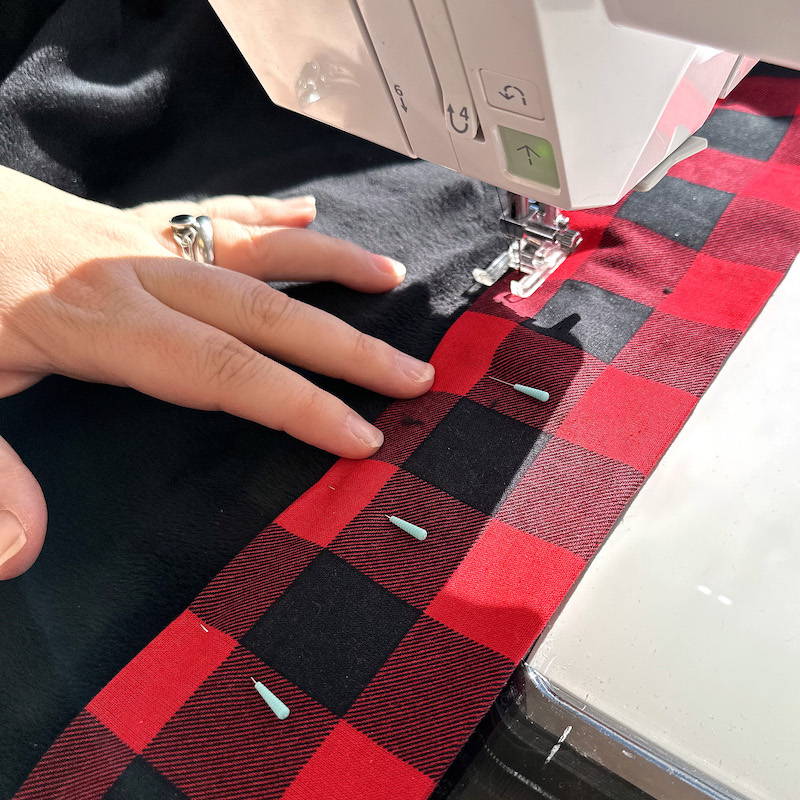
To finish the blanket, we’ll secure the minky into the backing frame with a straight-ish row of stitches, approximately ⅛ inch from the folded edge. This will secure the minky and the pocket. IF you’d like to add another row of decorative stitches, go for it! That’s it!
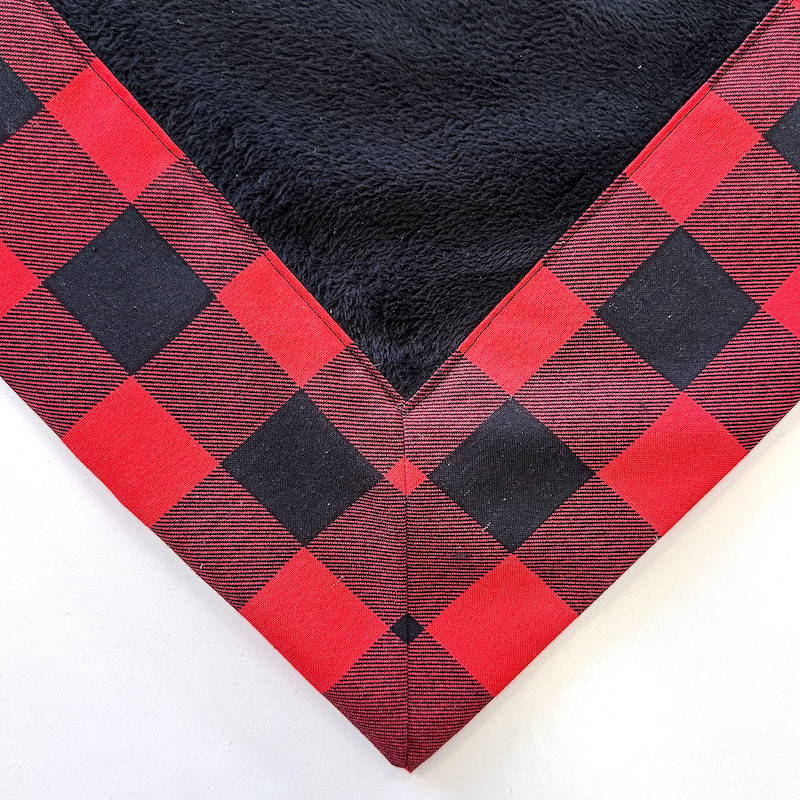
Enjoy! You did it!
This super snuggly, very soft and cozy comfortable blanket is made much bigger but still only used two pieces of fabric! You can use this method and adjust for any size. Making this much bigger blanket with my 6’5” guy in mind means he’ll be ready for movie night in style - and warm and snuggly head to toe. What do you think? Will you tackle this project? Show us YOUR Cozy Cuddle Bigger Blanket using #msqcshowandtell. We’ll be under this one scrolling through pictures, watching the snow fall.