



How to Make Bias Tape (and When You Actually Need It)
⚡ Quick Answer
- What bias tape is: fabric strips cut at a 45° angle to the grain, then folded and pressed — the diagonal cut is what lets it bend
- Why it matters: straight-grain binding will not go around a curve without puckering; bias tape will
- When you need it: scalloped edges, circles, tree skirts, rounded quilt corners, applié stems and vines
- When you don't: a normal quilt with straight edges and square corners — straight-grain binding is fine and uses less fabric
- What makes it easy: the Missouri Star Bias Binding Tool Kit for folding and the Bias Ruler for cutting
Bias tape is one of those things that sounds fussy until the day you need it, and then nothing else will do. You are binding a scalloped table topper or a round tree skirt, you reach for your usual binding, and it fights you the whole way around — rippling on the outside curves, bunching on the inside ones.
That is not your sewing. That is the grain of the fabric telling you it will not bend.
Here is what bias tape actually is, when it is worth the extra step, and the fastest way to make your own.
Key Takeaways
- ➤Bias means 45 degrees. Strips cut on the diagonal of the fabric have stretch. Strips cut along the grain do not. That single difference is the whole story.
- ➤Curves need bias. Straight edges do not. Save yourself the fabric and the effort on ordinary square quilts — bias is for curves, circles, scallops and rounded corners.
- ➤Cut strips at four times the finished width for double-fold. Two times the finished width for single-fold. A tape maker does the folding for you.
- ➤Continuous bias saves a lot of fabric. One seamed tube, cut in a spiral, gives you yards of bias from a modest square with far fewer joins.
- ➤Press, don't stretch. Bias will lengthen and go wavy if you pull it under the iron. Guide it, let it feed, and press straight down.
What Bias Tape Actually Is
Woven fabric has two sets of threads: lengthwise and crosswise. Cut along either one and you get an edge that is stable and strong — it will not give at all. Cut at 45° across both sets and you get the bias, where the threads can shift against each other. That is where the stretch comes from.
Bias tape is simply a strip cut on that diagonal, with the raw edges folded to the middle and pressed. If you want the deeper background on why grain behaves this way, our quilting terminology guide to bias lays it out.
💡 Pro Tip: Tug a strip gently along its length before you decide. If it gives and lengthens, it is on the bias. If it feels like a strap, it is straight grain.
When You Actually Need Bias Tape
This is the part that saves you time. Bias is not automatically better — it is better for specific jobs.
| Use bias tape for | Straight-grain binding is fine for |
|---|---|
| Scalloped or wavy edges | Standard square-cornered quilts |
| Circles and rounded corners — tree skirts, table toppers, bibs | Table runners with mitered corners |
| Appliqué stems, vines and celtic-style strips that have to curve | Placemats and pillow covers |
| Necklines, armholes and any garment curve | Straight-edged wall hangings |
| Anywhere the binding has to lie flat around a shape | Anything you want to bind with the least fabric possible |
The trade-off is fabric. Cutting on the diagonal produces shorter strips and more waste than cutting selvage to selvage, which is exactly why the continuous method below exists.
▶️ Watch it done: Binding 101 with Courtenay — essential techniques for clean bindings

How to Make Bias Tape, Step by Step
1. Square up your fabric and find the 45° line. Most quilting rulers have one marked; line it up with the cut edge of your fabric.
2. Cut your strips parallel to that diagonal line, all the same width. Width depends on what you are making — see the chart below.
3. Join the strips end to end with a diagonal seam. Lay two strips right sides together at a right angle, sew corner to corner, trim to a quarter inch and press the seam open. Diagonal joins spread the bulk out so it does not show as a lump in the finished binding.
4. Fold and press. This is where a tape maker earns its keep. Feed the strip in the wide end, it comes out with both raw edges folded to the center, and you press as it feeds. For double-fold, press the whole thing in half one more time.
The Missouri Star Bias Binding Tool Kit includes four sizes plus an awl for feeding the fabric through, and the tools are labeled by strip width:
| Tool | Cut strips | Makes single-fold | Makes double-fold |
|---|---|---|---|
| Teal | 1/2" | 1/4" | 1/8" |
| Peach | 1" | 1/2" | 1/4" |
| Blue | 1 1/2" | 3/4" | 3/8" |
| White | 2" | 1" | 1/2" |
For quilt binding you are usually working much wider than this — 2 1/2" strips folded in half, no tape maker needed. The small sizes are for appliqué stems, garment edges and delicate finishes.
💡 Pro Tip: Starch your fabric before cutting bias strips. A crisp strip behaves like straight grain while you cut and sew, then relaxes into the curve when you press it. It is the single biggest improvement most quilters can make to their bias.
The Continuous Bias Method — Yards of Binding, Almost No Joins
Cutting individual diagonal strips gets wasteful fast. The continuous method fixes that: you sew your fabric into a tube with a deliberate offset, then cut around the tube in one long spiral. One square of fabric, one long strip, and only a handful of seams.
The Bias Ruler is built for this — it yields 280 inches of 2 1/2" binding out of a half yard of fabric, more at narrower widths, and it hinges in half for storage. Watch it in action in our Continuous Bias Binding tutorial.
Tools That Make This Painless

For folding
Missouri Star Bias Binding Tool Kit
Four tools in one kit — 1/2", 1", 1 1/2" and 2" strip sizes — plus an awl for feeding fabric through. Single-fold or double-fold, no measuring at the ironing board. See the tutorial

For cutting
The Bias Ruler
Cuts bias strips from 1/4" to 2 1/2", hinges in half for storage, and gets 280 inches of binding out of a half yard. Made in the USA by Susan Brown. See the tutorial
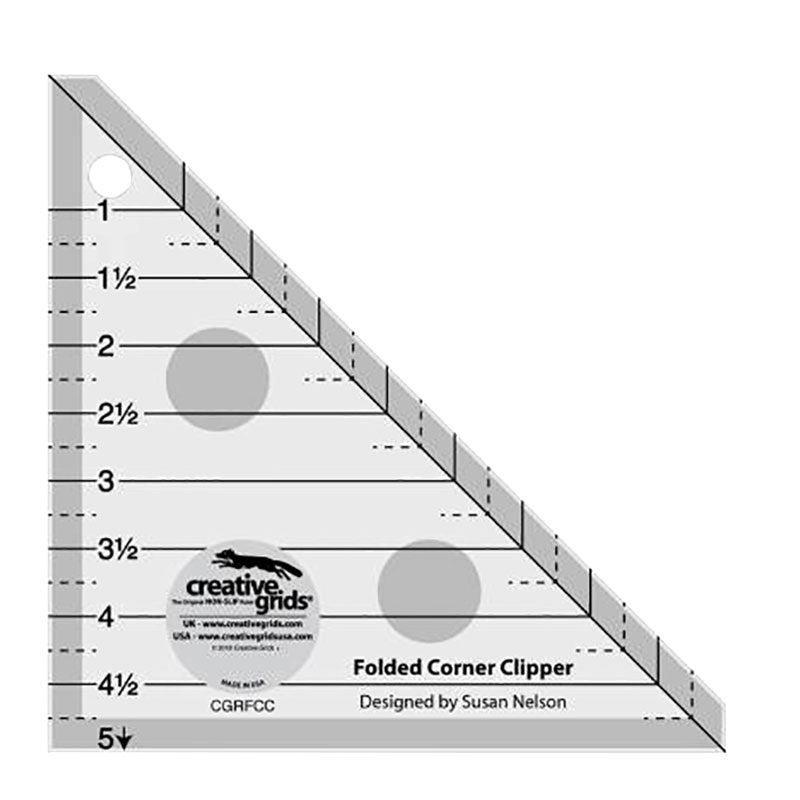
For trimming
Creative Grids Folded Corner Clipper
The companion for everything you bind. Trims folded corners and dog ears accurately so your edges are square before the binding ever goes on. See the tutorial
Putting It On
Making the tape is half the job. Attaching it around a curve is the other half, and it rewards a slow hand: ease the bias around outside curves without stretching it, and let it gather very slightly on inside curves. Our guide to binding curves and circles walks through exactly that, and Quilting 101: Single Fold Bias Binding covers the narrower single-fold finish.
Frequently Asked Questions
What is the difference between bias tape and bias binding?
They are the same thing, used differently. “Bias tape” usually describes the folded strip itself; “bias binding” describes it once it is sewn onto an edge to finish it.
How wide should I cut my bias strips?
For single-fold tape, cut twice the finished width. For double-fold, cut four times the finished width. For standard double-fold quilt binding, 2 1/2" strips are the usual choice.
How much fabric do I need for bias binding?
A half yard cut with the Bias Ruler yields around 280 inches at 2 1/2" wide — enough to bind a good-sized throw — and more if you cut narrower strips.
Can I use bias binding on a regular square quilt?
Absolutely. It uses more fabric, but it wears well and it is the traditional choice for quilts you expect to be loved hard, because the diagonal grain spreads wear across many threads instead of a few.
Why does my bias tape come out wavy?
You are pulling it. Bias stretches under tension, so let the tape maker feed the fabric to you and press straight down instead of running the iron along the strip.
Do I need a bias tape maker?
No, but it turns a fiddly measuring job into a steady one. Folding narrow strips by hand at the ironing board is where most people give up on making their own.
Once you have made your own, the store-bought packets start to look a little sad. Match your binding to your project, in a print you actually chose, for the cost of a fat quarter.