Sew Wide Striped Curtains From backing fabric to window dressing
by Liz Gubernatis
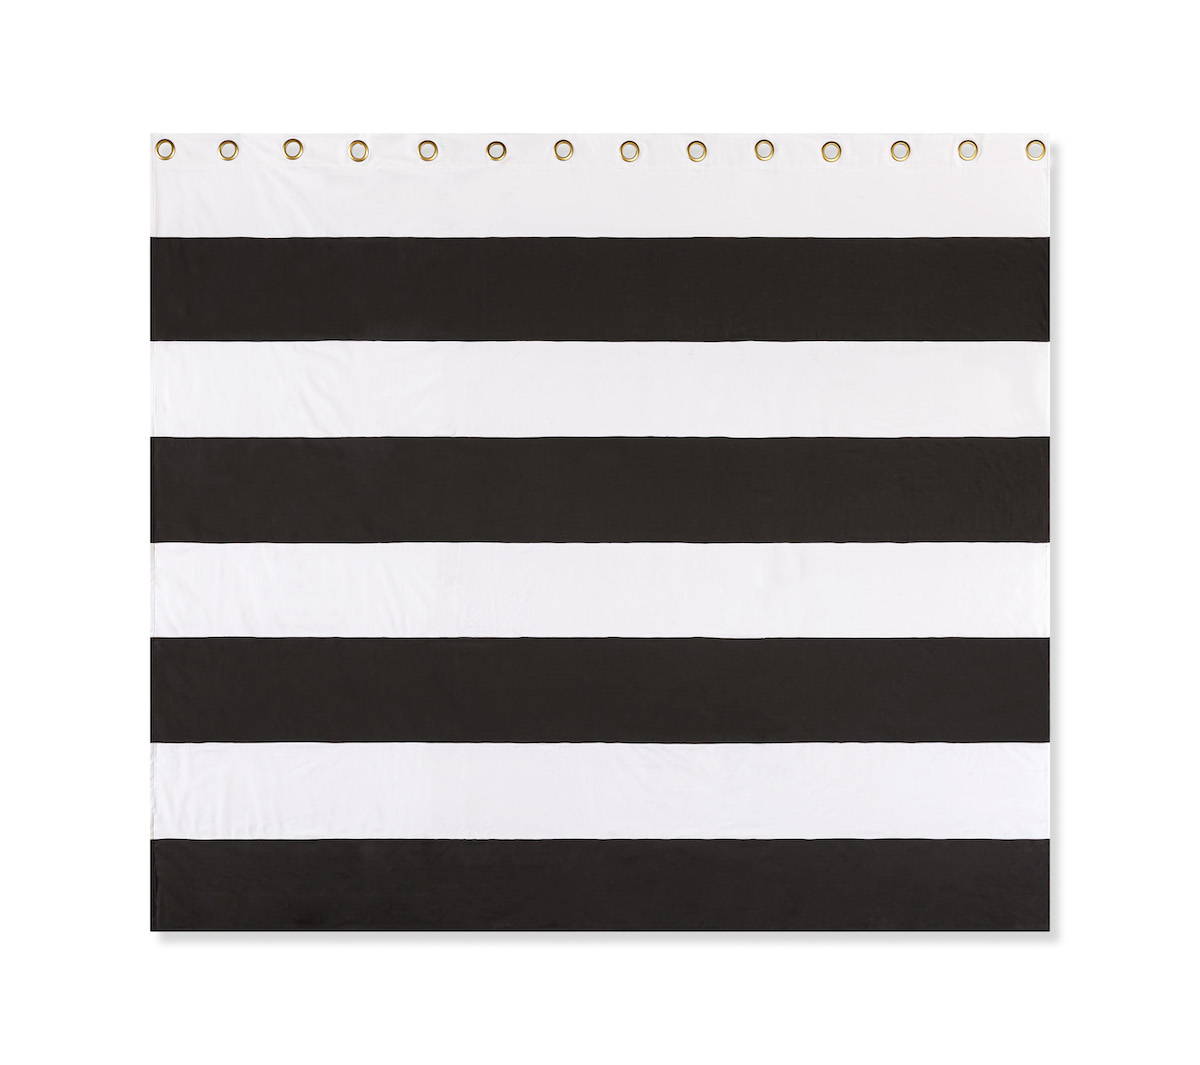
We wanted to make statement curtains. To create our own wide striped curtains, we started with 108” wide backing in 2 colors - classic black and white. You could go wild with this wide stripe and make every stripe another color, or find a print that’s oh-sew-you and pair it with a solid or softer look. Whatever you choose, grab a fresh needle, sharp scissors, and a coordinating (or boldly bright!) thread and wind a few bobbins. Let’s show you how we did this!
Project Size: 106 x 96 approximately per curtain panel. (We made 2 using the materials listed.)
Supplies Needed
To reinforce the top stripe for grommets, you’ll need an interfacing strip. We used ½ yard of fusible interfacing.
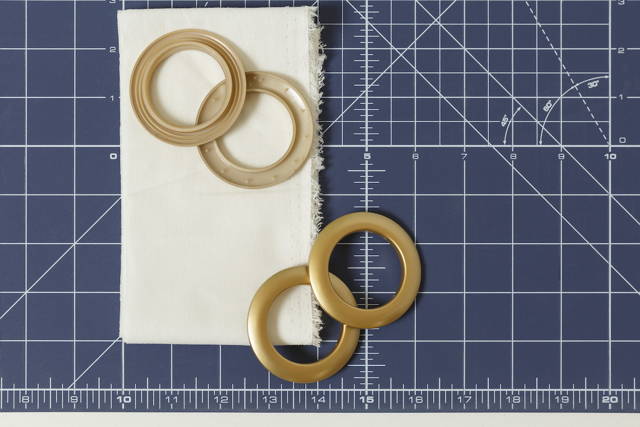
You’ll also need grommets.
Project Instructions
Cut
Step 1
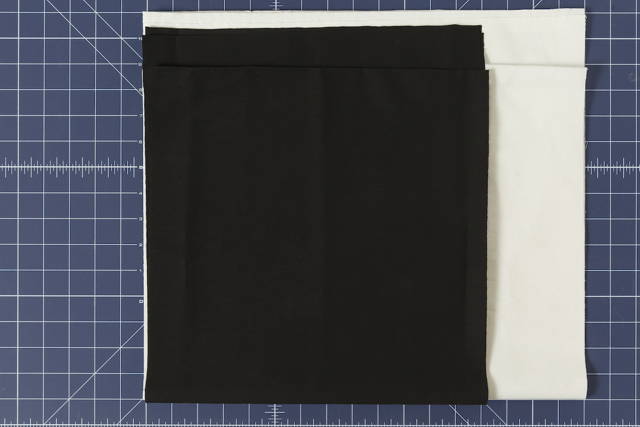
For our curtains, we decided on eight (8) 12-inch stripes per curtain, and determined that we wanted the white stripe at top. So for the pair, we need eight (8) 13” strips cut, 108” wide of the black and six (6) 13” strips cut, 108” wide of the white. For the top strip, we’ll be adding grommets, so we need to add another 4” to this measurement for the folded top. Cut two (2) strips 17” wide by 108” width of fabric of the white.
Step 2
Cut 4” strips of interfacing for the folded, reinforced top stripe/grommets area.
Sew
Step 3
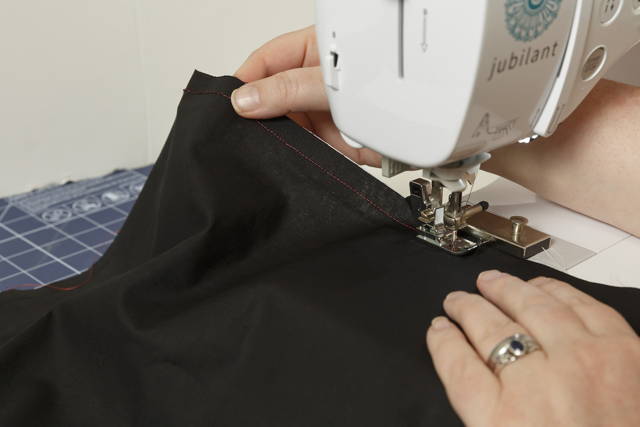
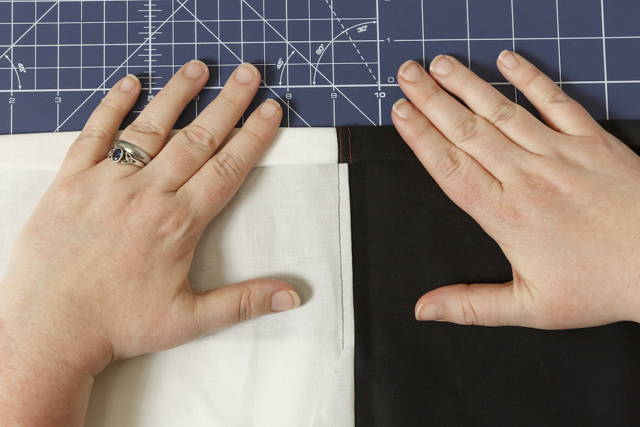
Using the folds of the fabric and a few pins, if you prefer, line up the stripes and stitch wrong sides together using a ½ inch seam allowance. For solid fabrics, there is no right or wrong side, but for prints, you’ll want to make sure they're the wrong sides together.
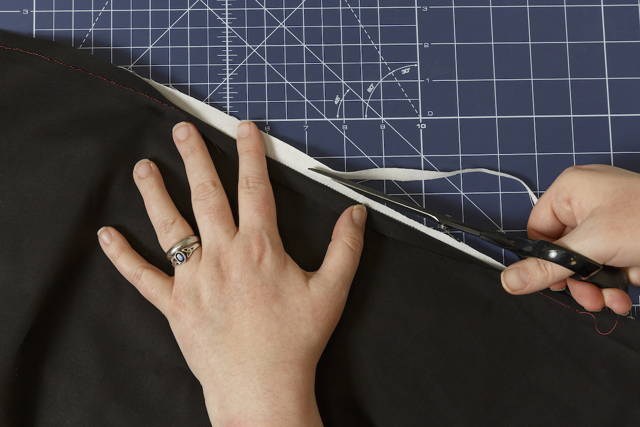
Step 4
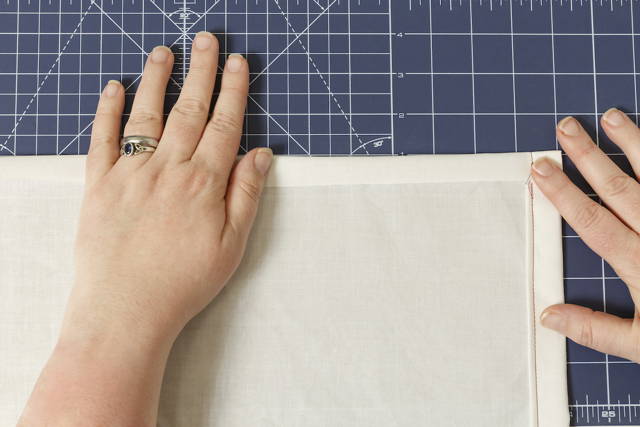
Next, we’re going to make flat-felled seams. First, trim the white approximately ¼ inch. ‘
Then, fold the black to meet the stitch line.
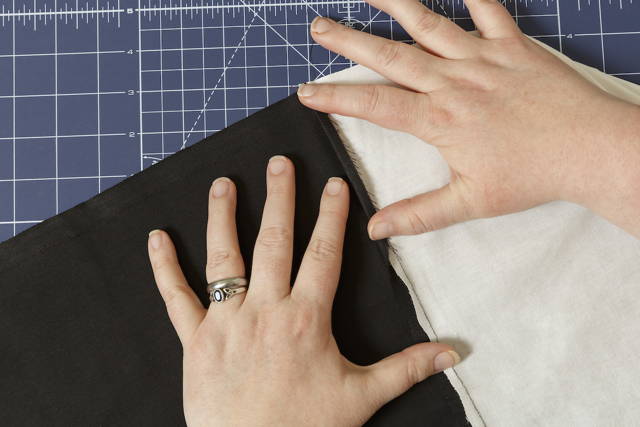

Finally, fold once more to enclose the white.
Step 5
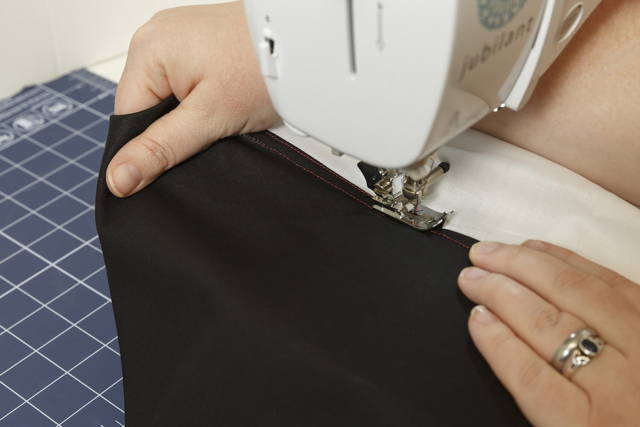
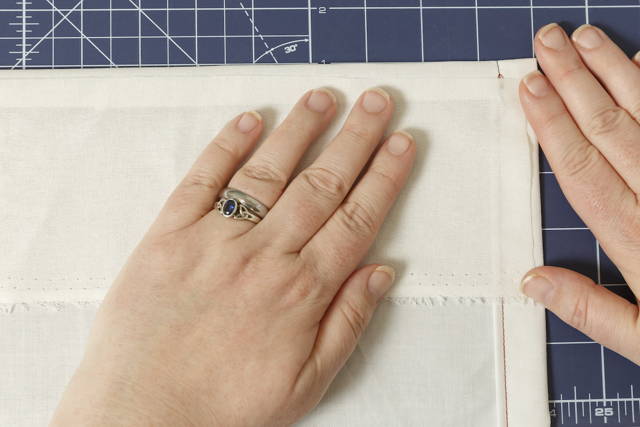
Stitch close to the edge, fully enclosing the white and black raw edges. You would likely match the black stripe (we did for Ashelyn’s room) but we used red here so you can see the stitch lines.
TIP: While flat-felling the seams, you may want to fold and hold a few inches at a time. You may also choose to pin the whole seam. Your preference, here..

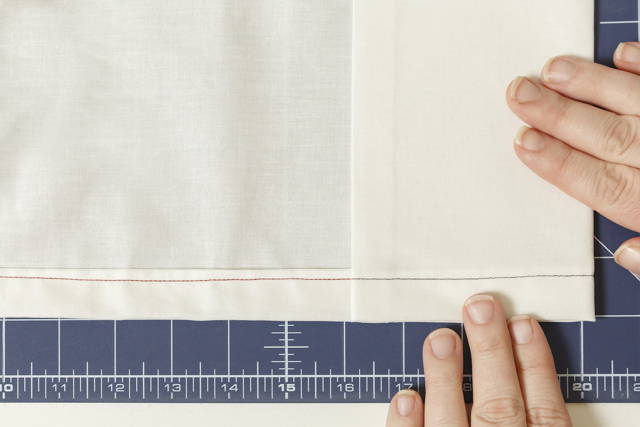
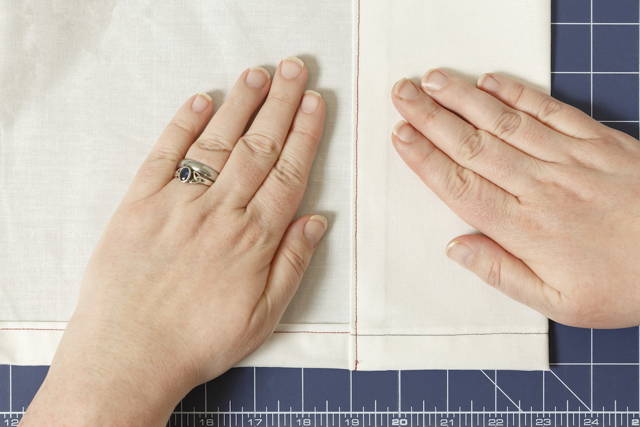
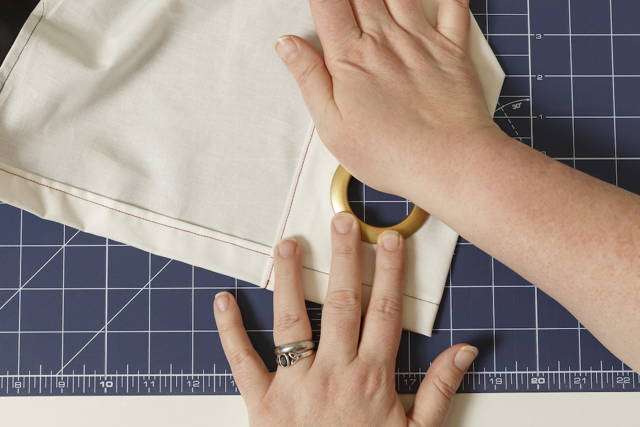
Step 6
Once all your stripes have been flat-felled, you’ll hem the sides, then the bottom of your curtain. To hem the sides, fold over the selvedge edge.
Then fold again.
Step 7
Then stitch close to the fold.
Repeat at the bottom stripe of the curtain, folding approximately ½ inch, then folding again and stitching to create the bottom hem. .
Step 8
At the top of your curtain, you have the 17” stripe. First, fold down ½ inch and press.
Step 9
Then position your 4” strips of interfacing across the top, overlapping the hem and fold, as shown. You may overlap strips across the full 108” width as necessary.
Step 10
Fold down once more, at the interfacing, and stitch in place, forming a large 4” cuff for grommets.
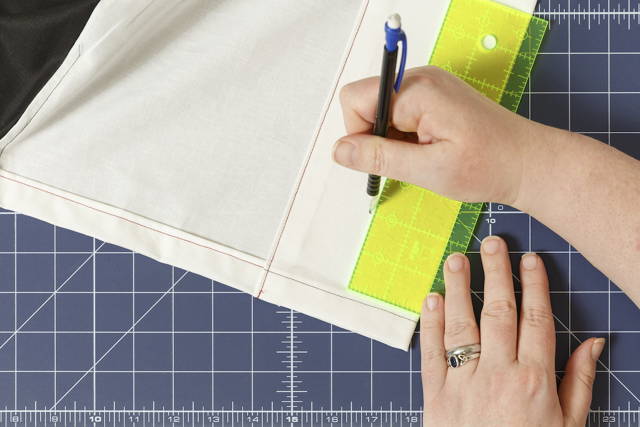
Step 11
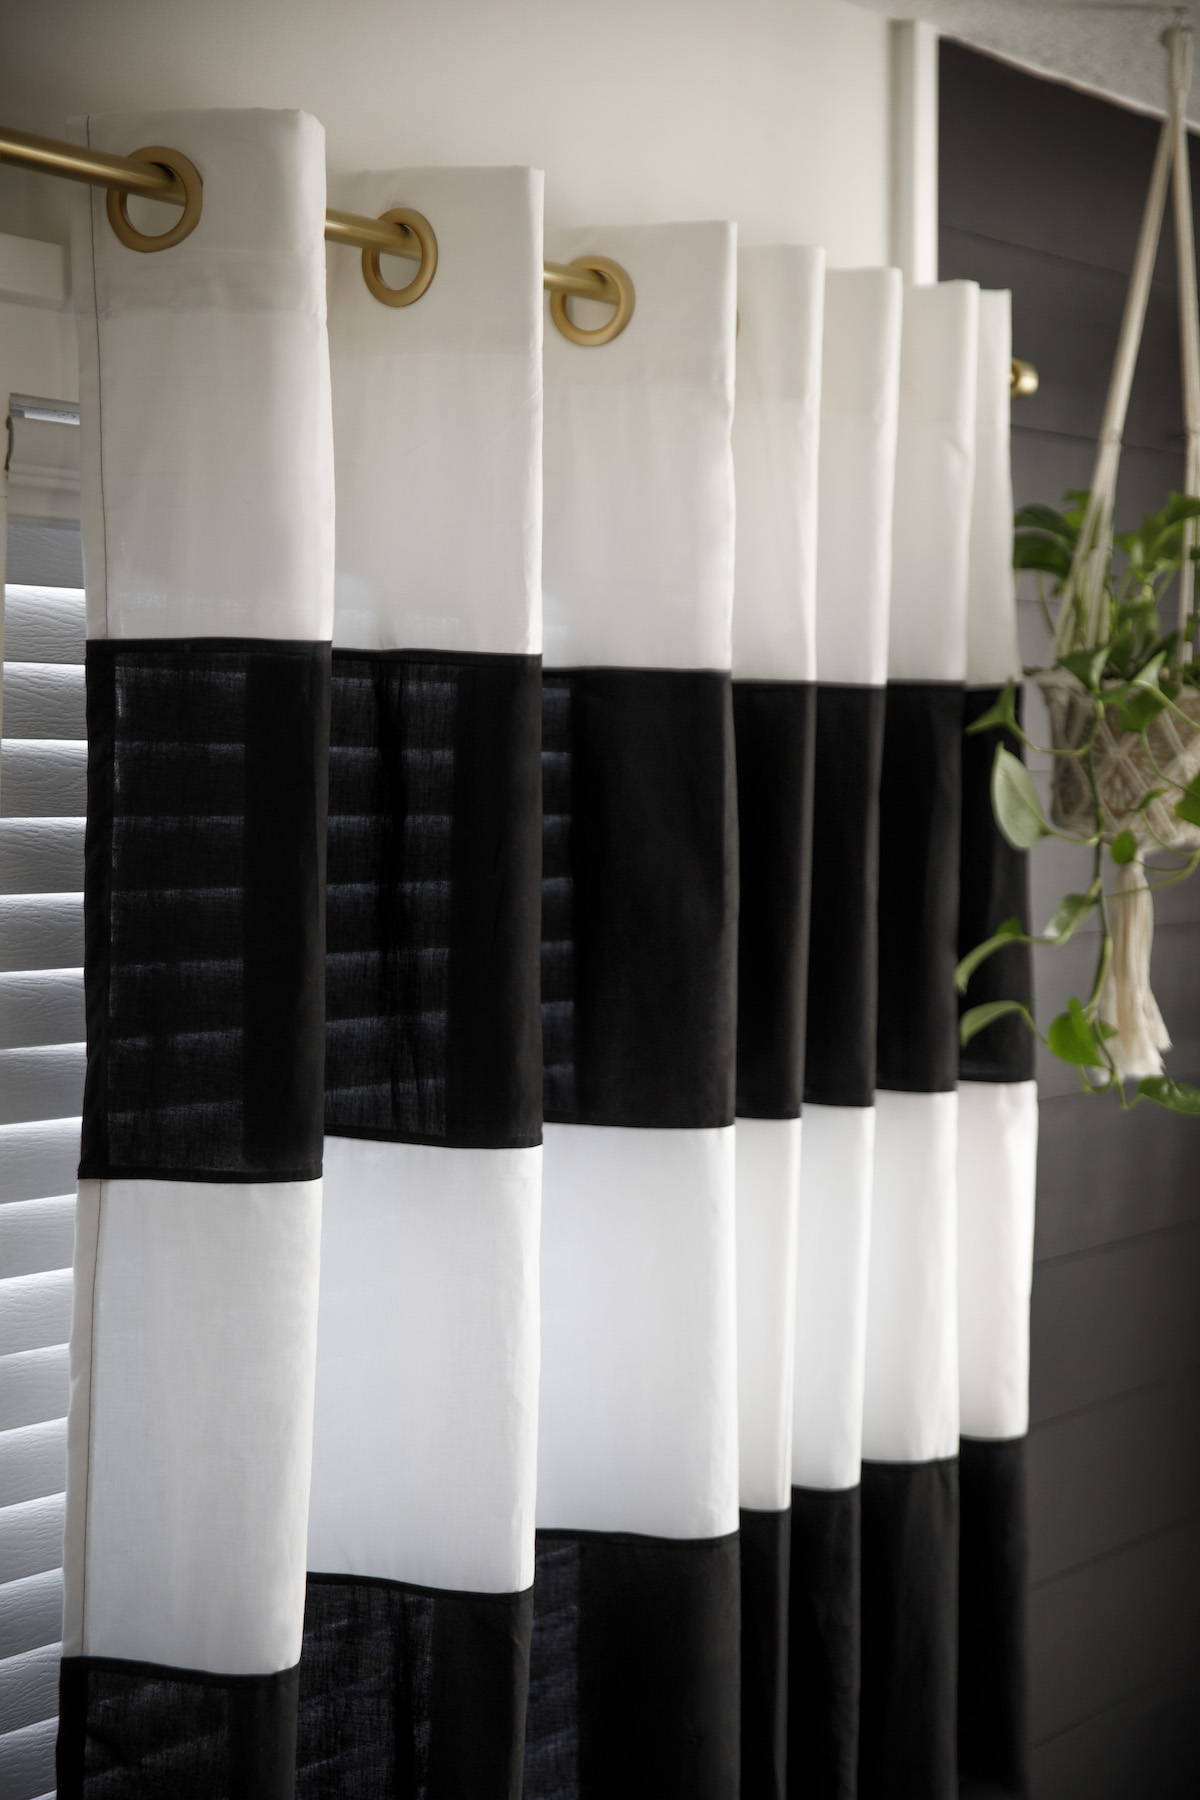
Follow instructions to place grommets. We chose to evenly space 14 grommets across the 106” of final curtain. First, mark the center for each.
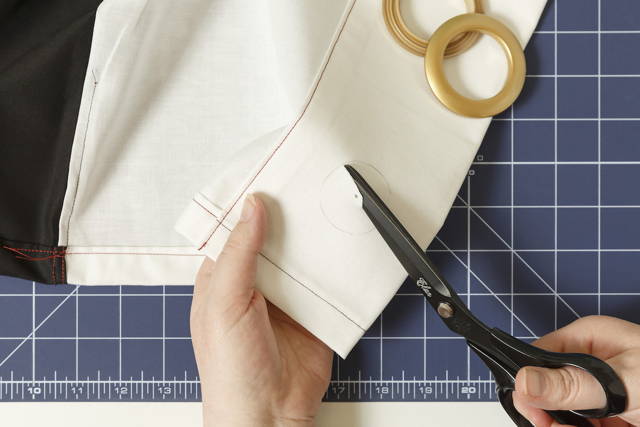
Step 12
Then, using the enclosed tool, mark the circle for cutting and cut away all layers with a pair of sharp scissors.
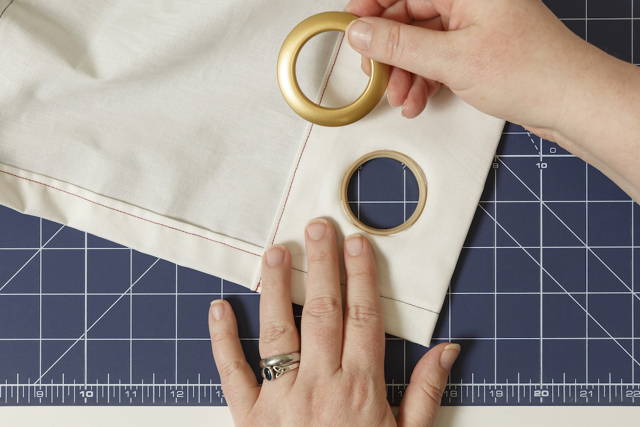
Step 13
Next, position the grommet halves. One half fits snugly through the hole you’ve cut. The other half, with prongs, snaps down onto it using the heel of your palm.
Step 14
Repeat for all grommets and you have a finished wide striped curtain panel!
Once you’ve conquered felled seams, you’ve got gorgeous wide-striped curtains. The grommets are oh-sew-easy to attach and the overall impact is stunning! Show us yours using #msqcshowandtell.