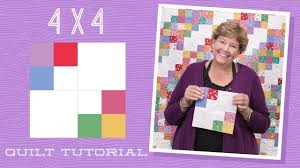
4 x 4 Quilt Tutorial
Jenny Doan
4 x 4 Quilt Tutorial
- 1 roll x 2.5" Precut Fabric Strips (Jelly Rolls)
- 1-3/4 yards x Background Fabric
- 1-1/4 yards x Outer Border Fabric
- 3/4 yards x Binding
- 5 yards x Backing Fabric


Finish your masterpiece and let us give it the finishing touch it deserves.
Subscribe to MSQC on YouTube
Hundreds of FREE tutorials and a new one from Jenny launches every Friday.
video transcript
Hi everybody, it’s Jenny from the MSQC. And I’ve got a fun project for you today. This is a great quilt. I’m calling it 4 x 4 because it’s all four patches. Now this is based on an old antique quilt and I want to show you a new construction way for it that makes it much easier than all those individual little squares. Let’s look at the quilt. Isn’t that fun? Now traditionally the other quilt was built where it all ran kind of in a fields and furrows way. And we’ve turned it and made it a little bit more modern and give it a little more oooh, ahh factor. So let me show you how to make this.
So to make this quilt what you’re going to need is one roll of 2 ½ inch strips. And we have Aunt Grace’s Basket of Scraps. It’s by Judy Rothermell for Marcus Brothers. You’re also going to need some background, 1 ¾ yards. That’s going to make these squares and this first inner border. The outer border you’re going to need 1 ¼ yards and it’s a 5 ½ inch border. Let me check to make sure, yep a little 5 ½ inch border. And for your background you’re going to need five yards. And you can see this background on here. It’s just so fun. I love 30’s they’re just so cute. And this makes a quilt that is 70 by 78 so a pretty good size quilt.
So what we’re going to do is we’re going to have to make some four patches. This whole quilt is just four patches. I’m calling it 4 x 4 for that very reason. So let me show you how to make them. Obviously there’s lots of ways to make four patches and this is just an idea. And what we’re going to do is we’re going to take two of our colored strips and sew them together to make a strip set. And this one obviously used to be way long. But you’re going to then cut, from this strip you’re going to cut 5 inch segments on it. So I’m just going to move this over here. We’re going to count, one, two, three, four, and a half like this. And we’re going to, oop and a half. Whew, measure twice, cut once. I almost made a big boo boo right there. Alright there we go, 5. There we go. Alright, so now we’ve got 5 and we’re going to sew all those pieces together. So you’re going to have lots of these strip sets sewn together. And we’re going to sew these together end to end to end right here. So I’m going to go ahead and sew this one on here just like this so you can see what I’m talking about. Now ordinarily I wouldn’t put two of these little blues right together like this. I just happen to have a bunch because that’s what I was working with. Although it really wouldn’t matter. It really would be fine. So then we’re going to press that out. Make sure they’re nice and flat.
So then to make these four patches what we’re going to do is we’re going to come along and we’re going to cut 2 ½ from the edge right here. And I like to actually fold this over right here because that gives you a nice straight edge. And your seam edge and you don’t have to do any of the math to figure out that quarter of an inch thing. So we’re going to do this right here and we’re going to trim this off like this. And that’s going to give us a four patch. And then we’re going to take this one and trim it off just like this. And it gets us another four patch and one more here. Make sure you’re lined up right along the edge. And we’ve got that. Alright now we have three four patches right here. And we’re going to need four of those to put it together to make a 16 block. So we’re going to go ahead and we’re going to stick these in here like this. Let’s see if we can turn this so it. Oop nope, let’s grab another one. You’re going to have a whole bunch of these to choose from. So just like this we’re going to put four of those together to make our 16 block. So just sew a regular, your four patches into a four patch. And you’re going to get a block like this. So that’s the first block.
Now the second block is going to be this one right here. And what we’re going to do is we’re going to have one of our two pieces together and a piece with a white in it. So you’re going to need another strip set of your print fabric that just has white sewn to one side. And you’re going to cut those into 2 ½ inch segments right here. See how I’ve done that? And you’re going to need two of those for each block. So let me grab them here. And then you’re going to couple those with your 2 ½ by 5 inch pieces that you cut from the other square. Now these don’t seem to be 2 ½ by 5 so I’m going to cut a little other one off of here and make sure that it’s actually 2 ½ wide. I’m not sure why those aren’t 2 ½, they should be. But we’re going to do this right here. Make sure it’s right. I want to show you the right way. Alright so we’re going to put these on here like this and like this. And we’re going to go to the sewing machine and sew these together.
Now you’re going to need two of these for each of your big four patch blocks because we’re going to couple these with a big four patch or a four, 5 inch background square. And I’m just going to chain piece these right together. And then we’re just going to press them open. Alrighty, there’s that one and here’s this one. Oop wants to slide on me. Alright now the trick to this block, here’s we’re going to take two of our 5 inch squares and we’re going to put them together like this. The trick to this block is to always make sure that your background square is touching your other background squares. So we’re going to put them together this way and this way. And we’re going to have a block that looks like this. So this whole quilt is just these two blocks.
So once you get your two different blocks done the fun is in the layout. So let’s take a look at that back here. So we’ve got four four patches and our four block. And you’ll notice these are all, these are running this way, the big blocks are running this way. And we do the same thing for the whole row like this. And then the next row we just alternate them but we keep these big blocks running the same direction. So then these follow down here and these follow down here. Now when we get down here we could do the whole thing at a slant like this but I thought how fun it would be to curve it around and bring it back. So by doing that what we did was we took the two blocks and put them together and that starts the row going the other direction. So it’s just fun to play with a layout and see what happens. And it makes a completely different looking quilt. So we hope you enjoyed this tutorial on the 4 x 4 Quilt from the MSQC.
& Progress on Social