Baby Blocks Quilt Tutorial
Jenny Doan
Baby Blocks Quilt Tutorial
- 4 x Strips from 1 roll of 2.5” Strips
- 3/4 yard x Background Fabric
- 1/2 yard x Contrasting Fabric
- 3/4 yard x Outer Border Fabric
- 3 yards x Backing Fabric


Finish your masterpiece and let us give it the finishing touch it deserves.
Subscribe to MSQC on YouTube
Hundreds of FREE tutorials and a new one from Jenny launches every Friday.
video transcript
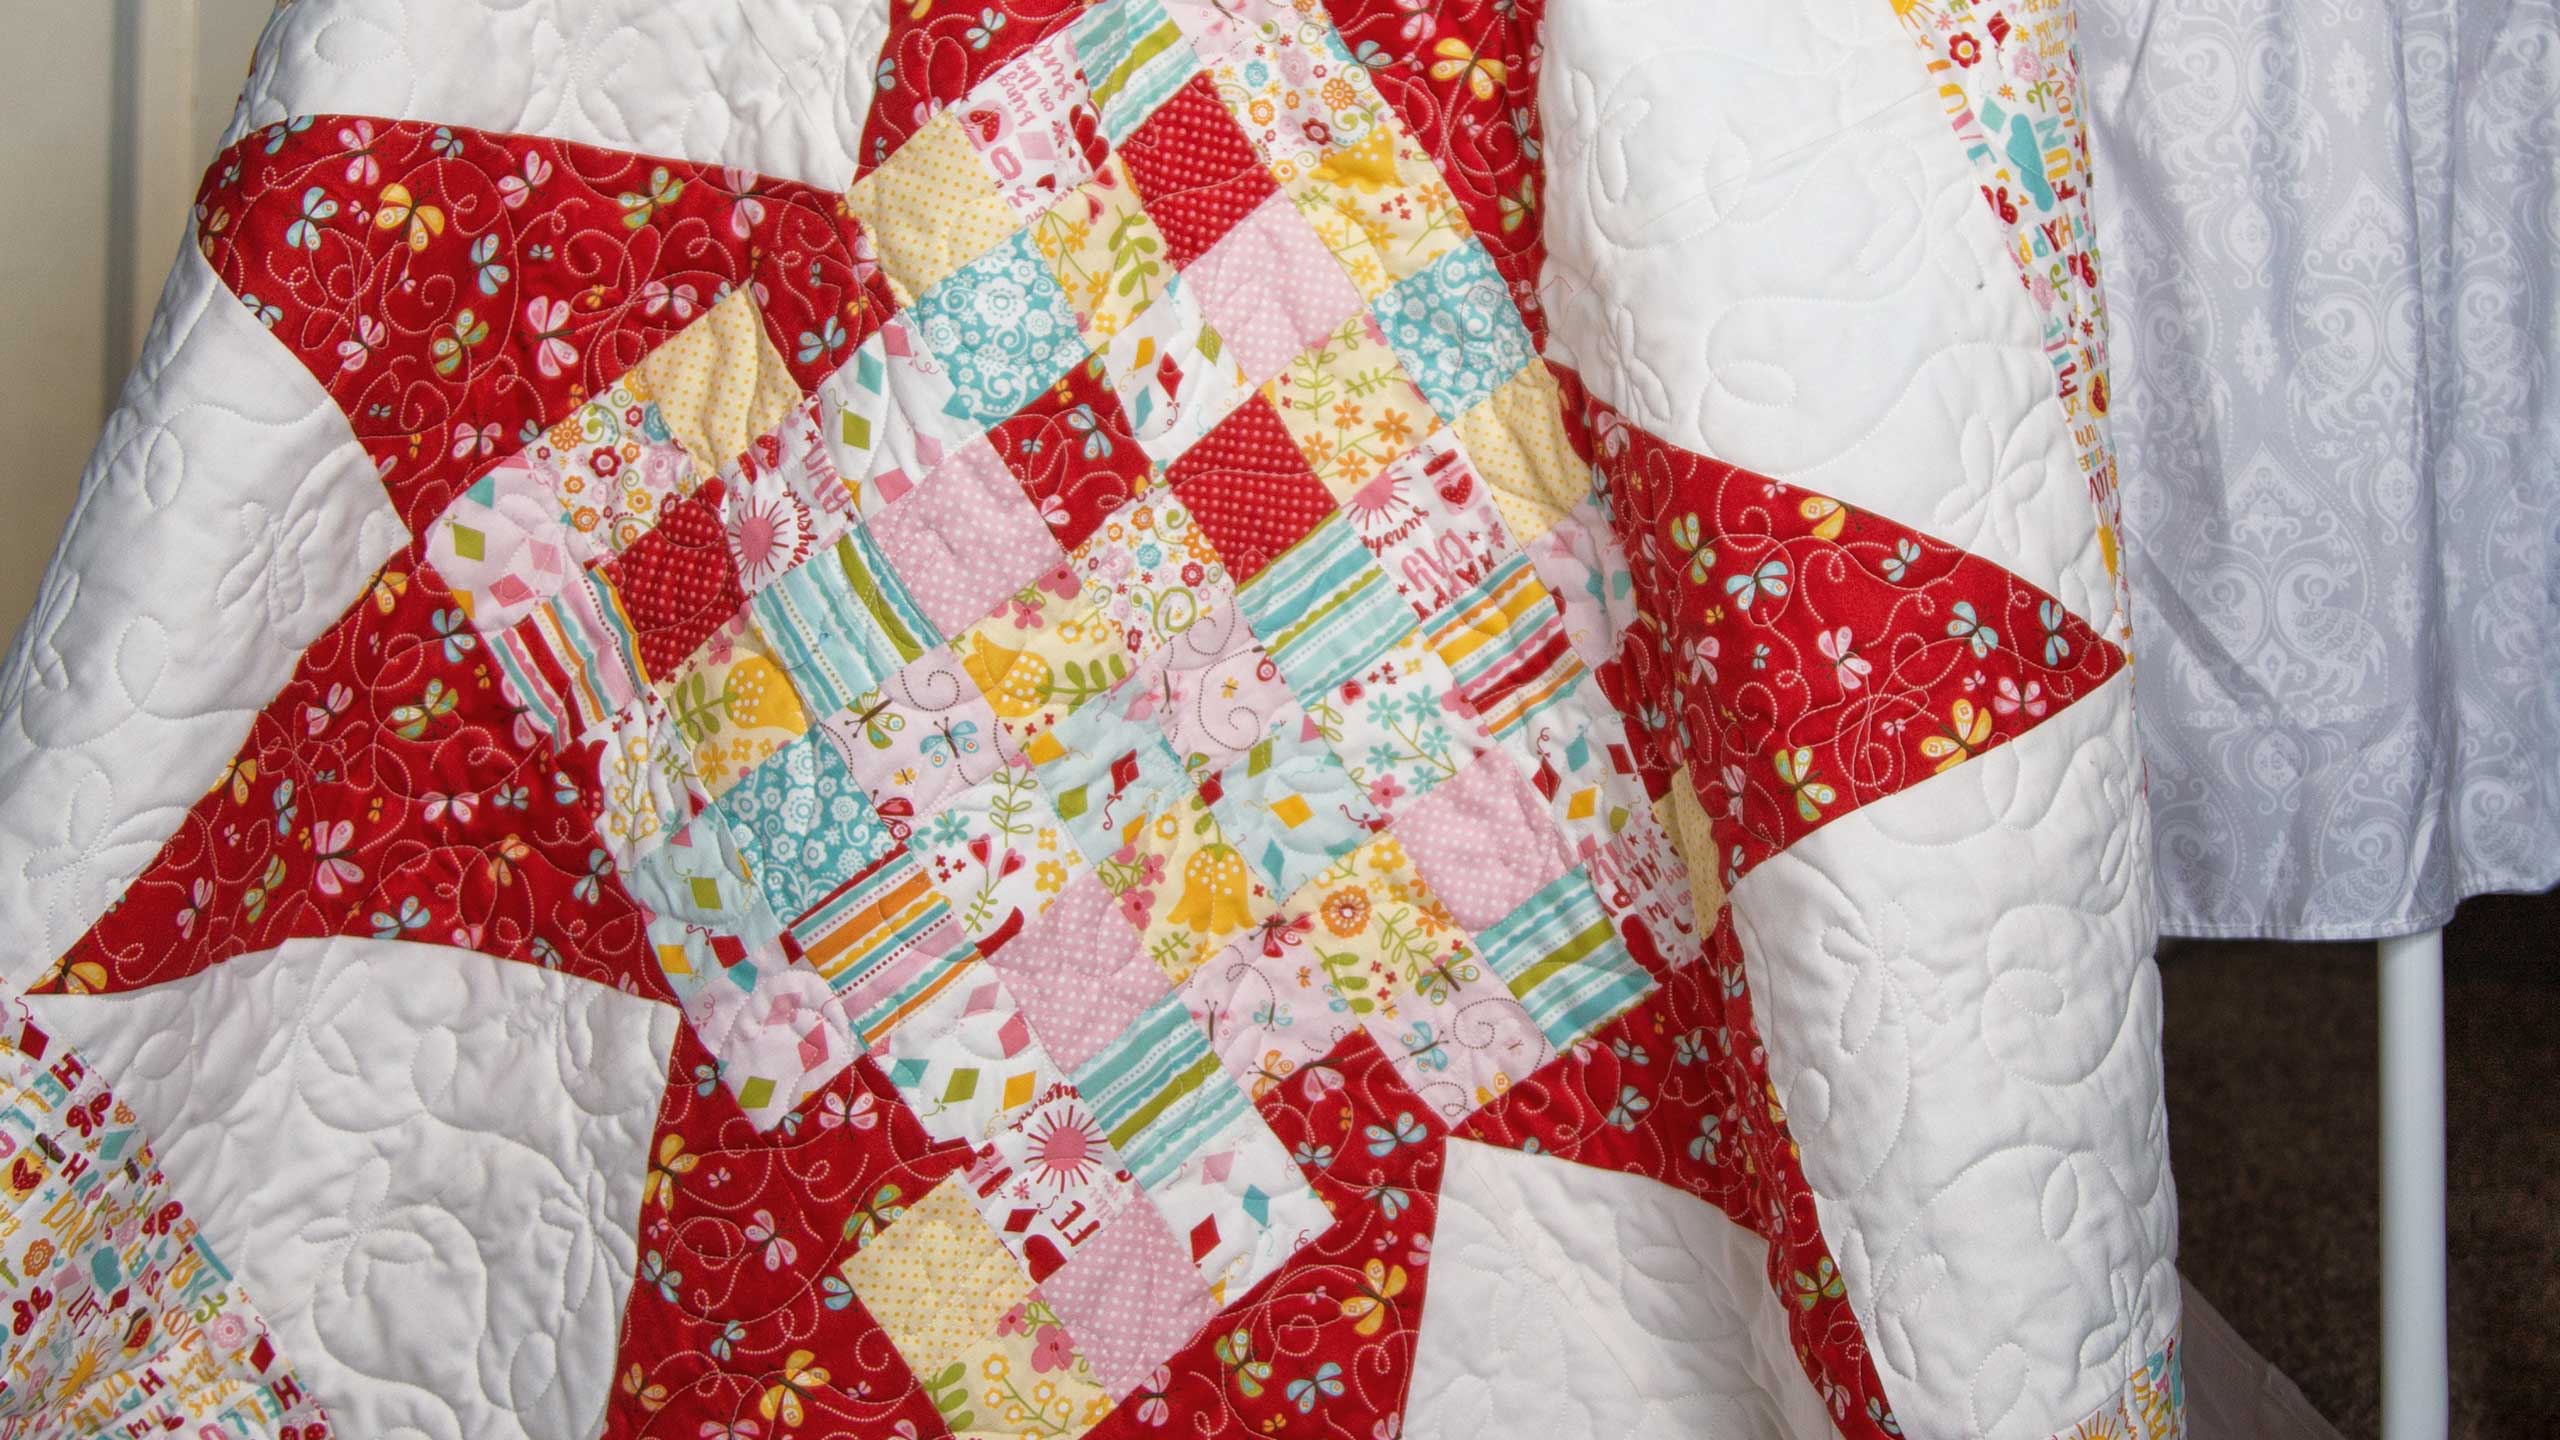
Hi everybody, it’s Jenny from the MSQC. And I am delighted to show you this project today. You know a lot of people ask me where I get ideas. And they come from all over the place. And sometimes they happen when I’m at a quilting retreat. So my daughters and I were at a quilting retreat here not too long ago. And Sarah loves little squares. She loves postage stamps. She loves putting all that together. And she had all these little squares. So she started sewing them together. Then Natalie had the idea to add some legs onto that and make a star. So I have to show you what she finished. Not it’s obviously not quilted, but take a look at this. I mean this is giant and enormous. Hey, one of you guys come help me hold this up. Here, come help me hold this up really quick. This is so cute. So she put nine of these stars together. And look how amazing it is. Isn’t that so beautiful? It’s so cool, huh? Don’t you just love that? Anyway, I thought one of those stars which is what she started with, thanks Misty. One of those stars would make an awesome baby quilt. So I thought if I showed you how to make one then you could go ahead and make as many as you want. But I’m going to show you today how to make this one for this cute little baby quilt right here behind me.
So to make this quilt you’re going to need four strips, four strips only. I’ve got a whole jelly roll here and I used quite a few of them because I wanted different blocks in there. But you really have a lot. And this is Happy Day by Lori Whitlock for Riley Blake. And it’s just this, it is a happy, happy little roll of fabric. And then you’re going to need, for your star legs you’re going to need a half a yard of fabric for your star legs, so half a yard of red, half a yard of white. You’re going to need ¾ of a yard for this little 5 ½ inch border out there. We’ve backed it with the same. It’s, you know it’s called Happy Day. How can you not love this? It’s happy day. So it’s just so cute. Anyway let me show you how to make this because this goes together really easily.
So what I did was I took some random strips and sewed four of them together in a row. And I actually did several strips so if you make baby quilts as often as I do this is one of those where you’ll either get a big quilt or you’ll get lots of fun little ones. So I have all these little random strips sewn together.Then what you’re going to do is you’re going to take and cut 2 ½ inch segments off of here. So I’ve got my, my strips laid up nicely on my mat so they’re all going the same way. So I’m going to lay my little 2 ½ inch ruler on here and it just barely fits. So we’re going to cut 2 ½ inch pieces like this. When you do that you’re going to put four of those together. And I have some together here. Here’s three sewn together. So let’s add another strip to these. Now when I sewed my strips too, I ironed all my seams going the same direction. But to be honest it doesn’t matter because if they’re perfect for going this way and you decide to flip it, they’re not so perfect. So what I did was as I sewed them together I just made one seam go one way and one seam go the other as I sewed down the side. . So let’s go add this last segment on here to this block. And this is a block of four.
Alright we’re sewing a quarter of an inch down the side. And what I do is I just let the bottom strips go the way they want to because I can’t control them as well as I can control the top ones. So I take a few stitches and I start down the side and I make sure that my next seam is nesting. And one seam is going one way and one the other. Once I get over that seam I’m going to stop and do the one following that. And so on just all the way down the strip. So now I have four of these sewn together. Now I often break things up into little segments because it’s easier for me to do if they’re in smaller segments. So then what I did was I took and I made four of these . And then I sewed them together in sets of two like this. And then I sewed those twos into a four. So I’m making a giant four patch of all these little squares. Isn’t that cute?
Now the measurement you need for the legs on this is your block measurement here. And make sure you have the seams out. So for us on this, it makes a nine inch, we’re using a nine inch square. And so what I’ve got here, let me show you because these are just big half square triangles. So let’s see I have some fabric here, oh here we go, alright. So I’ve cut these strips, I have these strips left right here. And we’re going to cut those into nine inch squares. And so I’m going to count, one, two, three, four, five, six, seven, eight, nine. Now I’ve stacked both of my fabrics together. And now I’ve got to find my rotary cutter. And yes it was closed. Alright now we’re going to turn this. And you’re going to need to do this to four of these, ok? So then we’re just going to cut these into nine inch squares like this. And again I’m going to line that up real nice. I’ve got to make sure they’re straight. There we go. Ok, now we’ve got one, two, three, four, five, six, seven, eight, nine. I’m going to put my finger there and there we go. Ok so now once you get two nine inch squares like this you are ready to make your half square triangles.
So what we’re going to do then is we are going to draw a line diagonally corner to corner. And I’ve got my little friction pen here. Anytime you draw a line on a, on fabric for this it really doesn’t matter what you use because that line is going to be in the seam. So it won’t matter. So then I’m going to lay that in my other square and I”m going to sew a quarter of an inch on either sides of this. So let’s go do that. Now I’m going to swing around and catch the other side. This really is a quick little quilt. When you need a baby quilt fast this is a fun one to do because it just looks like you worked so hard. Alright now we’re cutting our half square triangles in half on the line and we’re going to press them open. There we go and we’ve got one more. And I actually am going to make this seam go to the dark. Whoops, that seam rumpled a little bit right there. There we go, alright. Now we want to make sure how we’re going to set these that they look like legs so we have to turn these so that the red becomes the star legs which means we’re going to sew the white together in the middle. So we’re going to lay these right on top of each other. And I like to do this to all four sets. You’re going to make four sets of these for your legs. Alright, here we go. And then I’ll show you how I put this together because this is really fun. Alright so heres, heres our legs so let’s get our legs out. And I’m actually going to press this a little bit because it was a little bit, a little bit wrinkly. It had to travel from my studio over here to the filming studio so it got a little mussed. There we go.
Alright, so we have our middle and then we’ve got these legs. Now I’ve got the other legs already ready here. And you’re going to put it up to it like this. Here’s some more legs. And what I like to do, whatever size your, your, your star leg ends up being which I think ours should be. Let me measure one of these to make sure. It should be like 8 ½ I think, it is 8 ½. That is the same size your corner squares are going to be. So here’s my legs, one more set. See how fast that becomes a star. So then this block is the same size as this block. So then we’re going to stick one of these in there. You’re going to do that on, on all four sides like this. See how quickly that becomes a star. And it just looks great. So then what I do is I sew this row together and this row together that has, also has my corner squares in it. And then I sew these two legs to this middle and then just sew the three rows together. And it comes together just like this.So you see how you’ve got, you know this is one row. This big middle is one row and this is one row. Then you’re going to add that little 5 ½ inch border on the outside. And it’s just going to be darling and come together so cute. But if you want you can go ahead and make nine of these and get a great big quilt like Sarah’s. So we hope you enjoyed this tutorial on the Baby Blocks quilt from the MSQC.
& Progress on Social