Crown Jewel Quilt Tutorial
Jenny Doan
Crown Jewel Quilt Tutorial
- 3 Packs x 5" Precut Fabric Squares (Charm Packs)
- 2 3/4 Yards x Background Fabric
- 1 1/4 Yards x Complementary Quilt Fabric
- 1 1/4 Yards x Quilt Fabric for Outer Border
- 3/4 Yard x Quilt Fabric for Binding
- 5 Yards x Quilt Backing Fabric


Finish your masterpiece and let us give it the finishing touch it deserves.
Subscribe to MSQC on YouTube
Hundreds of FREE tutorials and a new one from Jenny launches every Friday.
video transcript
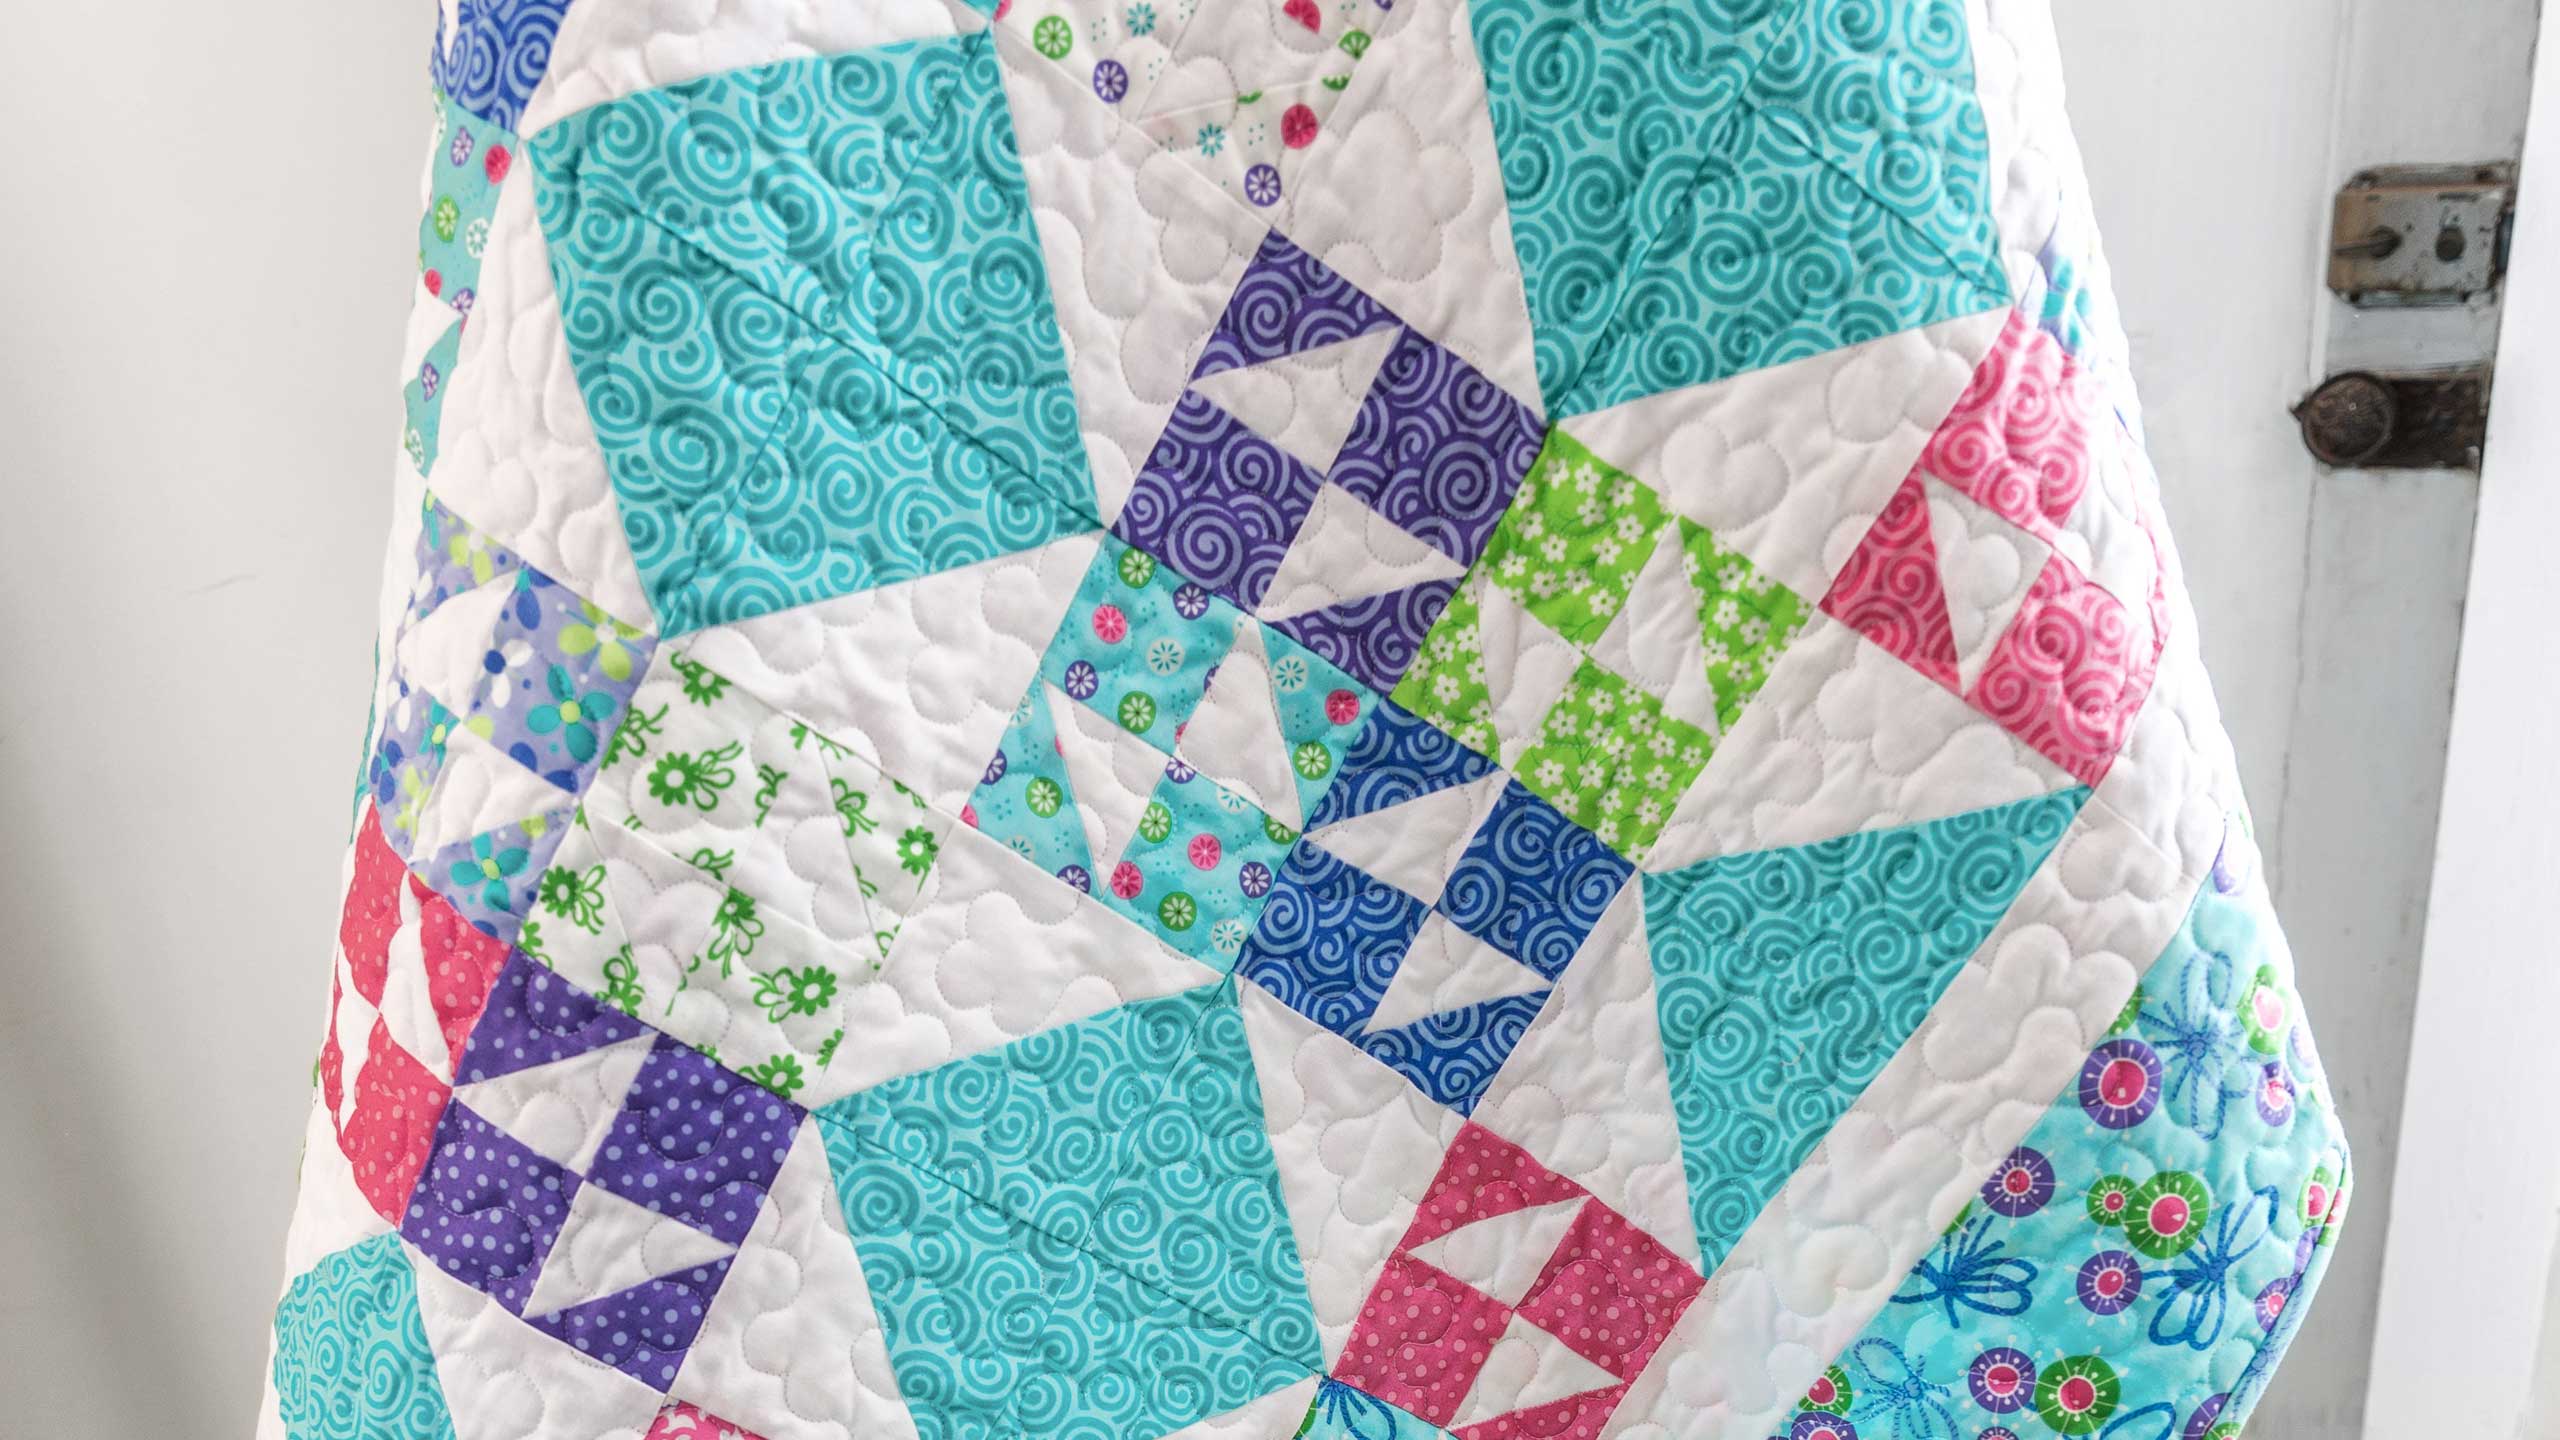
Hi everybody, it’s Jenny from the MSQC. And I have a really fun project for you today. Take a look at this quilt behind me. Isn’t this great? I did this one all scrappy and I used the Flower Sack quilt fabric line. But I also made it in two colors and look what a difference it makes when you see it in two colors. So it’s really fun to make and it’s so versatile. So many things you can do with it. So to make this quilt what you’re going to need are three packs of five inch squares and we’ve used Flower Sacks by Me and My Sister for Moda fabrics. You’re going to need some background fabric. Now the background is going to take care of all of this and your first border. You’re going to need 2 ¼ or sorry 2 ¾ yards of that. Your complimentary fabric which we used fabric off the bolt for our half square triangles. And that you’re going to need 1 ¼ yards. Your inner border again is cut from the background. Your outer border is a five inch border and we used a yard and a quarter. And the backing we used the same fabric on the border as on the back and you’re going to need five yards of that. And it just makes this darling quilt. And again this is a very versatile pattern.
So the first thing we’re going to do when we go to make this is we are going to make half square triangles. And to do that we’re going to take our complimentary fabric right here and we’re going to cut ten inch strips and then sub cut those into ten inch squares like this. Then we’re going to do the same thing with our white. We’re going to cut ten inch strips and sub cut those into ten inch squares because we’re going to do the easy eight method with our half square triangles. So to do that what we’re going to do is we’re going to put two squares together like this and we’re going to draw a line side to side like this. And then we are going to sew a quarter of an inch on both sides of this line. And now we’re ready to cut it. So let’s move this out of the way. And what we’re going to do is we’re going to line up our ruler right on the edge like this. Because this is a five inch ruler we’re cutting directly through the center of the block. And we’re going to just go ahead and cut this like this. And then I’m going to turn my ruler this way. And I’m going to cut it again. We’ve made a four patch cut and then we’re going to go ahead and cut on the diagonals as well which is going to give us eight half square triangles. So let me go ahead and cut these. And if they wiggle around or scoot around just make sure you kind of keep your ruler on the line. Alright now you’re going to want to square these. These square up to 4 ½ and I’m going to do that right here. I’m going to use this clearly perfect slotted trimmer A because I want them 4 ½ inches. So I’m going to match their seam line to my seam line and then we’re just going to trim. Now these are pretty close but even this little bit will make a difference for having your blocks perfect. So then we’re going to press them. We’re going to go ahead and set that seam and roll this back. And that’s going to give you a perfect 4 ½ inch square. And that’s how we make our half square triangles.
Now the half square triangles are part of a bigger block. And so let me show you the next part is we are going to take one of our charm squares right here and we are going to cut that in half both directions. So I’m going to lay my ruler on here at 2 ½ right here. And we are going to cut that the other direction as well just like that. Now we have four little 2 ½ inch squares. Out of our background fabric we’re also going to cut some 2 ½ inch strips so that we can add to those 2 ½ inch squares. Now I don’t know if you guys have seen these but there are these little packs of 2 ½ inch squares that they’re already cut out for you. I really love those. We’ve taken this yardage out of our, out of our background yardage so that’s why I’m telling you this way but they do have those convenient little packs. Alrighty. So what we’re going to do now is two of these we’re going to make half square triangles out of. So we’re going to take our background like this. And we’re going to draw the line on two of these. So we’re going to go corner to corner just like this. And one more over here. And this doesn’t matter which, which way you go. You’re just drawing the line. And then we’re going to sew right on the line on two of these. So let’s line them up and we’re going to sew right down, right on the line not either side of this one, but right on. And then we’re going to line this one up and do the same thing right on the line. Alrighty. Now what we’re going to do is we’re going to trim off the side of the quilt, I mean the side of the block. So I’m just going to put my ruler on the line and measure over a quarter of an inch and make a cut on this one and make a cut on this one. And you’re going to do us to all your little charm squares, every single one. We’re going to set the seam, we’re going to roll these back. And these should be exactly 2 ½ because we sewed on the line, they’re going to be much more exact. If you want to check them and square them up with your squaring up tool you can do that. But they should just match the size of the block like this which these do.
Alright so then we’re going to put these together in a little four patch. We’re going to make sure that our, our two whites are pointing at each other. And then we’ve got these colored ones in the corners just like this our print ones. And it makes a little four patch like this. And we are going to lay these on top of each other just like this. And take them to the sewing machine and sew a quarter of an inch right down the side. And if we sew them together like this we can chain piece them. And now we’re going to slide this next one under there. Chain piecing means you don’t cut your thread in between. And now we have these two together. And because we chain pieced them exactly how they’re supposed to go we should be able to open these. We should be able to open these right here and they should be exactly how we want them. And they are. So we’re just going to open these up. And I’m going to line up this top edge right here and take a few anchoring stitches just like this, one, two, three. And I’m going to leave my needle down in there and then I’m going to make sure that my middle is nested. One seam is going to go one way, one seam is going to go the other. I can feel with my finger there’s no space in between. And we’re just going to sew down the side. Alrighty. Now this block is part of a much larger block. Let’s iron this out. You see how cute that is that’s just a cute little block right there. You’re going to do eight of these for each block. And then we’re going to sew them together in groups of two like this. And so I have some of those together. And so at this point we are ready to assemble our block. We’ve made our half square triangles. We’ve made our little corner blocks and we’ve sewn them together.
And they go together in these little crown units. See how these go together. See it kind of goes up and down just like this. It makes like a little crown. And we’re going to have four of those. And it looks like I’m going to need to sew these two together over here. So when you do that you’re going to line them up like this so your two solids are here in the center and your crown makes a little U shape. So let me sew those together. I’ve got to sew these last two so we can make our block. And we’re just going to come down here, make sure that nests on the side right there. Alrighty. Now we’re going to press this open. And this is the other side of the block. Now comes all the half square triangles which I have a bunch done here. These go together in the middle to form this jewel right here in the center, this diamond. So we put four of those together like that, we scoot these in. Our corners are just the same half square triangle but we make sure that the color is to the outside like this and like this. And now we just need to sew this together. And this makes our cute little block.
So I always start with the middle block and I’m going to sew these two together you know the colors line up together so that we’ve got our diamond shape. And I’m going to add this next one. So just folding them right on top of each other and sewing down the side. Now a lot of people have different ways of keeping the blocks together. And you may want to do yours row by row. So now we’ve got these two together and we’re just going to sew a quarter of an inch right down the side. And this is going to make the diamond in the middle. And we’re going to press that open. Alright now what we’re going to do is we’re going to add these two side pieces like that and that’s going to make the whole middle section. So let’s go ahead and do that. Alrighty. Now we’re going to press this out and our whole middle section is done. You can see how fast this goes together. Alright now we’re going to do the top and the bottom row. And I’m going to go ahead and just fold these in on like this and like this. And we’re going to sew the top row. Alright now we’ve got the top row together and we’re going to do the same thing for the bottom row right here. And our rows are done and all we have to do is attach these to the center row right here. And so we’re just going to go ahead and do that. I’ve got the bottom one in my hand. That’s why is was chosen first. It doesn’t matter you can do either way it works. We’re just going to sew down. Now you do want to line up your, match up your first seam. And then your middle seam right there on the diamond. And then your edge seam over here is as well. And one more row here on the top. And we finished our block. Alright let’s press this nice and flat. Let me move these out of the way so I’ve got this good pressing room here. This makes such a cute block. Alright.
There we go. Take a look at that block. Isn’t that cute? It just makes a really cute block. And we set these together. We just put them right next to each other just like this. And so as they go together you see they form a secondary pattern. You’ve got your four patch cluster here. And your diamonds form up on either side. Let’s look at this quilt. So see how this happens here. So it forms up a four patch and these clusters, when in reality your block is right here. And so if we sashed this, this would be a whole different quilt. If you use different fabrics like I showed you earlier this would be a whole different quilt. But it just goes together so slick and it’s really a cute block. And we hope you enjoyed this tutorial on the Crown Jewel quilt from the MSQC.
& Progress on Social