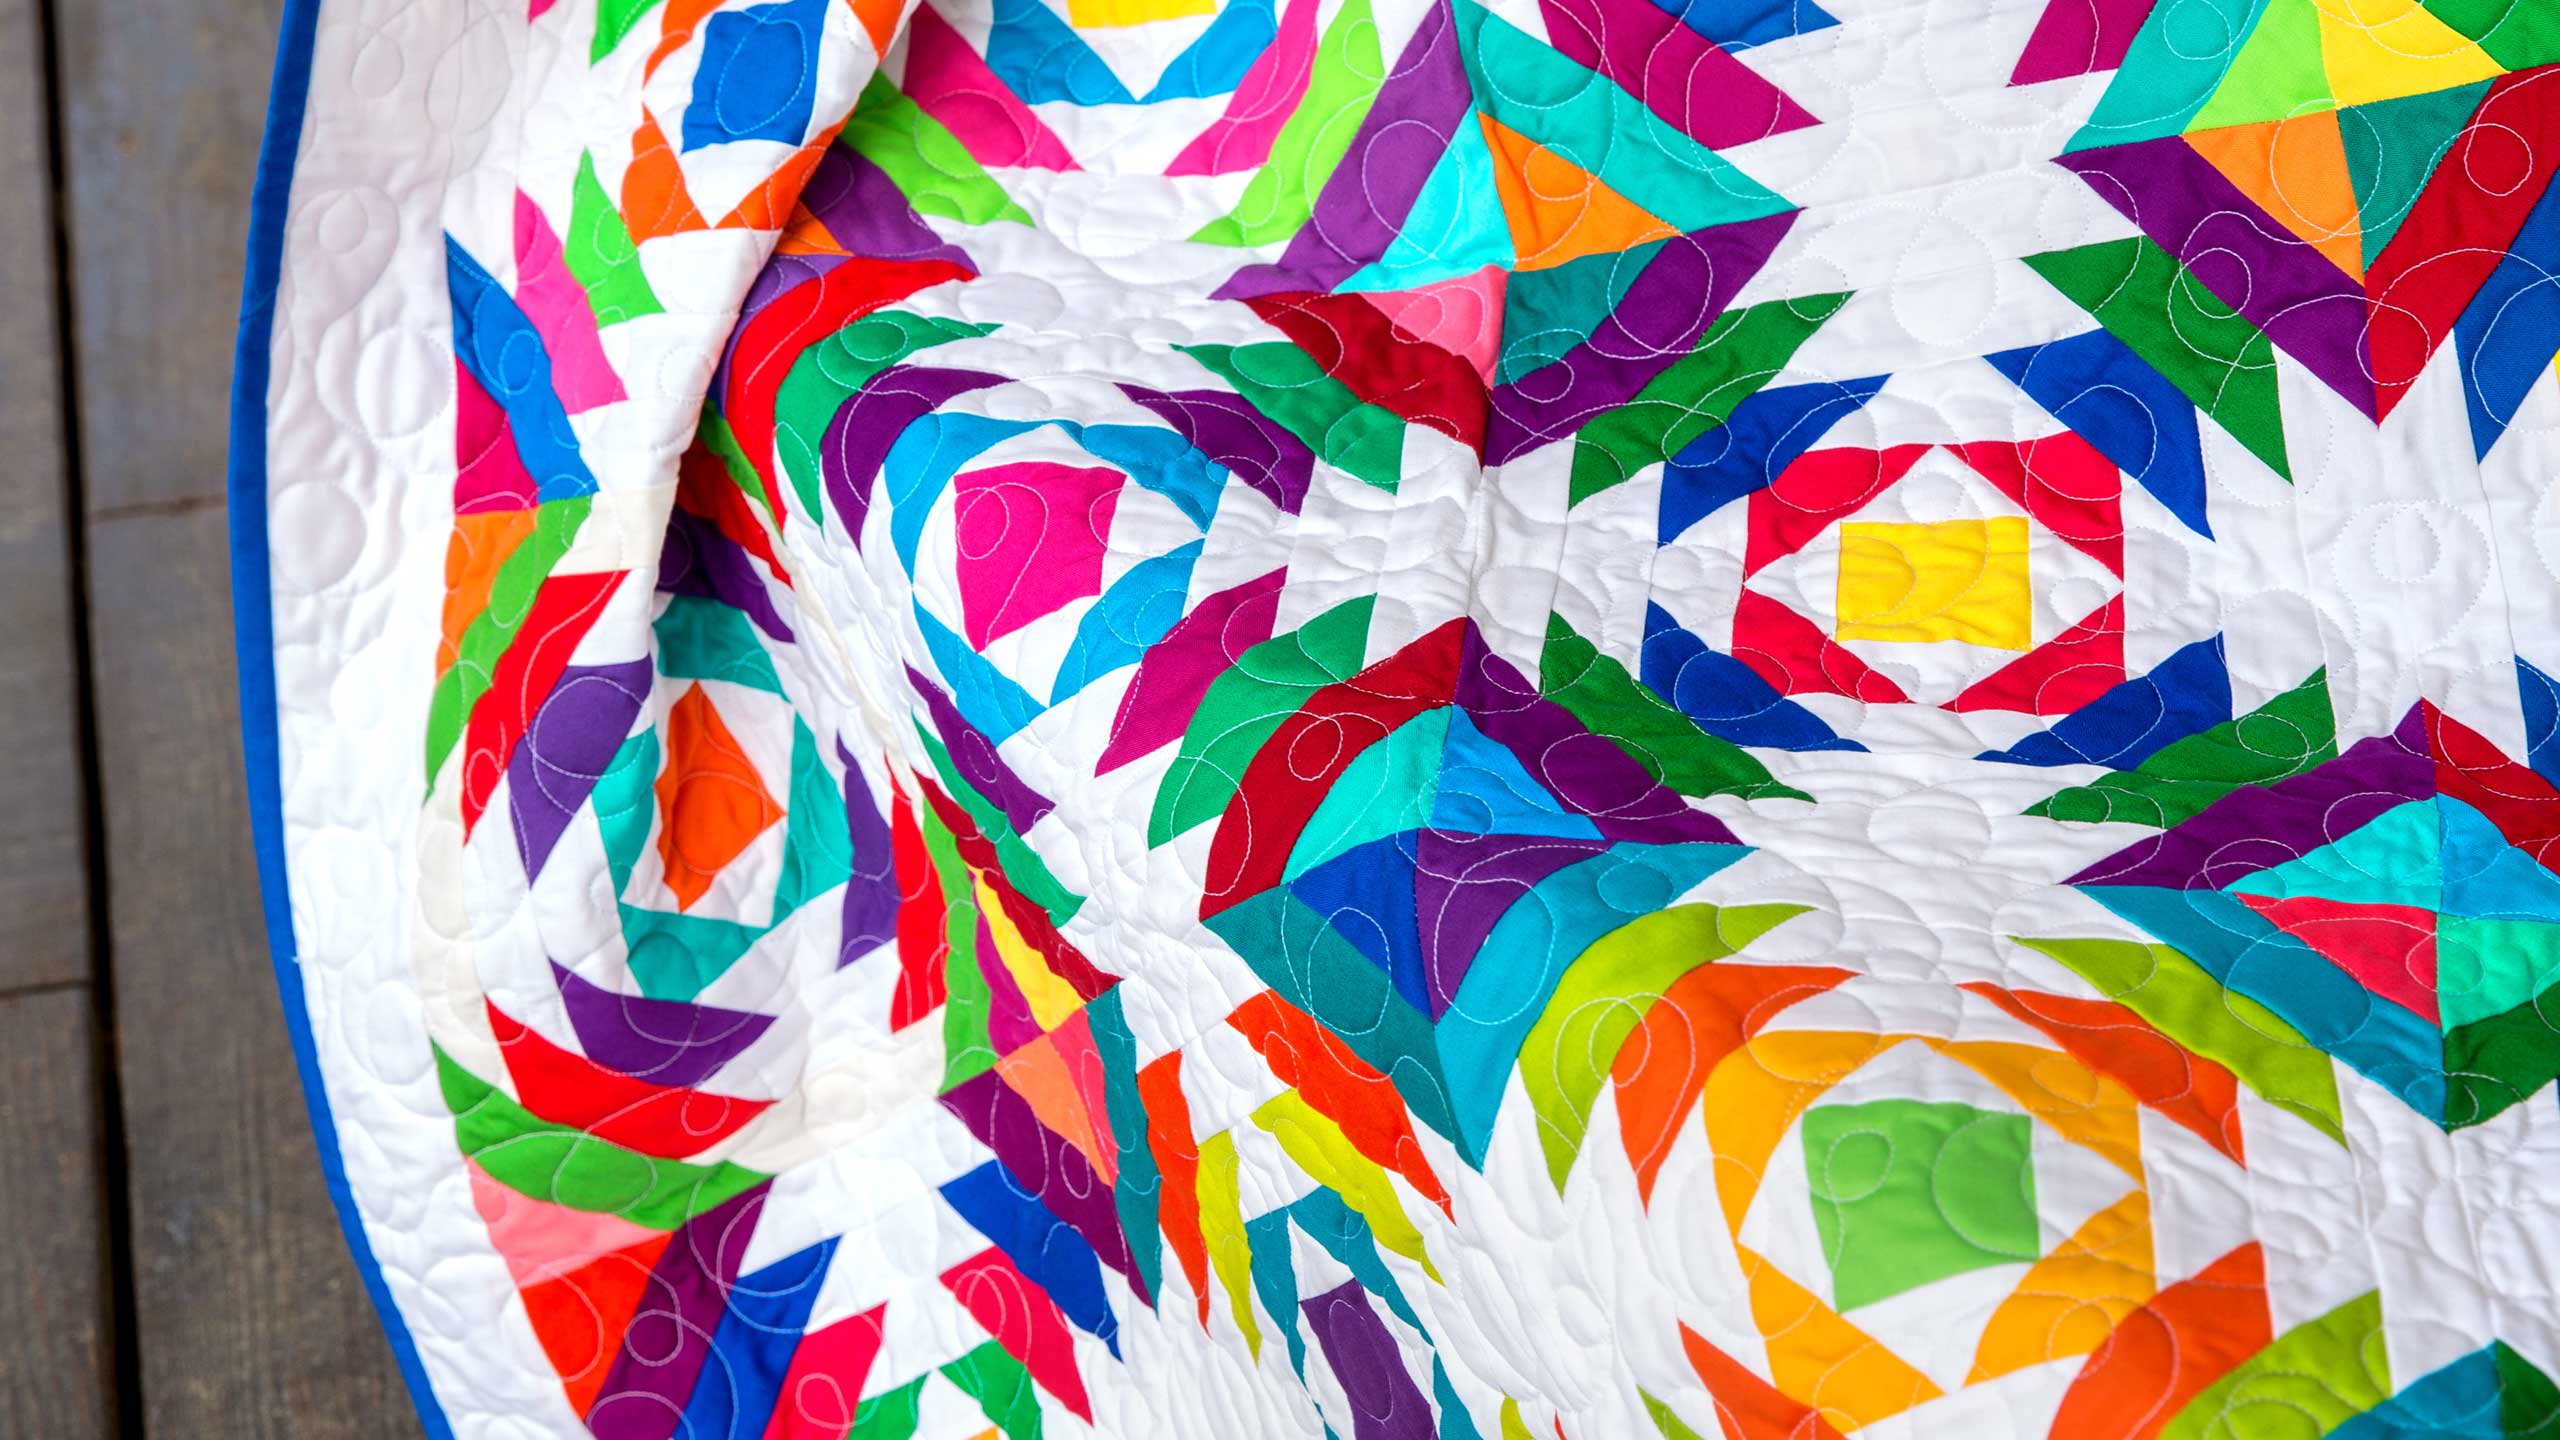
Pineapple Quilt Tutorial
Jenny Doan
Pineapple Quilt Tutorial
- 2 packs x 5" Precut Fabric Squares (Charm Packs)
- 2 rolls x 1.5" Precut Fabric Strips (Honey Buns)
- 1 roll x 1.5" Precut Fabric Strips (Honey Buns) - Background
- 1 yard x Outer Border Fabric
- 3-1/2 yards x Quilt Backing Fabric


Finish your masterpiece and let us give it the finishing touch it deserves.
Subscribe to MSQC on YouTube
Hundreds of FREE tutorials and a new one from Jenny launches every Friday.
video transcript
Hi everybody, it’s Jenny from the MSQC. And I can’t even begin to tell you how excited I am to show you today’s quilt. Let’s take a look at this quilt. This is the pineapple block. This is also something I never thought I would do. I have a habit of collecting old antique blocks like this one when I’m out and about. And thinking, oh maybe someday I’ll see if I can make a quilt like this. And so these are the two old pineapple blocks I got. And do you see this one how it’s like all wonky stretched like this, you know. This poor gal, it’s just a mess. You will not have this problem when I show you how to do this. It’s going to lay flat and perfect and be the most awesome pineapple block you have ever made. I just am so excited about this. Oh my gosh. So to make this quilt what you’re going to need is one of these pineapple trim tool rulers. It’s got the non-stick. It’s by Creative Grids. And I seriously, every time I trimmed it I thought, that just looks perfect. You know I’m not a perfect sewer. And I just loved this. You’re also going to need one set of background skinny strips and one of the colored skinny strips. And this is the Classic Palette by Kona. And we also have, and I don’t know if you know this, but Kona has this new pack. It’s a 101 pack. This is the Bright packs and look at all those colors. One square of every color. Isn’t that so fun. A hundred and one squares, this is so cool. Anyway I’ve just got to show you how to do this because I, I’m so in love with this.
So for our center of our block we’re going to start with a 2 ½ inch square and we’re going to take our little 2 ½ inch ruler and we’re just going to cut that both directions so that we get two 2 ½ inch squares there to start our center. Just like this. So we just need one for our center and we are going to border all four sides of that with a white strip. Now the way this goes is color, white, color, white, color, white. And so what I do is just lay this right along here and I’m going to stitch this down, trim it off, stitch the other side as well. So let’s start by this right here. And I did, I really did just one block at a time. First wasn’t sure I could do it and second I wanted to, I wanted my colors to be the same on all four sides. So what I did, and honestly you’re going to want to make sure that you have your, your little sewing area set up for you close. And So I put, I have a little TV tray that I put an ironing mat on on this side. And you’re going to want this close so that you can just sit at your sewing machine and press and cut and press and cut and press and cut because you do that a lot in this quilt. Alright so we’re going to add this strip to all four sides. And I’m just going to trim this off right here. Oop, there we go. And press. Alright, now you can see I’m not even being super careful about this. I’m just adding my strips on all four sides because once you get the hang of this, this just flies. You can tell I’m a little excited can’t you? This is one of those things that you never think you’re going to be able to do. Look, not even a ruler. It doesn’t have to be perfect because every round gets squared up. Alright one more time. And let’s sew it on. Alrighty. Trim it off and press it. Now I’m getting a workout walking back and forth. But when I made mine I literally had my sewing machine, my cutting mat and my pressing mat. So I’m like pressing, cutting, pressing, cutting just like that.
Alright now let me show you how you do this because you do this to every single round. So I want to show you, I want you to take a look at this ruler and you’ll see right here, this says centering square round eight, centering square round six, four, two. And this is one that it has the white line about it, so you’ll want to pay attention to those. So your even blocks you put on a centering square, your odd blocks for rounds three, five, and seven you line up on this square. And I’ll show you, I’ll show you that. So right now this white one is centering square for round one. Round one is our center piece right here. We’re going to lay that one there. We’re going to match up that square just like this. And mine isn’t, you can even see mine isn’t perfectly square but I’m just centering it in there and I’m going to trim these off. And we’re going to turn this to all four sides. I know I’m just almost a little out of breath. I’m so excited to show you this because this is just the coolest thing. So four times you’re going to trim this round one, like this. Just like that. Alright so every time you trim it up and it becomes perfect again.
So now we’re going to add our colors. So let’s add, let’s put a pink, a pink row in there. And I’m going to again put this on all four sides. So I’m going to sew, and I’m going to sew. And I used this pair of scissors instead of a rotary cutter because I could literally just sit here and snip and snip and cut and snip and cut. Ok right back over here. I barely even left my seat. Alright here we go. Now it’s big enough that we can cut on either side and press two at a time. So we’re going to press these open. And again just watch your little quarter of an inch seam. And see it doesn’t matter if they’re wonky, we’re just going to lay this strip on here and we’re going to sew it right down. And I’m just something my center squared square as the part I line up the strip on so my edges don’t have to be perfect. And as you grow this out the edges don’t even have to be sewn together. You just sew on the sides. Whoops let me just trim that off. And one more side. Lay it up along that center seam and so I’m following that line. You just want to eyeball it until you get to the center. Oops my thread just broke. Let me just thread this again. So now I’ve got my machine threaded and I even grabbed a pair of scissors while I was gone and so we’re going to sew these sides on. Now you’ll notice I’m not even going up to the corner on this. We just need to make sure the sides are covered. And so I’m just going to lay this over here and I’m going to sew down that way, pull it out and now I’m just going to snip this off. And this is where your scissors come in really handy because you just stay there. So then we’re going to press this back. Now this is really important to note, what’s important on this is not that you sew all the way out here to the edge. What’s important is that you cover the side, ok? You just need a quarter of an inch on that edge so that’s how I actually our pattern calls for two of these rolls because they’re cutting all of the pieces before hand but I was so stingy, I just covered this part and that’s the part that matters. So now every time I cut because you don’t want to lose your place, I would count. You never count your center, never. So you count one, two. This is my second cut so I’m going to look for box two here, right here. I’m going to center up that on my middle square. It always gets centered on that middle square and then I’m going to trim off again. So trim on all four sides just like this with the round two square in the middle. And then turn it around. Find my round two square, put it on there and then I can cut this one, I can cut both sides at the same time here, alrighty. Just like that. And so it squares it up again.
Now you add the white row just on the side. And again I’m just going to lay it on these sides right here. So let me just show you real quick, that. You don’t have to pull it up to the corner because you can already see you’re starting to have that gap there. So again I show you this. And see how just sewing that. I’m just going to trim that off there and press that back. So it doesn’t have to go to the edges we just need to press this back. And I’m going to put this white on all four sides and then I’ll meet you back here for the trimming. Alright, now we’re back here for the trimming and it just looks, it just looks so terrible. But it squares up every time. And so now again you want to count from, not counting the center, you want to count your rings out. So one, two, three, we’re on three. And all the odds, three, five and seven they get cut on this line. So what you do is on this white line right here you’re going to lay that on your color. See right here on your color. And you’re just going to trim that off. And you’re going to turn this and lay that trim line on and cut off right there. See this line here right along your color, just like that. And it just keeps growing and growing and growing. Now when you add, you know your next round is going to be another color, you know. And I like to add the same color all the way around. However there is a block on this quilt. So here I like to do this and I’m just going to sew to this side, remember, we don’t have to come over here to the corner. So just the side, side, side like that the color and then I’ll meet you back here for the trimmings. You can see the trimming one more time. Alright, a quarter of an inch on all four sides.
Alrighty. Now we’ve got it all pressed back and we’re ready to trim again. So we’re going to count, remember never, never the middle center just this one. One, two, three, four, and four is an even number so we’re going to look for round four on here. We’re going to put our square right center that up in the middle square. And then we’re going to trim off these two sides here and here. And then we’re going to turn this, center up round four. And you can cut two sides then here and here. And it’s perfect again. It just keeps going and going and going. It’s so amazing and it always looks perfect. Now when you get eight rounds done, I want to show you this right here, then you’re ready for your corners. So see how I’m ready for my corners and my corners are just these squares right here cut in half. So we just took a five inch square here, cut it in half like this and you don’t even have to have a perfect measurement you just cut it in half. You’re going to lay it on here and sew it down. And let me do one right here to show you. The other ones are sewn on. But this one is waiting for me to show you. So again you can turn this over. You’re just sewing on this quarter of an inch part here. So we’re going to go and sew down there. And now we’re going to press these back. And I’m going to press all four of them here and one more. And you want to make sure they’re laying kind of nice because this is, these are the squares that finish off your block. Alright now let me just move this stuff out of the way so you get a clear shot of what I’m doing here. Now when you’re to the very last round, and again you’re going to count. One, two, three, four, five, six, seven, eight this is our eighth round. Our centering square for round eight, it’s an even number, it’s going to be a square. We put that in the middle just like this. Center it up. Now what we’re going to do is we’re just going to come and we’re going to cut this like this. And you can cut three sides on this. That one isn’t, I don’t cut too well going that way. And it’s probably not a good idea. So now I’m just going to flip this around and again put my centering square in there. And we’re just going to cut. Make sure we’re lined up here, here and here. And across, across here like this. And that is your finished, finished block. And it’s amazing every time. I literally, I just couldn’t believe I was doing this. I’m like this is so cool. And it was just so perfect.
Now when you put the quilt together you can see, here’s our blocks right here. This is how they go in, the blocks. So we’ve got four across by five down. That’s how they go. Toward the end of my roll because I wasn’t paying attention to in the beginning I started to run out of strips that were big enough. And because I was trying to squeeze it all out of this one roll. So I have a couple of blocks down here. I want to point them out to you. Like right here, this one right here. See how every side is a different color. Even if you do that it works. You don’t notice it. It doesn’t like pop out and go, hey you made a boo boo. It’s none of that. And so it just goes together really well. Now I want you to look at this one over here. So this I just took scraps of 30’s and put this together because I wanted to make a pineapple block that looked old. So here’s all these scraps of 30’s and isn’t it just adorable. This one is just nine blocks and so it makes a perfect little table topper or baby quilt size. And I just think it’s adorable. And those are just 30’s scraps because I wanted to make an old one.
There’s something else I need to tell you. So this ruler makes this block. And I thought alright I can do this one and all but, but the Creative Grids people, I almost lost their name, the Creative Grids people, guess what, they made a tiny. They made a tiny ruler to make a tiny pineapple block. And I thought to myself well I can do this one surely. But I can’t do it tiny. I don’t love tiny. I’m not careful enough. I’m not perfect enough. Well guess what. With this ruler, look at this one I made. So isn’t this the cutest thing that you’ve ever seen. I mean I can’t even believe that I did this. I love this tool. It made it so easy. Every round gets squared back up again and it’s perfect. Now this little quilt right here with 20 little blocks. It makes a quilt that is 46 by 56. We used ¾ of a yard of your background fabric to make this little three inch border out here. And then I just, actually I think that’s 3 ½ it’s three finished, it’s 3 ½ unfinished. And then we used ¾ of a yard for our binding. The backing takes 3 ¼ yards. And you’re just going to sew your pieces together with a horizontal seam to make your backing. And so it just makes a really fabulous quilt so fun. And I just can’t even tell you how excited I am to be able to recreate this antique block in these fun brights with this amazing tool. So thank you for joining us today. We hope you enjoyed this tutorial on the Pineapple Block from the MSQC.
& Progress on Social