Simple Diamond Quilt Tutorial
Jenny Doan
Simple Diamond Quilt Tutorial
- 1 pack x 10" Precut Quilt Squares (Layer Cakes) - Print
- 1-1/4 yards x Background Fabric
- 1-1/4 yards x Outer Border Fabric
- 4-1/2 yards x Backing Fabric


Finish your masterpiece and let us give it the finishing touch it deserves.
Subscribe to MSQC on YouTube
Hundreds of FREE tutorials and a new one from Jenny launches every Friday.
video transcript
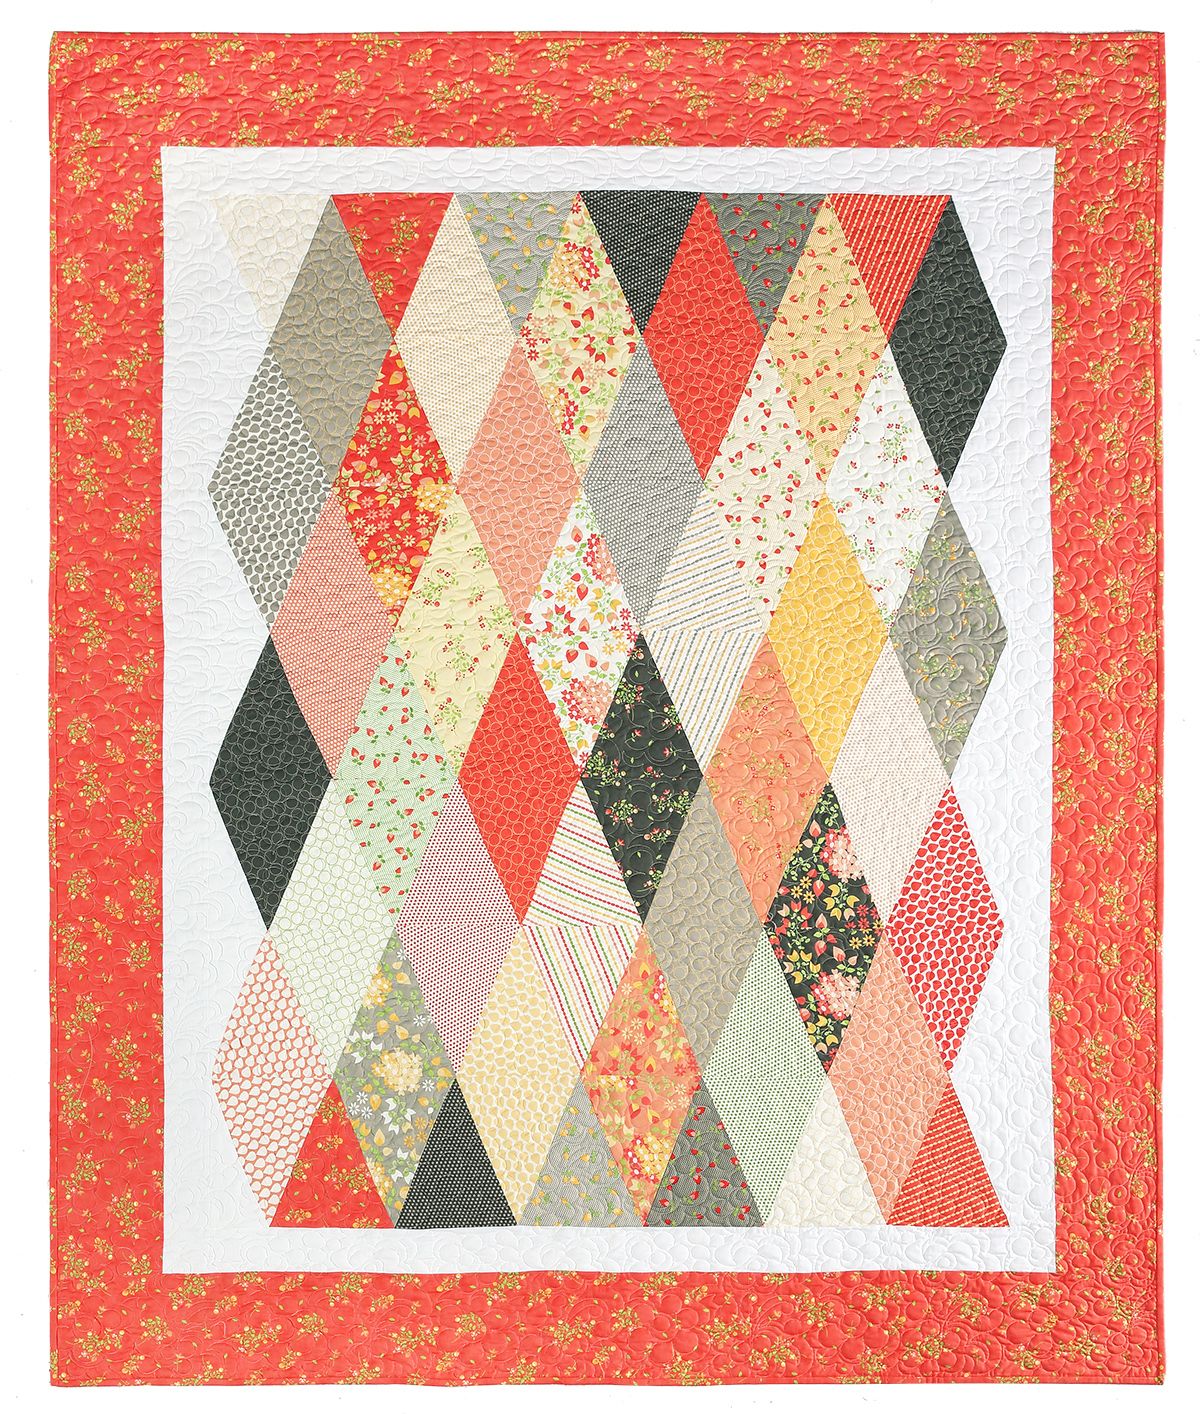
Hi everybody it’s Jenny from the MSQC. And I have a fun project for you today. Let’s take a look at this quilt behind me. Isn’t this great? Love these great big diamonds. They’re just really fun and so easy. So to make this quilt what you’re going to need is one packet of ten inch squares and we, that’s 42 of them. And we have used Sun Drops by Cory Yoder from Moda. And it’s just a great little line. You’re also going to need a yard and a quarter of background fabric. Now that’s going to take care of this inner piece right here and this first 2 ½ inch border out there. For your outer border you’re going to need a yard and a quarter. And this is a nice six inch border. And so it just makes, it just frames up the quilt really pretty. Now if you want to check on the backing, the backing is going to be 4 ½ yards right here. And this is the backing we used. It’s the same as the border and it’s just really, really pretty.
So to make this quilt you’re going to need your simple wedge ruler. And the reason we like the simple wedge is because you can get two cuts out of every ten inch square with our wedge. So the first thing we’re going to do is we’re going to bring over our ten inch squares and we have a couple right here. And you can see I’ve stacked them on top of each other which is actually great. You know, most of the times you can stack about four and that makes your cutting go twice as fast. So we’re going to lay this on here like this. And we’re going to make our first cut. And we are going to go right in here just like this. And be careful at this point right here. And then we’re going to cut right down this side. Now those are, those are cut right there and ready to go. And, and this is where our wedge fits and really all we do is just move it over like this. Alright so once you get this all lined up on your second piece then we’re going to cut this as well. And I’m just going to come along here. And then I’m going to flip this over because I want to get my edge really nice and clean. And you can see I’m barely shaving off a little piece on there. And we’re ready to go. So then you have your two wedges.
Now this quilt, because it’s big diamonds, you’re going to want to lay it out because you want to make sure that they match up with each other. So you’re going to have one that goes this way and you’re going to put its matching piece down here. Now these are going to be sewn together in rows like this. So then, and since, to get them to match up you have to put one up and one down, then the other half of this one is going to be up here like this. So you’re constantly working like on three rows. So you’re just going to keep laying them out. Like this one will go here. And this one will go here. Just like this. And making sure that your other halves are always on the opposite side like this. So you have your rows together. Now I have a couple of rows over here that are sewn together. Right here. And you can see that I’ve started with a white square. You want to start and end every row with a white, I mean, I’m sorry a wedge, with a white wedge. You want to start every row with one of these. Because this is what’s going to make your border. You’re going to trim this off. Now I tried cutting them in half, it just didn’t work as well. And so a little bit of waste on our edge there. But other than that, you know you’re going to get your rows, you’re going to sew your rows together like this. And then you’re going to come back later and you’re just going to trim these off. You just want to leave a quarter of an inch right here at this junction right here. And then just come and trim these off. And that’s what makes your straight edge.
So there’s a few things I don’t want to overlook on this that make it a little bit easier. And so I want to go over those really quick. Because this is such a quick easy project, you know, it’s easy to get caught up in the doing of it and not pay attention to some of the details. And so I wanted to go over this right here. When you’re ready, actually let me use a lighter one so it’s easier for you to see. When you are ready to sew your two pieces together, so you have them laid like this and you’re ready to sew those two together, there’s a little tip I want to remind you of. So what I want you to do when you lay these right on the edges, I want you to try and have a little bit of quarter of an inch of your bottom one sticking out and then a quarter of an inch of this hang over. They will match up. But if you do that they’ll be off set a little bit. So this makes it so that when you sew across here that will actually open up the quarter of an inch seam. So let me sew that quarter of an inch down here to show you what I mean. So remember, just a little ear hanging over on each side, a quarter of an inch. And let me show you that so you can see that.
So I’m just going to start this right here and my needle can go right in that little divot. And you’re just going to sew down like that. So now let’s open it up, and these should be, see how these lay really nice like that. And they stay with your, with your quarter of an inch. One doesn’t slide up or down. You don’t have to hide anything in your seam. And so just remember to hang your tails over.
The other is is when you’re getting ready to sew your rows together right like this. So here you have your rows all laid out and you’re getting ready to sew them together, you’re going to put them right on top of each other like this and you are going to nest these seams. So right here these two where these points come together, you know try to keep all your seams going this way on one row and going that way on the other row. And you’re going to nest these up and you can pretty much feel them as you go along. One will go to one side and one will go to the other. And then they’ll have a nice match up. So we can also sew those just so you see that. You know some of these things for, for those of us who have been quilting a long time, these are just old, you know, things that we know. These are standards. But sometimes I get, I get going so quick on things that I’m like, Oh I didn’t match those up. And then you feel like you’ve got to pull those out and make sure they line up real carefully. So hopefully this will just make everybody pay a little attention and not rush through this too fast. Because with these easy quilts, it’s easy to get going. And, you know, then we’re like the horse to water. We just fly home. Alright so let’s look at this so you can see what I’m talking about. So when they nest up like this, see right there how that goes together so pretty and it makes the nice, you get your points right there. And the come together so nice. And it looks like diamonds. Also once you’re ready to, you get your rows together, and of course remember you’re going to start and end with a white. And once you get your rows together, see how this comes together as a quarter of an inch. And that gives you the line that you’re going to cut your pieces off on. And you’re just going to lay this, I would lay this straight on the mat like this. And then go ahead and come, you’ll come a quarter of an inch over on that line. And come straight down. And trim your edge. And that will work for you.
So let’s look at our quilt one more time. You know we’ve got our diamonds across here. And you can see it’s starts, there’s our little half diamond, I mean I’m sorry, half wedge on this side for the, of the white to give it the straight edge that we’re then going to sew our 2 ½ inch border to. So of these little diamonds you’re going to put one, two, three, four, five, six, seven, eight, nine, ten, eleven, twelve across. And we are going to have one, two, three, four, five, six, seven rows down. So, so just remember that will help you with the layout. Goes together super quick and it’s an awesome quilt. And we hope you enjoyed this tutorial on Simple Diamonds from the MSQC.
& Progress on Social