Candy Twist Quilt Tutorial
Jenny Doan
Candy Twist Quilt Tutorial
- 2 packs x 5" Precut Fabric Quilt Squares (Charm Packs) - Print
- 1 pack x 5" Precut Fabric Quilt Squares (Charm Packs) - Background
- 4 yards x Background Fabric
- ¼ yard x Complementary Fabric - for pieced border
- ¾ yard x Binding
- 5 yards x Backing


Finish your masterpiece and let us give it the finishing touch it deserves.
Subscribe to MSQC on YouTube
Hundreds of FREE tutorials and a new one from Jenny launches every Friday.
video transcript
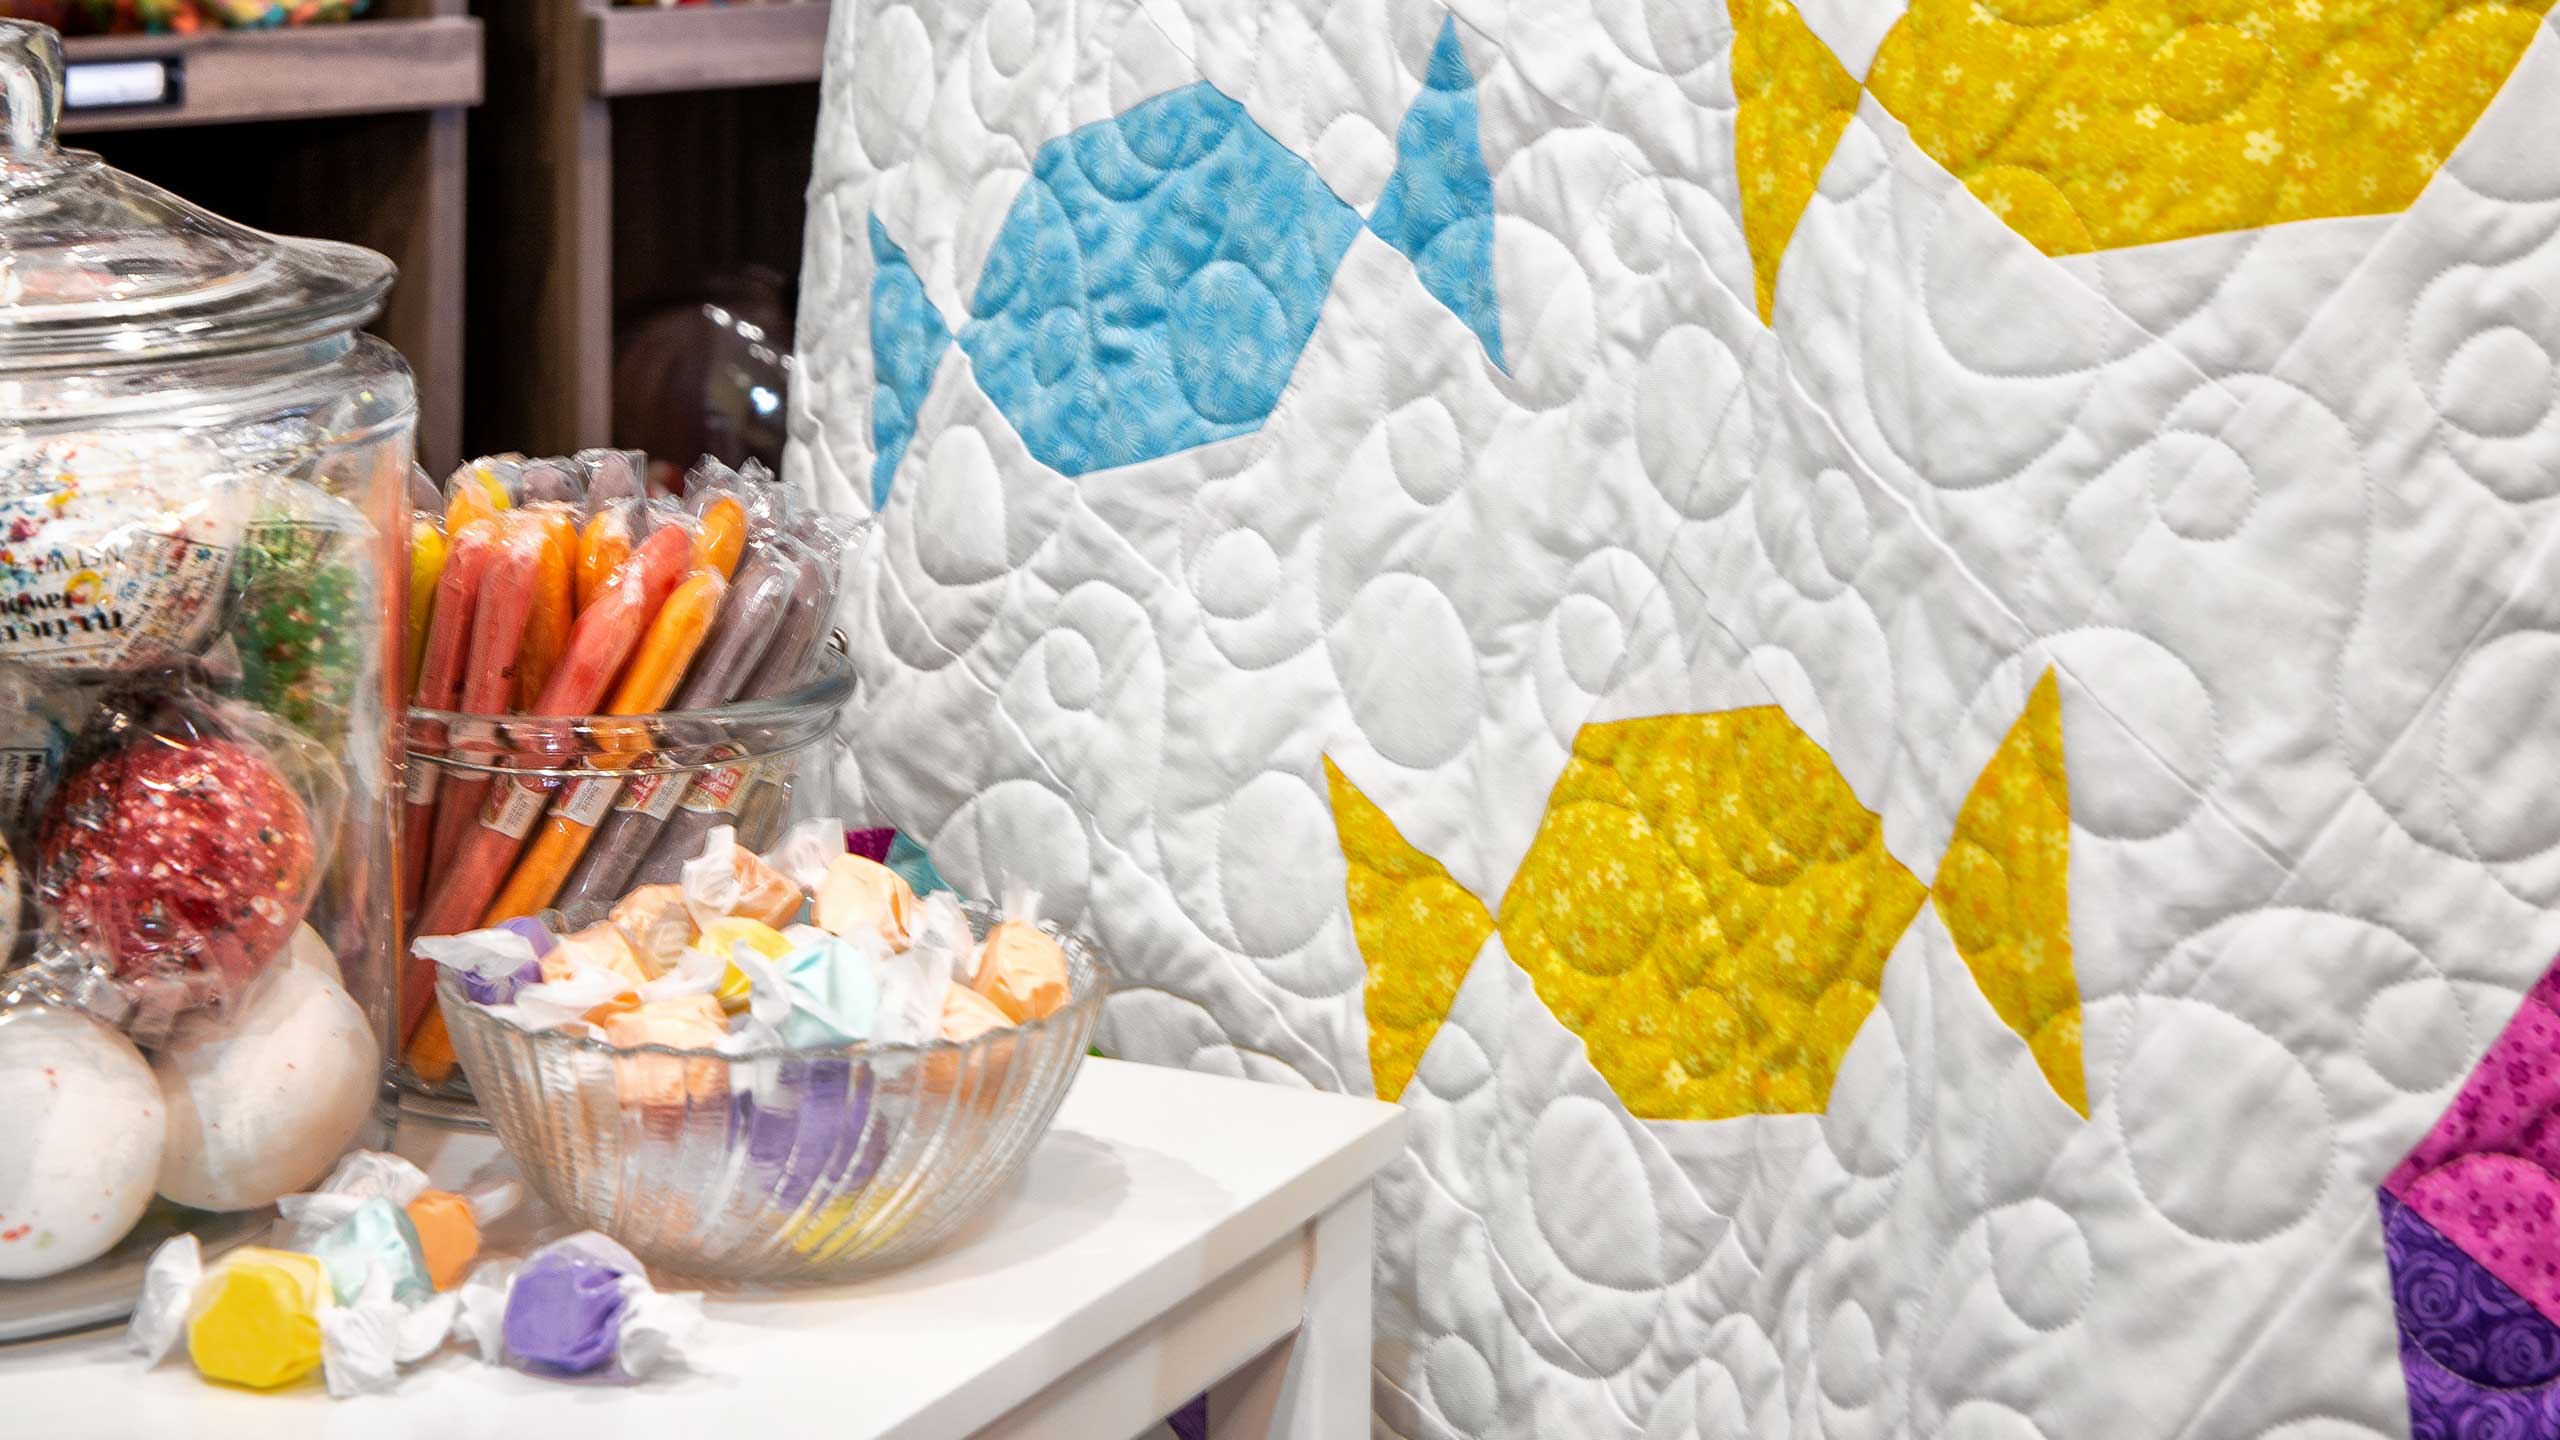
Hi everybody, it’s Jenny from the MSQC. And I’ve got a fun project for you today. Take a look at this candy quilt behind me. Isn’t this great? We all know someone in our lives who has a sweet tooth. This is the perfect quilt for them. We’re calling it Candy Twist because we used some of our leftover blocks to make this ribbon border out here. So to make this quilt what you’re going to need are two packs of five inch squares. And we have used Hopscotch Candy Necklace by Jamie Fingle for RJR Fabrics. You’re also going to need some background fabrics. You’re going to need one pack of five inch squares. And then you’re going to need about four yards of background fabric because that makes all these strips, the inner and the outer borders so you’ll need that much. For the background you are going to need about five yards, vertical seams. And look how bright and happy that is. Isn’t that fun? Alright so let me show you how to make this because this is super easy.
So to make this block what we’re going to do is we’re going to take our colored square and we are going to put a 2 ½ inch square on both corners, diagonally from each other. So out of your yardage you’re going to cut a 2 ½ inch strip and you’re going to cut 2 ½ inch squares, sub cut them out of that strip. Now you’re going to get, you get 16 2 ½ inch squares out of a strip. So you’ll get quite a few. Anyway what we’re going to do is we’re going to draw a line or press a line so we have a sew line for this. And we’re going to put one square in each corner and we’re going to sew directly on that line. So let’s go do that. And you’re going to do that to both corners. So I have another square here ready to go. And I’ll just put them on at the same time. So we are sewing right on that line. And then I’m going to turn this around and we are going to sew on the other side too. Sew it exactly the same direction on the line. I want to make sure you guys remember because a lot of times we sew on either side of the line. But on this one we’re sewing directly on the line. You want to make sure that your corners are pretty square when you fold them back. And if they’re not perfect, like see this one isn’t quite perfect but I can, I’ll be able to hide that in my quarter inch seam so I’m not too worried about that. So we’re going to clip off these corners like this. Just like that. And this makes the center of our candy right here. So let’s press this out. And then see right here where this candy is, this makes this center piece right there.
So now we have to make the little wrapper ends. And to do that we’re going to take a five inch square of fabric and we are going to sew all the way around it. So we’re combining it with our color. We’re putting those right sides together and we are going to sew all the way around this and make our half square triangles that really easy way. So I’m just sewing a quarter of an inch all the way around. One more side. Whew. There we go. Alright so now what we’re going to do is we’re going to take this and we are going to cut in half both directions. So I’m going to lay my ruler on here, make sure it goes right corner to corner and I’m going to cut this and then I’m going to come over here and cut this. . You can see my sewing machine grabbed that little edge right there but we’re not going to worry about that because we’re going to cut right through it. Alright so now we have four of these and we need to square them up. We need to make sure that these are three inches. So we’re going to put our little squaring tool on here. Match our little, our seam line to their seam line on the three. And we’re going to trim this. And it’s just little bits on there. They should be pretty close. And you need two of these to finish your block. So there’s our two for our block. These other two I’m going to go ahead and square up because we are going to use these in the border. Oop, that one is perfect. Let me see this one. This one is pretty close too. Let me just cut this little edge off right here. There we go.
Alright we’re going to set those aside for now and we’re going to press these open. Now these have been squared to three which means that your border pieces around the edge of your block also have to be three inches. Those you’re going to cut out of your background yardage. So I have some cut here. And these are three by five because our charm square is five inches. And we’re going to sew these on either side like this. Now let me make sure that I have this laid out right. So we’ve got our charm squares on either side like this. And then these corner ones right here, they’re going to go, wait I’m a little angley challenged. Ok they go on these corners.The green touches the green like this. I have to do those little things to remind myself so I don’t get lost. And then we’re going to need a little bit longer piece to put over here and over there. And that makes our little block.
So let me show you how this works and we start sewing it together. First we’re going to sew our two three inch, three by five inch rectangles onto our five inch square. And we’re just going to sew a quarter of an inch down the side. Any time you’re adding a sashing your side pieces are always the size of your block. So what that means is that for anything, you know for any block you make when you want to add sashings, that’s your measurement right there. That kind of frees you because you don’t have to figure any math. You just measure your block. And you know it’s that size. And then your top and bottom piece are the width of the whole thing across the top now. So it makes it easy to come up with your own ideas and your own blocks.
Alright so for these, I’m going to sew these together first. And so I’m going to lay this on here like this and sew this one together. And we’re just putting those right sides together, matching up our corners. And again we squared our triangles to three so our little sashing pieces are also three. And then I’m going to do this one too. And you’ll notice as I sew these together if you want to chain piece these, these are all done exactly the same way. So even though they’re top and bottom and I’m going to flip one, they’re put on the same way. So you can chain piece these, and you know they both go the same direction. Alrighty now I’m going to clip off this little dog ear right here and press that back. Just like that. And just like this.
Alright now what we’re going to do is we’re going to add this one to the bottom and this one to the top right here. So we’re going to come over here to the sewing machine and add this one. And I’m going to make that seam match up so I’m going to take a few stitches to anchor my, anchor my row and then I’m going to lift this up and I”m going to make sure that these two seams line up exactly because that’s the point of the wrapper. And we want that candy wrapper to be right together right there. And then the rest of it is just one long strip. There we go. Now we’ll add the other one on. And we’re going to do the same thing. We’re going to make sure that this edge lines right up with it. We’re putting it on the opposite side. Alrighty. Ok so now we’re just going to press this open and our corners look pretty good. And I’m wondering, I have this one kind of wonky triangle out here. And I’m wondering if I didn’t actually trim it up when I trimmed the other ones and I missed it. So what I’m going to straighten this up is I’m just going to trim this edge right here just like this. So that little corner is right and then this little corner over here is right. So make sure you square your little half square triangles to three. I think I just missed squaring that one. That’s funny. Oh well, it all works out, right? Alright. So now we have our cute little candy block. When you set them together you are literally just going to sew them together one next to the other next to the other to the other. So we have six in this top row and seven down. You can put them together any way you’d like.
Alright so then once you get all those candies together you’re going to add this first 2 ½ inch border. Then out here are all those extra three inch triangles that we got because when you sew around a square you get four. And we’ve only used two on this. So you get two more for each one. So what we did then was we put these together and we mixed them up and we sewed them together just like this. So color together just like this all of our little pairs and then we sewed them in a long strip. So we have this cute like candy ribbon border out here that goes all the way down. And we didn’t have quite enough to finish it and so we added this other piece. Now remember these are going to be three inches wide so this piece is also going to be three inches wide out here. We have one on the top and one on the bottom and I just think it kind of frames it up. That’s the fun of designing your own quilt. You get to decide how you, how you use it and how it goes together. Now this, this right here I wanted to use these in the quilt. I wanted to, I’m one of those who likes to use all my pieces so there’s no waste. But I just think it’s a really cute idea. And when I think of candy I think of Halloween. And so I wanted to make some Halloween candies for this and I just think this is so adorable. And whenever I make a runner, this is just a little runner tip, I put a solid square right in the center because that’s wherever you set your candlestick or your bowl of fruit or whatever it is you’re going to put in the center or a big bowl of candy. So we hope you enjoyed this tutorial today on the Candy Twist quilt from the MSQC.
& Progress on Social