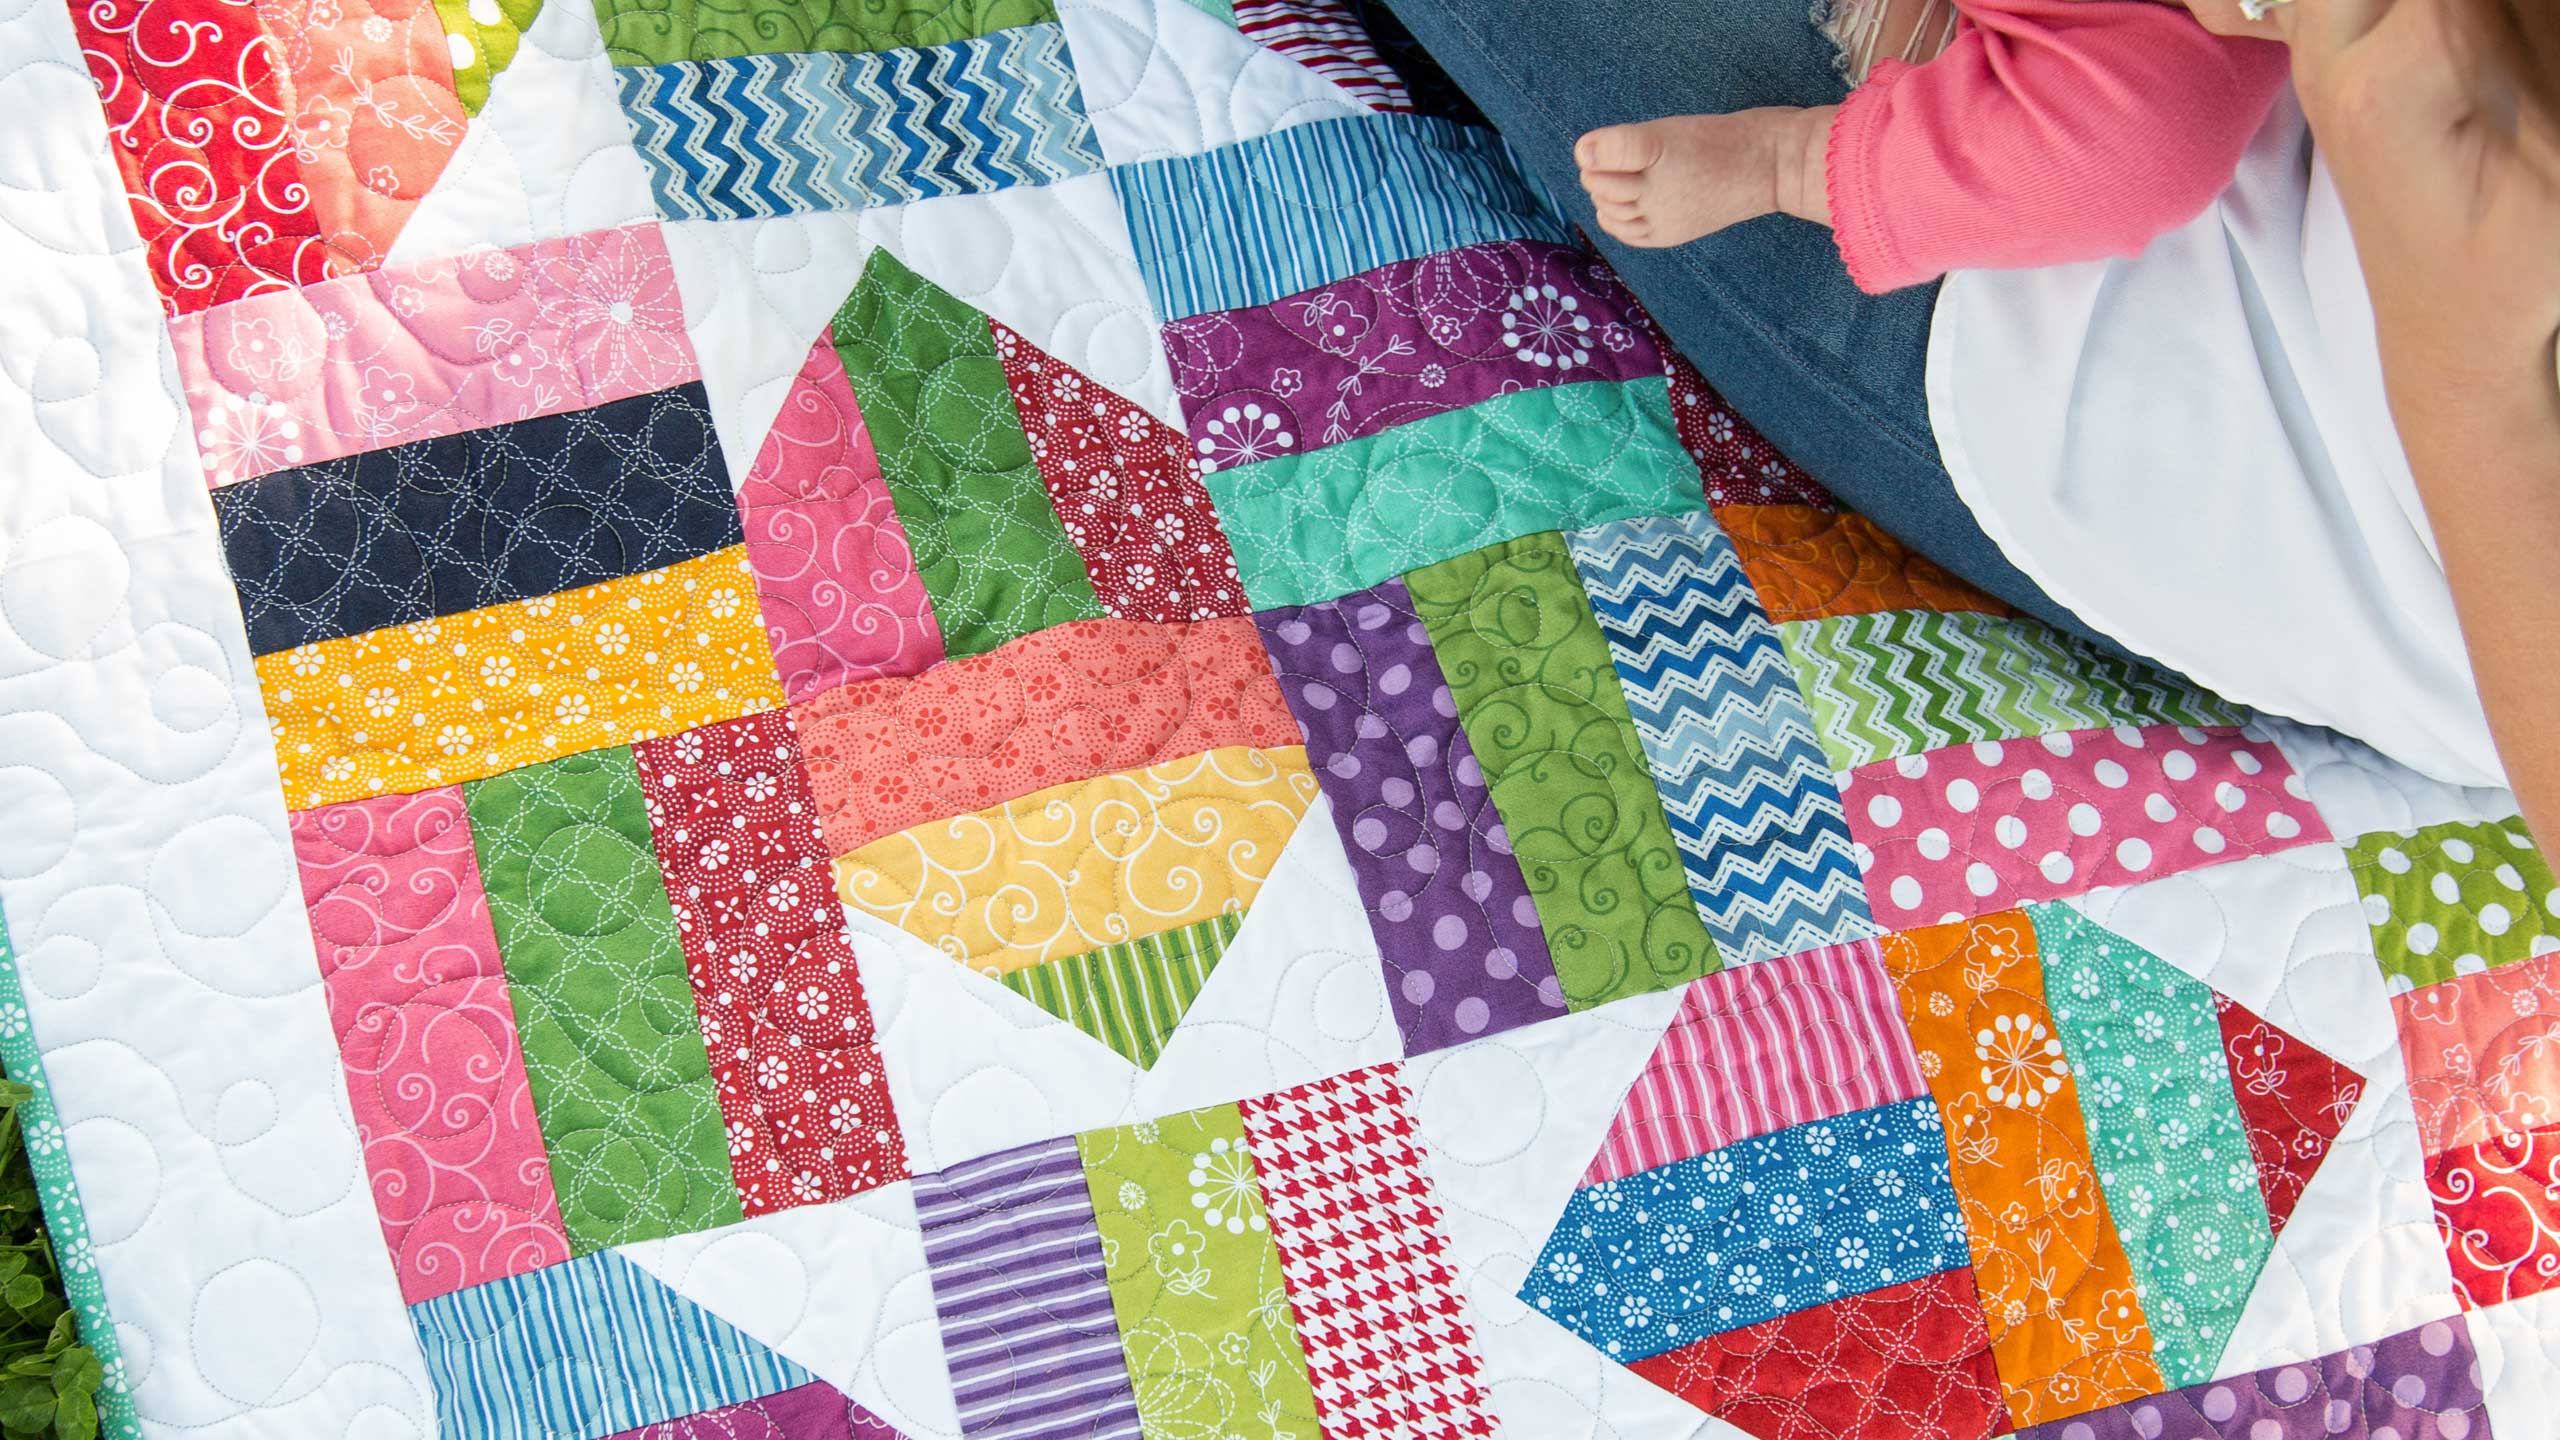
Fence Rail Star Quilt Tutorial
Jenny Doan
Fence Rail Star Quilt Tutorial
- 1 Roll x 2.5" Fabric Strips (Jelly Rolls)
- 1 Yard x Background Fabric
- 3 Yards x Quilt Backing Fabric


Finish your masterpiece and let us give it the finishing touch it deserves.
Subscribe to MSQC on YouTube
Hundreds of FREE tutorials and a new one from Jenny launches every Friday.
video transcript
Hi everybody, it’s Jenny from the MSQC. And I’ve got a great project for you today. Today we’re making the simple fence rail block and we’re going to put star points on some of the squares to make this awesome fence rail star. See how cool that looks in there. That is just a beautiful block. So to make this quilt what you’re going to need is one roll of 2 ½ inch strips. That’s 40 2 ½ inch strips. And we’ve used the Kimber Bell Basic line for Maywood Studios. It’s just a darling line as you can see. You’re also going to need a yard of background fabric. That’s our white star points and our first little border out here. And you’ll need a yard for that. So let me show you how to do this because this is so easy.
Basically all we’re doing is making fence rail blocks. So you’re going to take three strips, we’re making three in a set. And so you’ll have 13 sets. And we’re going to sew our strips together a quarter of an inch all the way down the side. We have two sewn together here and we’re going to add a third on there. So you’re just going to randomly mix yours up and put, put three strips together. And I’m just going to sew this one on here. And we’re just going to make a three strip set and sew it down a quarter of an inch right down the side. Go ahead and get it started. And then I come way out here, hold it, and make sure it’s lined up. And then I can sail for quite a long time. And so you’re not stopping and piecing it. So again I just pulled it toward myself, holding the bottom one, lay the top one right on top. Make sure those edges are lined up. And then I can sail. I can just let it go. Alright. Now we just need to press this open. So let me move, clear off my ironing board here a little bit here. And what I’m going to do is I’m going to press from the top because I don’t want any pleats or folds. So I’m going to press from the top like this. Make sure there’s no folds. I’m going to kind of make my seams go, you know, to the outside. The seams don’t really matter on a fence rail because you don’t match anything up. But I like them to lay flat. So what I do then is I flip it over and make sure that these seams are all going the same way. So right here, I don’t know if you can see that but this one kind of folds over. So we’re just going to press that down, make them go the same way all the way down. And then it will lay real nice for you.
Alright, now we’re going to cut these into blocks. When you do a fence rail block what you want is you want however tall it is, that’s how wide we want to cut it because we want squares. So what we’re going to do here is I’m going to trim off my selvedges. Now you can see by sewing these on I have all different lengths. So you want to make sure that you catch the very shortest so that you have a nice straight edge. Because I have before cut my selvedges only to realize that I had one coming in underneath. And you don’t want that. So I’m just going to measure this to make sure. So we are at 6 ½ . And so then I’m going to come in 6 ½ which means I count, one, two, three, four, five, six, and a half. Lay my thing on there. Now you can, I have my strip set folded together so that means that every time I cut I get two blocks out of every one. So we’re going to cut our whole strip. And I’ve got my half here at the beginning. So I’ve got one, two, three, four, five, six, right here. And one more cut. Let me pull this over here so it’s in the middle. And we’ve got 6 ½ right here. And we’ve got this little piece of extra here. That’s just, well it’s for whatever you want to use it for. I can’t use it in this quilt but you never know. . Alright.
So once you get all your strip sets sewn and all of them cut up into blocks you’re ready to start putting them the quilt together. Now what I’ve got going on here is I’ve got a whole little stack of blocks. And what I like to do is kind of lay them out in a big nine patch. So when you do a fence rail you do one strip set up, one strip set over, one going up and down like this. So you want to make sure that they’re turned, every one. And we are going to do this, not the same one, a different one. Here we go. So over, up. Nope that’s the same as the top one. Hang on, hang on I’m getting it. And you’re going to do all three of your rows like this. Make sure that they just twist and turn. Alright.
So then, and you’ll have a lot more to choose from. I just have a few here. So then, these blocks, one, two, three, these are your blocks that are going to get your star points on them. So we’re going to pick out four of those and we’re going to put star points on them. Now to make your star points what you’re going to do is you’re going to take your background yardage and ours was white because we wanted our stars to pop. And we’re going to cut four inch strips because our little star squares are going to be four inches. And I’m just going to lay that on there. And then we’re going to trim our selvedges and cut four inch blocks. And so we’re going to come over here and cut four. And four more. And this just gets, this goes really easy as you start cutting them up. Oh from this fold end here, I should probably show you this. So right here at this fold end you can actually get another block out of there. So open up your fold and then put your, oops you’ve got to open your rotary cutter. Ok, there we go. Alright now I’m going to flip this around and cut the other side as well because but sides weren’t exactly straight. So I just want to trim off both sides. Alright. So you should get ten four inch squares from each strip.
So then we need to draw or iron our sew lines on here. So I’m going to iron mine. That’s going to be faster. So I’m going to come over here and I’m just going to take four of these and iron them. Actually no, you need eight per block. Because each star has two star legs. I almost told you wrong there. Alright, let me get two more done here, one more. Alright. So this is my sew line that I’ve ironed remember. So now I’m going to take mine here just like this. And this is the only thing you have to remember on this block is that two of our star points were going to sew on when our block is horizontal so our star points go this way. Two of them we’re going to turn so they’re vertical like this and so our star points on this side. Alright, so you’ve got to remember that part. So I have, I have these right here I’m going to turn. I’m going to make the star points and do on the top right here. So what I’m going to do is I”m going to lay one square right on the corner. Now these are going to way overlap. And I wanted to do that so you could actually see the star really well. So what I’m going to do is I’m going to sew right along here. And just on that line and sew straight across. Make sure your square stays in the corner. Now because this is such a big square I’m going to come over about a half an inch and sew again because this is going to make a really cute little secondary square that I haven’t used and I’m not going to use in this quilt. But by golly I’m going to put it in a baggy and use it for something. It’s just too much to toss. So this little piece right here I’m just going to save over here for another project. And these I’m going to iron back. So just iron this back. And then you have to remember that you’re actually doing it on this side. So I made a mistake with that one time where I had a whole bunch only going one direction. And that’s not good. You need your stars to go on the right side. So then again we’re just going to come down here and sew this one as well. Alright, so just lay it right across, match it up in the corner and, and make sure that you come back and sew that second seam because. Actually you don’t have to do that. I just do that because I’m not a waster. And so then this is how your block should look like this. Alright, I’m going to iron that back. And I have some blocks over here that are partially done so I can show you how this is going to look.
So when you go to sew them together, again you put it together just like a normal fence rail. So you have your vertical, horizontal, vertical. And I have one here. Vertical, horizontal, vertical. So the pieces I need to put in here are these pieces right here that are on, see the difference here? This one goes sideways, this one goes up and down. My star points are at the top and they’re going to go in the sides right here. So we’ve got this one. We’ve got a center square right there. And again, strips you want to alternate them every one. And then this one over here. So see how that makes our star. So let’s go ahead and sew this together right here. And this is, this is basically just a big nine patch star so it makes it really fun. So two of these go on either side. And I’m just going to reach for this one, grab it and sew it to the other side of this strip like that. Alright, so now we’re ready to press these out. I’ve got my, I’ve got my, my seam lines pressed this way so the center seam lines I’m going to press inside toward the middle. And then I’m going to flip this over and press from the top. And make sure I have no folds or pleats. When you’re dealing with little strips it’s really easy to get folds or pleats and that will change your block size. So that is going to fit right in here and just make a star. See how, see how that lines up?
Now what we’re going to do is we’re going to put our rows together like this. We’re going to match up these points. Make sure you can’t feel any room in between them and just sew right down the side. So I’m going to come from this side, make sure my seams are nested nicely. And just sew down that side. Alright, I always sew a little bit and then go back and recheck my seam. Then I’m going to go ahead and just sew the other side to this as well. Alright, so now I’m going to make sure I’m going the right direction. Sew this one this way and just sew it on. Ok, so once you get your rows all sewn together your nine patch is complete. Let’s press it. Check our corners to make sure things lined up pretty good. And here it is, your beautiful fence rail star. Isn’t that gorgeous?
So let me show you how to put these together. So what you’re going to do is you have to make sure that your fence rails keep alternating. So, because if you put them like this, see how this, see how this right here, this is going to line right up and be the same. So you turn your block to make sure that they’re opposites. And if these, like if there was a red right there, I would turn it again because I want to have, you know, lots of contrast and lots of color there. So it took four of these to make this little quilt behind me. Now this is something I want to point out because when I got all my strip sets sewn and cut and my blocks together, I had eight. Now eight doesn’t make a good quilt especially with a big block because you’ve got two by four, you got, you know, I mean it just doesn’t. You don’t want a runway quilt, you know. And so I decided that I could make two, two baby quilts out of, out of these strips. And so I’ve got one here. And I’ve just set them together. You can see. And my, my, you know, it alternates, it continues to alternate with my four stars. I used a little three inch border on there. And, and I have enough blocks right here, four more, to go ahead and make me another baby quilt. We always need baby quilts. So then you just put it together. Make sure they’re turned. So they continue to alternate like this. And I actually think on this one I’m going to try a little sashing in here to set them apart. I think that will look really fun. But remember if you’re going to go ahead and make two baby quilts out of this, I quoted you a yard of your white fabric. You’re going to need two, you’re going to need to double that. Also on your backing here, we used three yards of this. And it’s a cute little petite print for the back. And just really fun and a pretty quilt. I also think it would make an awesome Quilts of Valor quilt. Because if you did all these strips in different reds, whites and blues with your white stars, wouldn’t that be gorgeous? So have fun with this. Play with it, enjoy it. And remember if you want to make another you’re going to need another roll and another yard of background fabric.
So I just had so much fun making this. It went together so quickly and so easily. And it’s really a stunning quilt. So we hope you enjoyed this tutorial on the Fence Rail Star quilt from the MSQC.
& Progress on Social