Pecking Order Quilt Tutorial
Jenny Doan
Pecking Order Quilt Tutorial
- 1 pack x 5" Precut Fabric Squares (Charm Packs) - Print
- 4 packs x 5" Precut Fabric Squares (Charm Packs) - Solid
- 1-1/2 yards x Outer Border Fabric
- 4-1/4 yards x Quilt Backing Fabric


Finish your masterpiece and let us give it the finishing touch it deserves.
Subscribe to MSQC on YouTube
Hundreds of FREE tutorials and a new one from Jenny launches every Friday.
video transcript
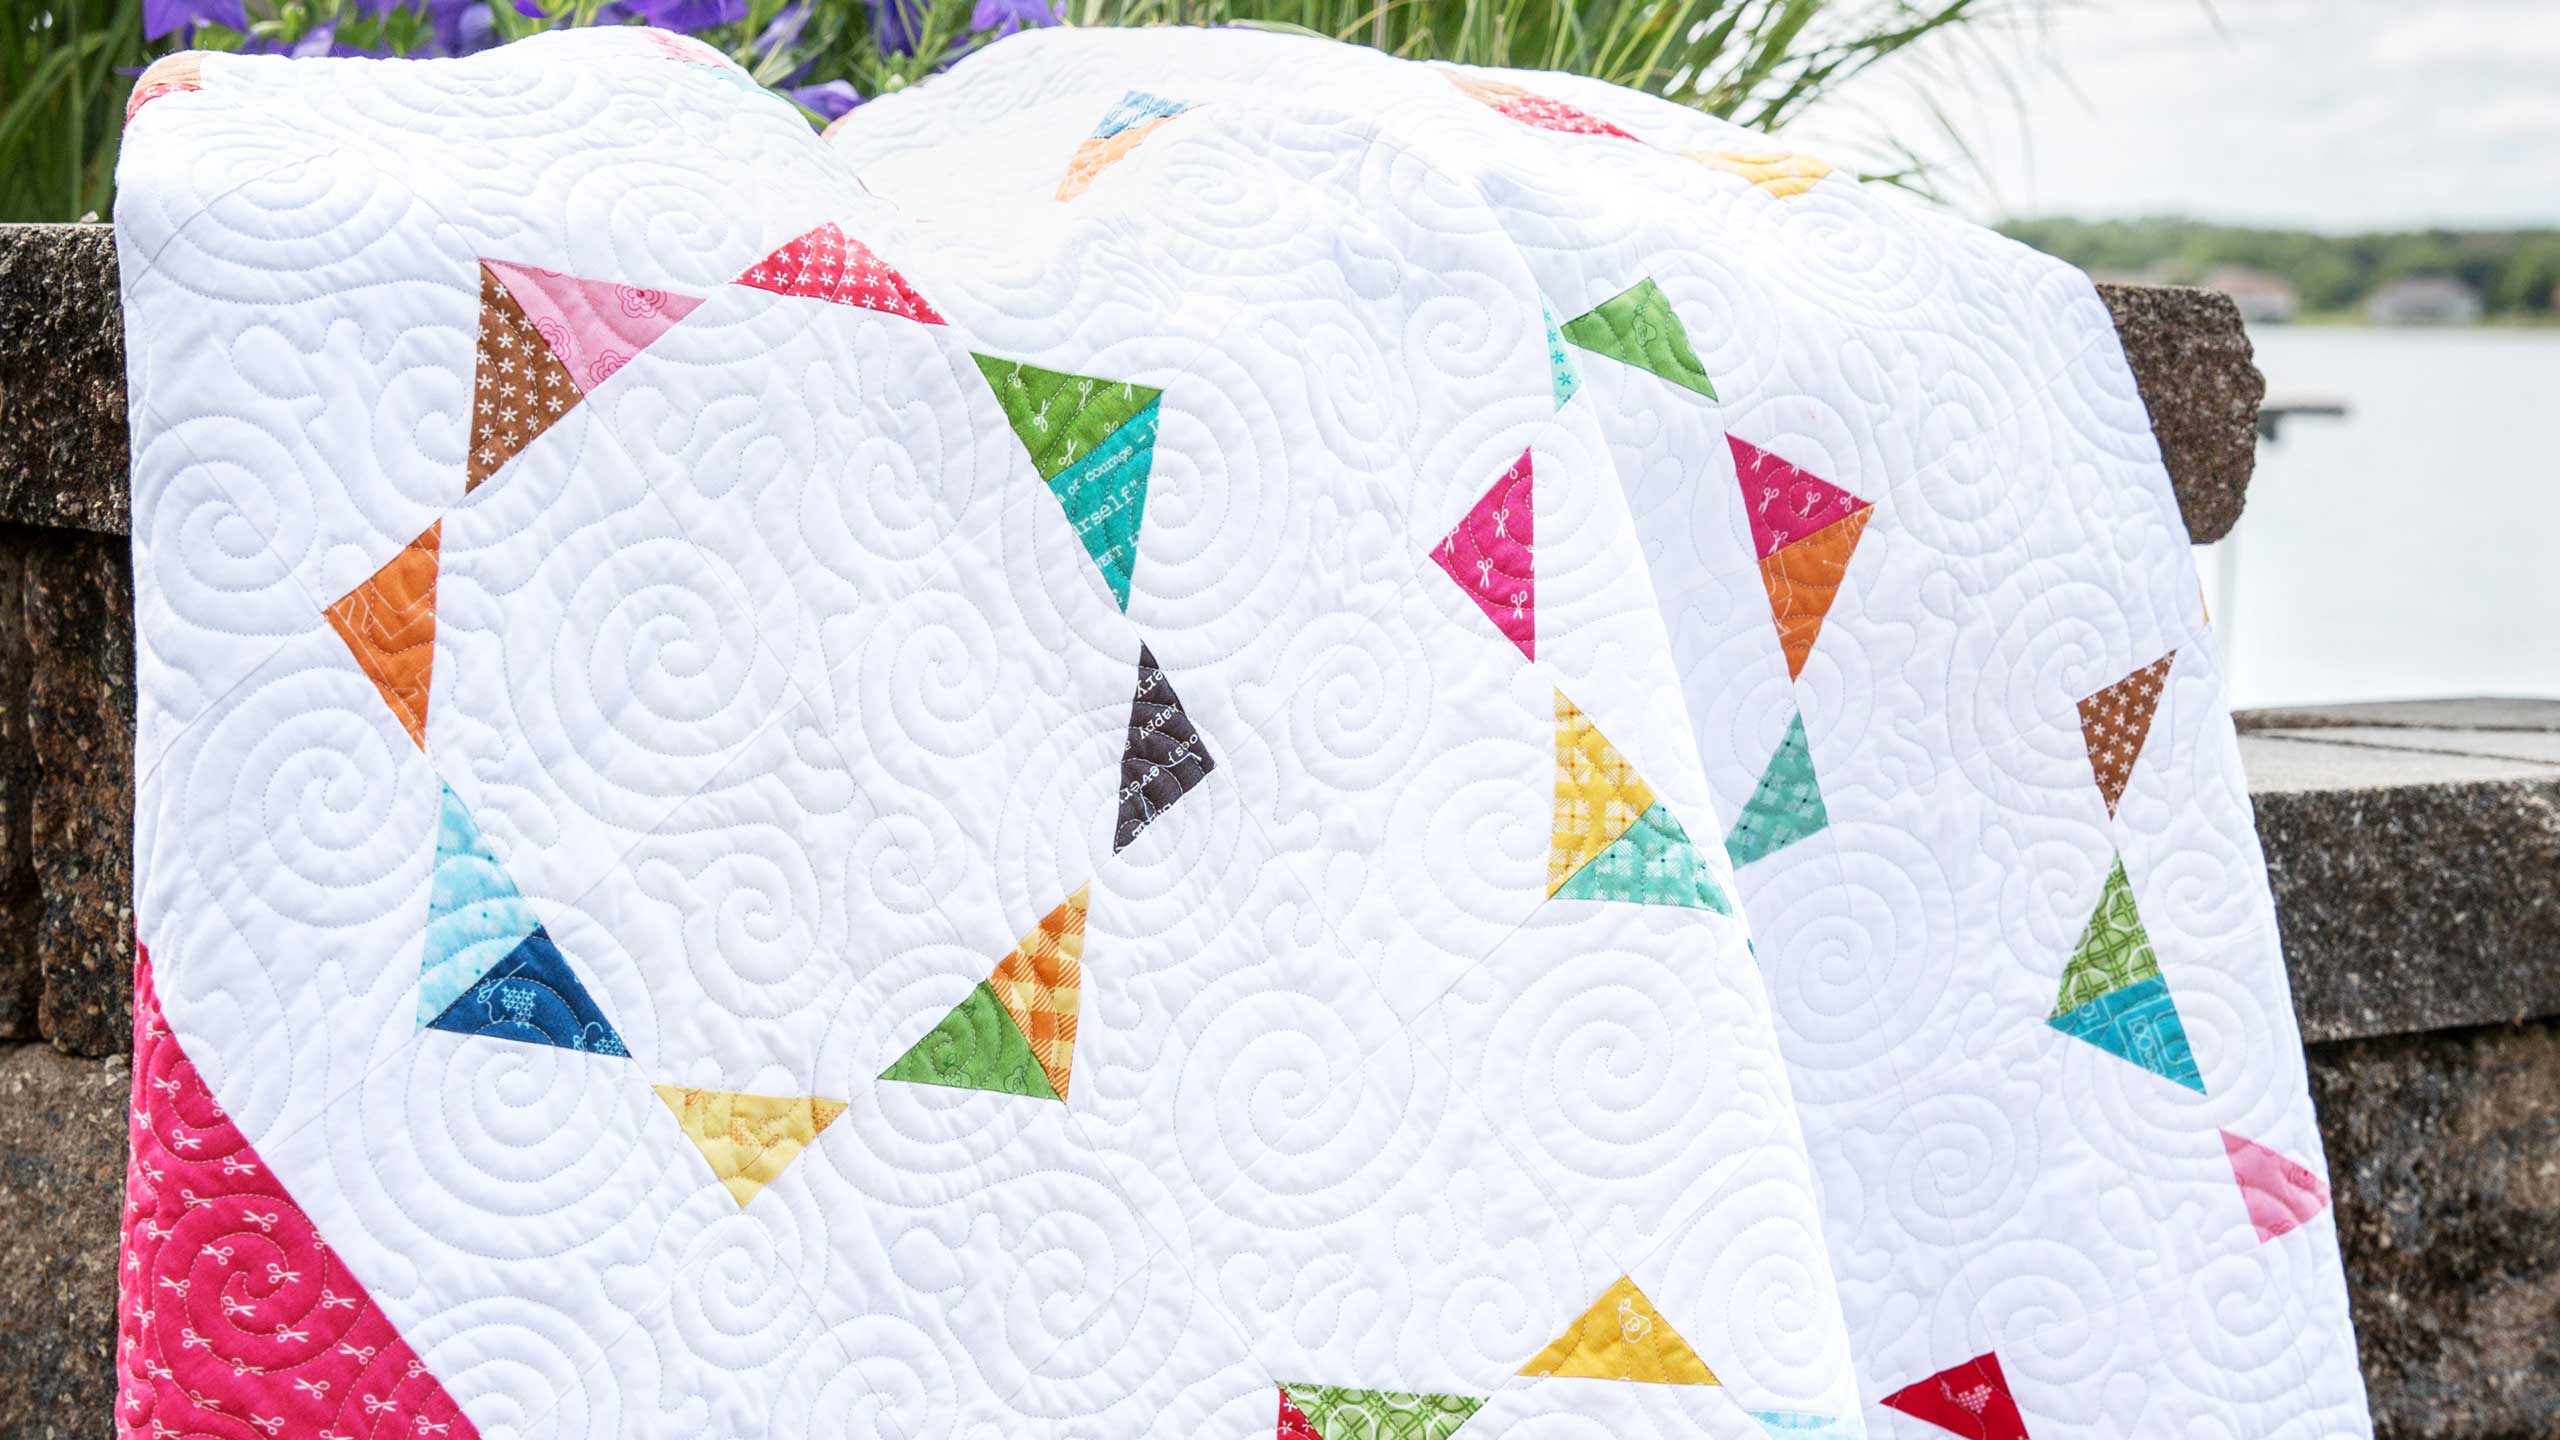
Hi everybody, it’s Jenny from the MSQC. And I’ve got such a fun project for you today. Let’s take a look at this quilt behind me. Isn’t this great? Such a modern, clean feel. It’s just so light and airy. It makes a quilt that is about 66 by 70. So it’s a pretty good sized quilt. I love how these little points come together to form these rings. Really a fun block. Now let’s talk about what you need. You’re going to need one packet of five inch squares just to make this quilt, of a printed. You’re going to need four background packets of five inch squares for this or three yards. You can get it out of yardage as well. You’re also going to need a yard and a half for this outer border out here. This is a 6 ½ inch border. And you are going to need 4 ¼ yards for your background. And look how cute that is. Isn’t that a fun background. That gingham, gingham is coming back. It was big when I was a kid. But it’s coming back again. And actually it is back. Anyway so let’s talk about how you do this.
So what you’re going to do first is you’re going to take your five inch square, one of your squares. And we’ll just choose one out of here. Let’s go ahead and choose, oh so many choices. I’ll choose this one. Alright, here we go. So all of this fabric is so cute. Even like, I hope you noticed the little border. It’s tiny scissors. It’s so cute. Alright so we’re going to take our print charm pack and we are going to cut it into fourths. And I’m just using my little 2 ½ ruler because I know if I lay it on the edge it will get me right to the middle. And I’m going to put it on both sides and do this. Alright so now we have four of those just like that. And we’re ready to go.
What you want to do on this is you want to draw your line corner to corner or press it. I like to press my line. And so I’ve got a little finger press on there. I’m just going to touch it with the iron. And then I’m going to get one of my white squares right here. Move these out of the way. I think I have two. Nope I just guess I have one. And then you’re going to lay them right sides together. And we are going to sew right on the line, right on top of that line right there. So let’s go to the sewing machine and do that. And I think I’m going to flip this around. So it lines up really nicely in the corner there. There we go. Alright. Now I’m sewing right on the line. You know fairly often in quilting I get the question asked about, do we backstitch in quilting. Do we backstitch? A lot of us come from clothing backgrounds where everything is backstitched. In quilting, every seam is enclosed in another seam so you don’t really need to backstitch. That was a hard habit for me to break. And sometimes I still backstitch. It doesn’t matter either way. But once you realize you don’t have to, for some people it’s just like, ahhh! You know, you’re just really happy about it. Alright let’s go press this back. Now I’m just rolling the iron back and keeping that fabric back, because my background is white I’m keeping my fabric on, the, the color on the color side. And take a look at this block because this my friends is your whole quilt. This is it right here. You’re going to do that to all your squares. You’re going to cut them up and do this one thing. And it makes this quilt.
Now for some quilts the whole trick is in the layout. And this one is definitely one of those kind of quilts. So you’re going to want to look at your diagram. You’re going to have a diagram that looks something like this. And you’re going to want to make that layout work for you. Because it’s going to, when you put it together like this, it’s going to form those rings. So let me show you how I did that. So, you know you guys know me, I’m a little angley challenged so I have to come up with ways to put things together. And when I started on my board, I started with four seams or four blocks in the center like this. I’m talking about my design board, when I started on my design board laying this out I wanted to start with four blocks together like this. Now your, this block up here I’m taking the same block but turning them so they line up like a little geese. And we’re going to do that on all four sides like this. And over here. You see the ring forming. Oh it’s so cute. Alright there we go. So now, now that comes together and forms that ring.
Now you can’t actually put this together as a block because when you start over here, this one also comes together like this when you put the next one together. And it’s the peak of the next ring. That’s what makes them offset. So the best way to lay this out is row by row. So you’re going to lay your rows out and follow your diagram. And then you’re going to sew this row together and this row together, this row together and then this row together. And then you’ll sew your rows together. So once you get your long single pieces together you’ll sew your whole row. And as long as you’ve laid it out and watched the direction everything is going then you’ll be able to put those together and it will turn out just like this. So let’s look at again at the quilt. Here’s our little rows up here. So this one kind of has, you know, little geese, little geese, little geese. And those of course you can sew together in pairs like this. You know you just want to watch, watch this little seam right here to make sure this lines up. And if your seam happens to be really bulky you can press it open like this. You know pressing is a personal preference. And it just works for your block. If my block lays nice and flat when it’s pressed to the side I just let it go. But sometimes it will have a little bulk there and you’ll want to press that open.
Alright so let’s look again. Here’s our next row right here and then this row and so on. So just watch the diagram how you lay it out. Because this is about the easiest block you’re ever going to make. So we hope you enjoyed this tutorial. We’re calling it Pecking Order because it’s a take off on my silly goose block. And, and you have to get them all in order to make this design work. So we’re calling this Pecking Order. And we hope you enjoyed this tutorial from the MSQC.
& Progress on Social