Sparkle Quilt Tutorial
Jenny Doan
Sparkle Quilt Tutorial
- 3 packs x 5" Precut Quilt Squares (Charm Packs)
- 3-1/4 yards x Background Fabric
- 1-1/2 yards x Outer Border Fabric
- 7-1/4 yards x Quilt Backing Fabric


Finish your masterpiece and let us give it the finishing touch it deserves.
Subscribe to MSQC on YouTube
Hundreds of FREE tutorials and a new one from Jenny launches every Friday.
video transcript
Jenny demonstrates how to make a beautiful Sparkle Quilt using yardage and charm packs (5 inch squares of precut fabric.) We used Flow by Zen Chic for Moda Fabrics. Learn how to snowball corners, nest seams, add sashing, and sew a 9 patch .
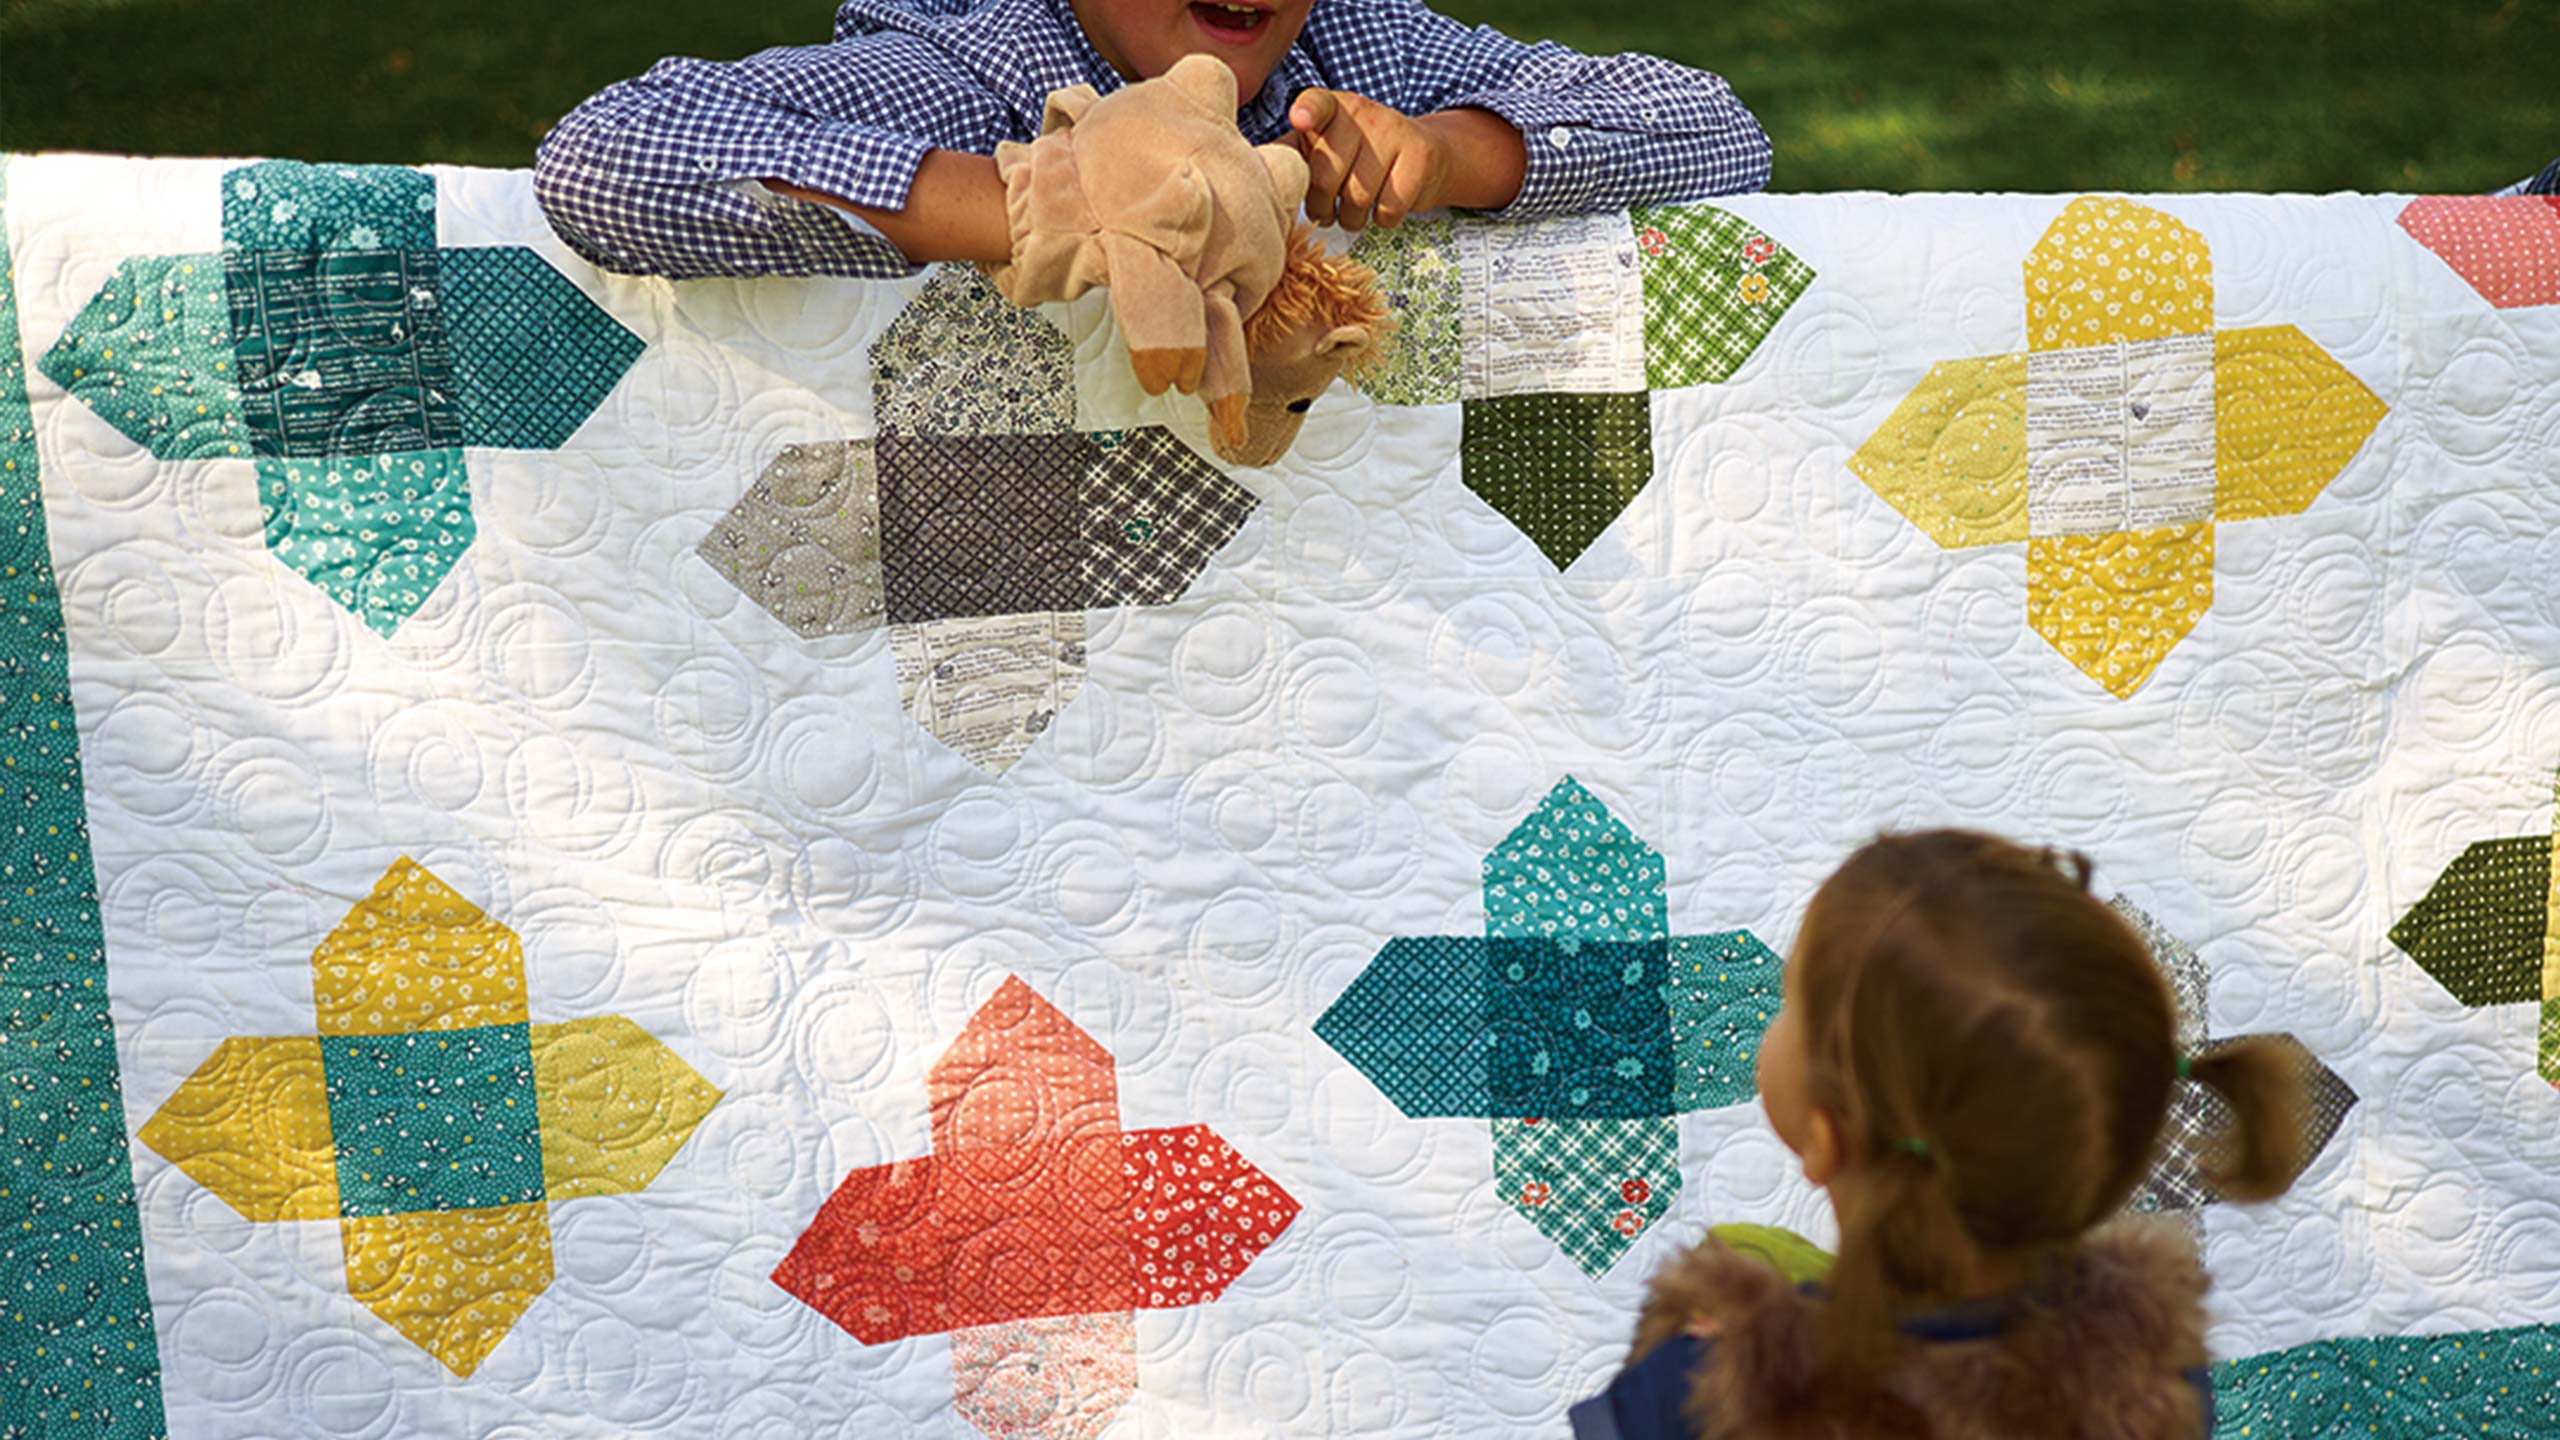
Hi everybody it’s Jenny from the MSQC. And I’ve got a great project for you today. It’s so interesting to me how you make a few little changes and a whole new pattern appears. So let’s take a look at this quilt behind me. Isn’t this fun? I mean this is just a great really fun kind of modern looking pattern. We’re calling it Sparkle because it looks like little pops of color here and there. And I just love how it all came together. So to make this quilt what you’re going to need is three packs of these five inch squares. And we’ve used Flow by Moda for Zen Chic. You’re also going to need 3 ¾ yards of background fabric and that’s your, that’s your white fabric. That’s all this fabric in here. And then you’re going to need a yard and a half for your border. We’ve put a six inch border on there that’s just really fun. Makes the whole quilt pop.
So first thing we’re going to do is we’re going to take our background fabric and we’ve got to cut some squares for this. So you’re going to cut five inch strips and then you’re going to sub cut those into five inch squares and you’re going to need 80 of those. Then we’re going to take and we’re going to cut some three inch strips. And cut three inch squares. These are going to be our snowballing squares. And so for that you’re going to need 160 of those. And you’re also going to need some pieces for our fun sashing when we set it. And you’re actually going to need 20 five by 14 inch rectangles. But we’ll cover that a little bit later. So the first thing we have to do is make our snowball block. So we’re going to take one of our squares like this. And we are going to take two of our three inch squares. And we’re going to snowball the top corners. So to snowball a corner what you’re going to do is take your little square, fold it diagonally. Make sure it hits the corners. I’ve got that one that’s kind of leaning over there. And you can iron it or you can fingerpress it like I just did or you can draw the line, either way. And when you draw the line you just lay a ruler on there and draw a line from corner to corner. And then we’re going to attach these squares to the top right and the top left corners. We have to do them one at a time. So we’re going to sew right along this edge, trim this off and iron that back and add another corner to the other side. So we’re going to go to the sewing machine and sew this on.
So now what we’re going to do is make sure your little three inch square stays lined up along the outer edge of your five inch square. And then we’re going to center our sewing machine so that it’s right on that line. And we’re just going to sew straight across to the corner. Just like that. Now a good test to see if you got a good straight line is to fold this back and it should line up pretty close on that corner. See how mine right here, see how this right here, it’s a little bit off. You can see that other piece. That won’t matter because I’ll be able to catch that in the quarter of an inch seam. But if it’s way off or you know you can’t catch it in the seam then you’re going to want to make, do that over and make sure that’s good. So now what I’m going to do is I’m going to trim this corner off right here. And I’m going to press it back, and give it a good press so that it’s just nice and flat. Because then what we’re going to do is we’re going to add our other three inch corner to the other side just like this. Alright and see how they cross over here they’re going to have a long, it’s going to cross right over. That’s exactly as it’s supposed to look like that. So now what we’re going to do is we’re going to go to the sewing machine and sew right along this line.
Alright, I’m centering it up. Take a few stitches, make sure we’re still lined up. And just go from one side to the other. Ok, so now we’re going to trim this off right here. And you can use your rotary cutter or scissors, either way. And we’re going to press this back. So your square should still be a five inch square. That should remain the same. So you’re going to this to all four of them. And I’ve done or to four squares, and I’ve done that to four right here. So there’s my four. And now I get to show you how this block goes together. This is really fun, this goes together just like a nine patch.
So we’re going to make sure that all of our snowballed corners are to the outside like this. And we’re going to put these together like this. I think I’m going to mix these over here a little bit. There we go. And then we’re going to put a center square in there. That’s color, just the same regular five inch squares because these have all remained five inches, so is this. Then we’re going to take four of the five inch squares we cut out of our background fabric. And we’re going to put those on the corners. Just like that. So now what we’re going to do is we’re going to sew three rows of three together. And we’re just going to take these rows over to the sewing machine and sew them together. The first row is right here. You can see I’m just going to lay this on here right sides together and sew a quarter of an inch down and do that to both sides. We’ll do the same thing to the middle and the same thing to the bottom. So let’s sew these together.
This is one of those blocks that’s pretty gratifying because as you, as you start sewing it together it looks like, you know it looks a lot more complicated than it is. So I’m sewing a white square to the outside of both of my little sparkle block. Alrighty, now we can put this together. But the most important, but one of the most important things on this is the pressing. So our top two rows we’re going to press to the out, our middle rows we’re going to press in. So when I say press to the out, what I mean is I’m going to press on the top here. Make sure it, that is stays nice and flat with no pleats for folds. I’m going to open this up and by some miracle they’re both pointing out. That doesn’t usually happen. Usually you have to rearrange your seams a little bit. But maybe if I do that here it will happen again. So again I’m going to press the top, flip it over and make sure my seams are going the direction that I want them to. Now on this middle one because our outside ones are going out we want this one to go in. The reason we do that is because it will help them nest better. Alright so we’ve got this nice and flat, flip it over and we’ve got to change the directions this one is going. Alright so now these two are pressed in. See how that goes in and then these go out. So that’s going to allow it to nest up and we’re going to be able to pull these in and they’re going to snug up real tight. So what we’re going to do is we’re going to put these right sides together. And right here we’re going to nest that seam. And we’re going to sew these three rows together. So let’s go to the sewing machine and do that.
Alright, I’ve got a few stitches down to anchor it and then I’m down the side. I’m making sure that I’m lined up at my intersection where my squares line up. And then we’re going to add that last row on the bottom here just like this. And it will all come together in one big block. Alrighty. So then your block should look like this. Isn’t that cute? So let’s iron that out. This is just a really quick easy fun block isn’t it? Alright so let’s make our seams go the way we want them to on the back. And we have this cute block. Now for the sashing. So let me show you about the sashing.
You’re going to take your background strips and you’re going to cut them into five inch strips and sub cut them into 14 inch. So five by 14 inch rectangle. And you’re going to sew it to one side, just like that. We’re going to put these right sides together and we’re going to sew this a quarter of an inch right down the side. Alrighty. So again all we just did was take a five by 14 inch rectangle and attach it to the bottom of our block. And that makes our whole sashing. It’s so cool how this goes together. And this is a good sashing to remember for other blocks that you want them kind of off set. So here’s what we’re doing. We’ve got this one like this. And I’ve got some blocks I’ve already sewn together here. And this next block here we’re going to, see how they’re exactly the same, we’re just going to flip it around like this. See and it off sets them.
So let me show you how this whole row goes together here because I’ve got a few more done here. Alright so these are sewn together so I’m going to go back and flip this one and flip this one so the whole thing works. Look at that. Just like that you’ve got your row and your sashing off sets them just by adding by that five by 14 inch piece on the bottom. So let’s take a look at this. We’ve got five across here and four down. The reason that makes the quilt, usually it’s longer than it is wide, but the reason it works is because we are adding a five inch piece on every single one of these blocks. So you know it makes it longer. So we’ve got five across by four down. And just by adding that piece and flipping them around every other time, it gives it that cool off set look. And then you’re just going to sew your rows together. You’re going to go ahead and just put a border right on there. We didn’t have any inner border. We just had our, our six inch border on the outside. And it just goes together so so fun and quick. And look at this back. Look how cute this is. We took on of the fabrics from the line and put it on the back. Just makes a really cute back. So this is a lot easier than you thought it was and it’s so much fun. And we hope you enjoyed this tutorial on the Sparkle quilt from the MSQC.
& Progress on Social