Star Crossed Quilt Tutorial
Jenny Doan
Star Crossed Quilt Tutorial
- 1 pack x 10" Precut Fabric Squares (Layer Cakes) - Print
- 4 yards x Background Fabric (incl. sashing)
- 1-3/4 yards x Border Fabric
- 3/4 yard x Fabric for Binding
- 8 yards x Backing Fabric (or 2¾ yds. of 108" wide)


Finish your masterpiece and let us give it the finishing touch it deserves.
Subscribe to MSQC on YouTube
Hundreds of FREE tutorials and a new one from Jenny launches every Friday.
video transcript
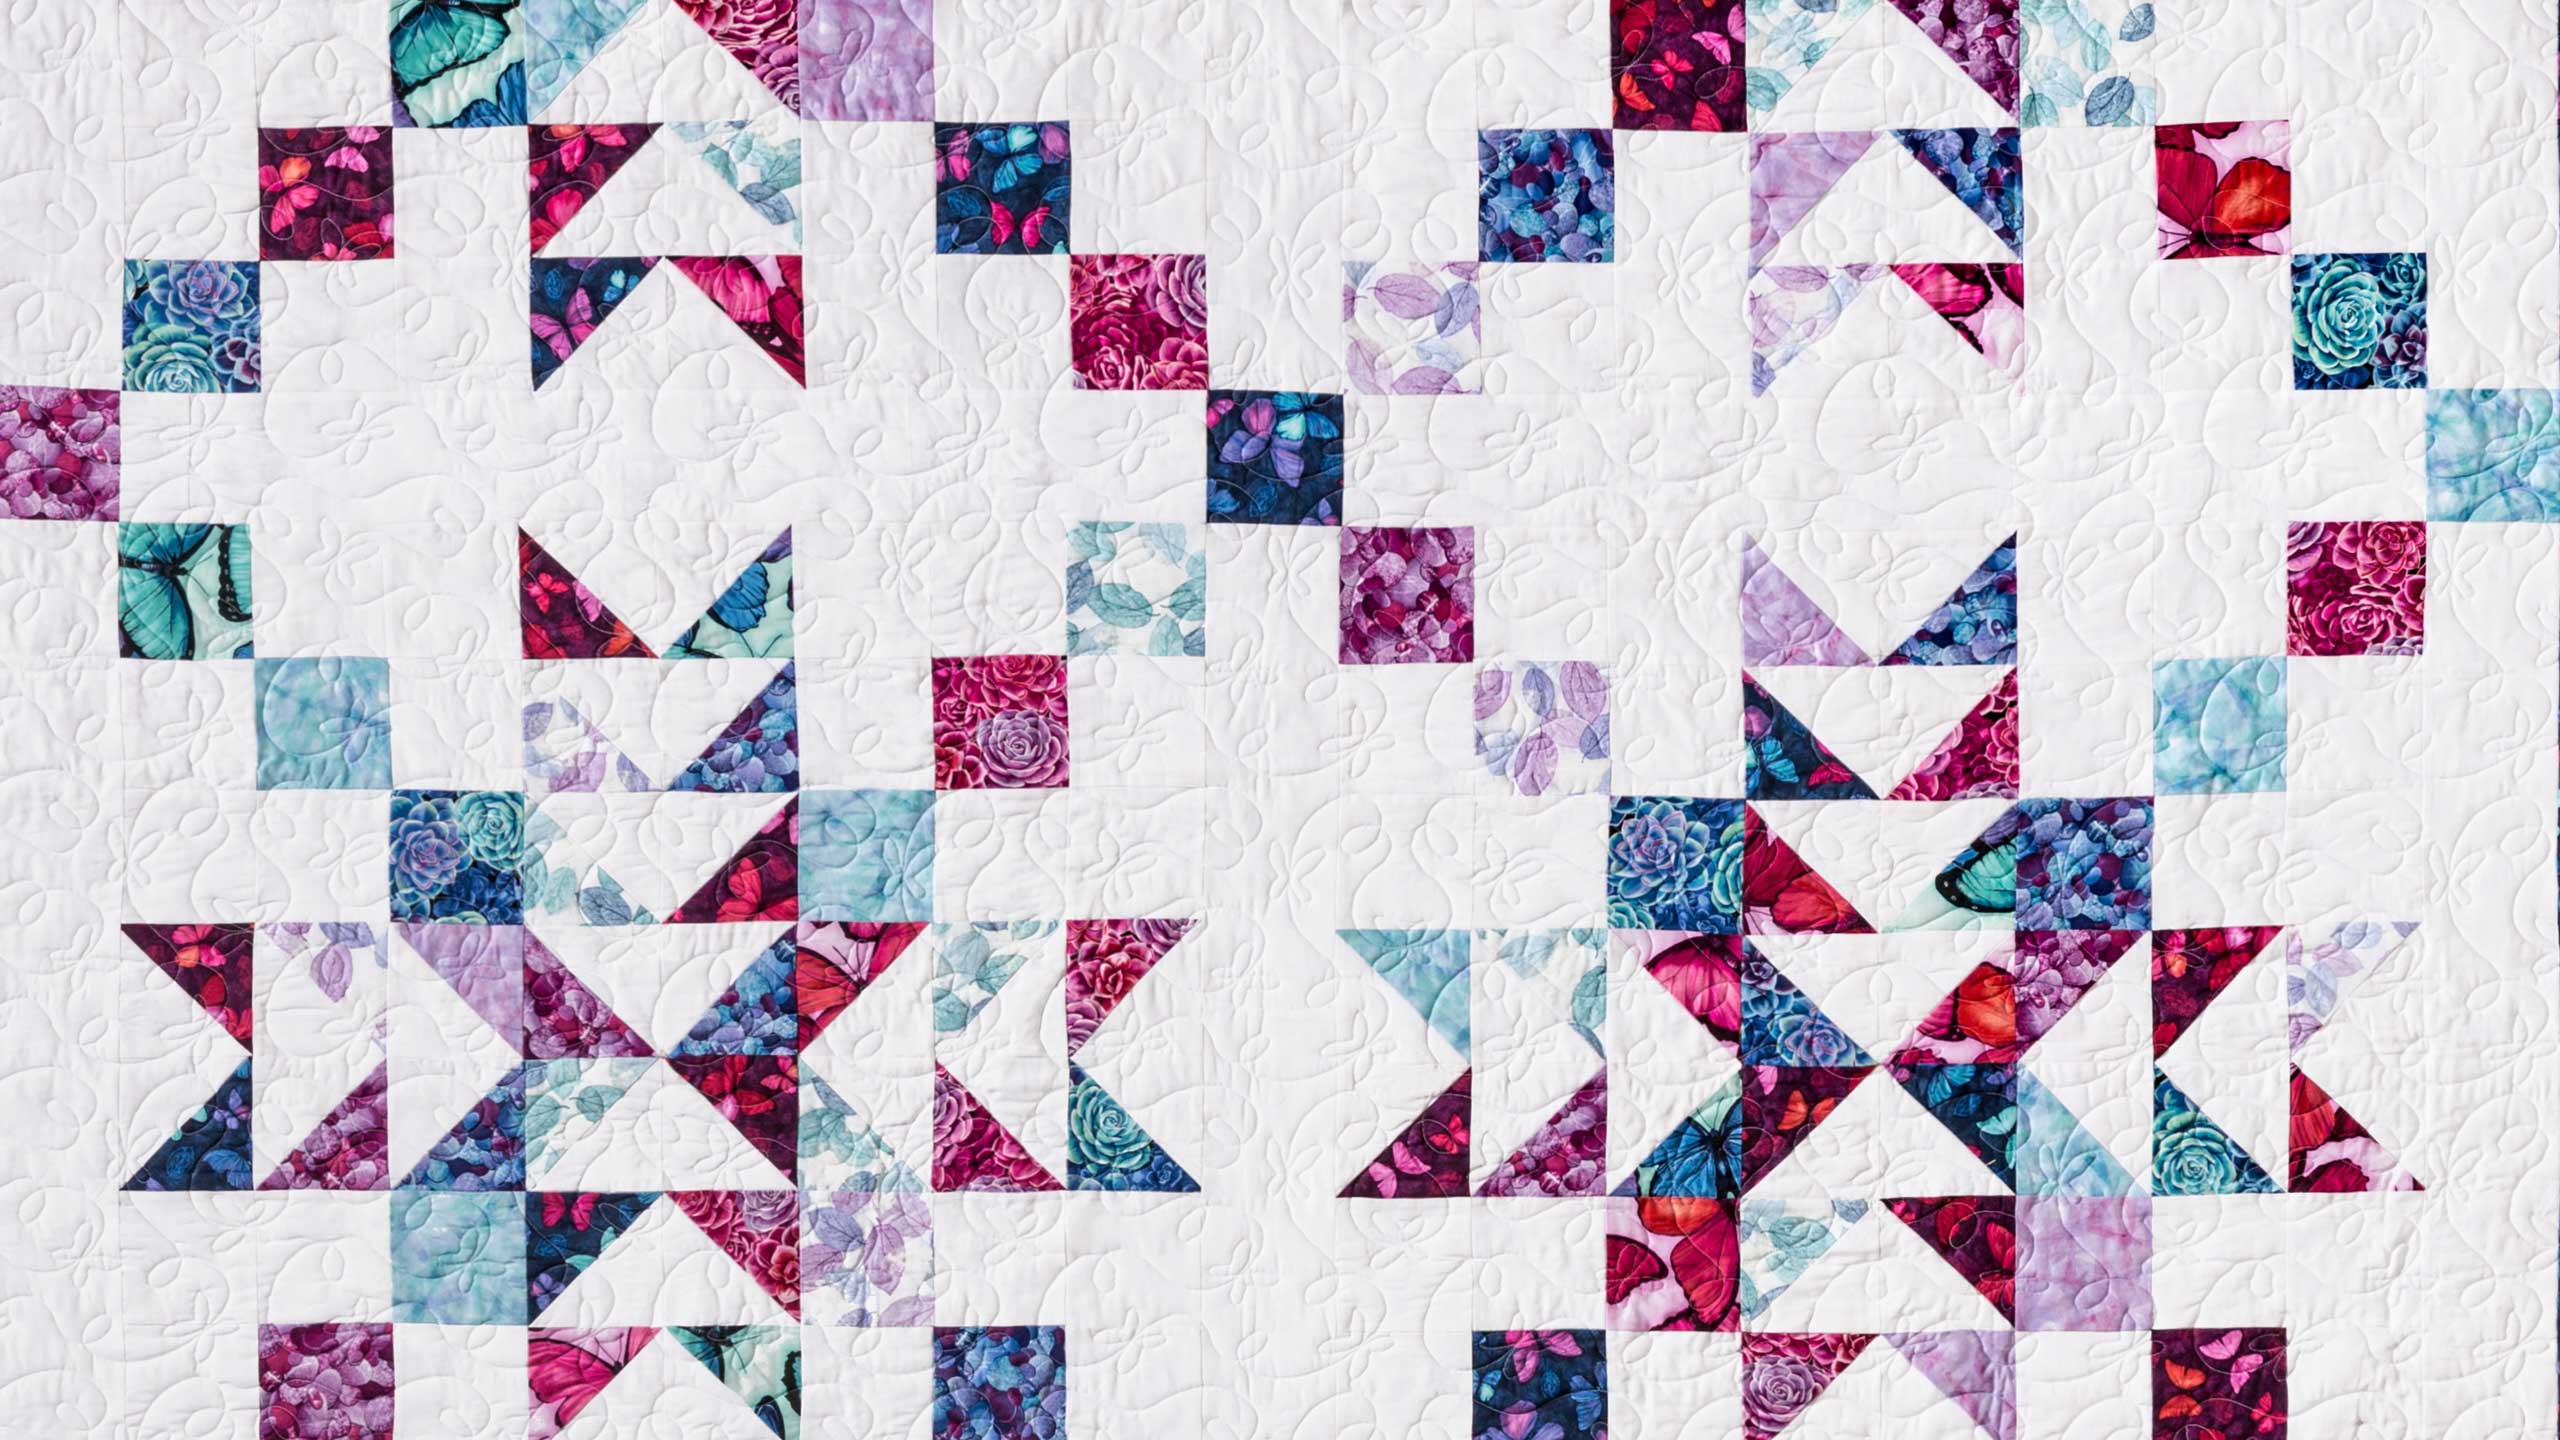
Hi everybody, it’s Jenny from the MSQC. And I’ve got a fun project for you today. So awhile ago we did an issue of Block that was all dedicated to baby quilts because we all have to make a lot of baby quilts in our, in our lives. And it’s one of the things we love. So this is a whole book of ideas. And one of the ideas was this little Starlet quilt right here. And it’s just a great little quilt. And this is what it looks like in one block right here. So this is the Starlet block that you make for your, to make your baby quilt. We had so many requests though from people who wanted to see it big. And so we decided that we would put four of these blocks together and make this big quilt right here that you see behind me. It’s just gorgeous, isn’t it?
So what you’re going to need is one packet of ten inch squares. And we have used Viva Terra by Studio E. And we’re actually going to be cutting these into five inch squares so charms would work as well. You’re going to need some background fabric, four yards. And that takes care of all the background, then this first border. You’re also going to need your outer border which is 1 ¾ yards. And this is a 6 ½ inch strip that is unfinished. For your backing, look at this a gorgeous backing. I love this. So this backing you’re going to need eight yards with a vertical seam if you use 45 inch fabric. Now if you want to use 108 it’s only going to be 2 ¾ and so you can decide. This fabric only comes 45. I wanted it on the back because it’s gorgeous so we used a big vertical seam and you’ll need eight yards for that. Because this makes a big quilt, it’s 88 by 88 so it’s a pretty big quilt. So this quilt is made from two different blocks. They’re both super simple. It’s just how we put them together that makes it look like you worked so hard. The fabric I used on this quilt is called Viva Terra by Studio E. It’s so gorgeous. I love the jewel tones. Love the butterflies. It’s just really, really fun fabric.
So let’s start first with the easiest block or the one I consider to be the easiest. And that’s a nine patch. And basically this is going to be made out of nine blocks. And I want to show it to you so you can see what we’re going for. Now this is a nine patch, not traditionally what you think about. It’s made with nine different patches. So all these patches have to be cut into 4 ½ inch squares. So when you cut your whites you’re going to cut a strip of 4 ½ and sub cut those into squares. For your charms you’re just going to have to cut them, cut a half an inch off of two sides. And I stack them up. You can see right here. I have three stacked up right here because I need three for this block. And I’m just going to take my little ruler, and it has this little half inch line right here and I’m going to line it right along the
edge. And I’m going to take that side off and I’m just going to turn this and take this side off over here. So just a tiny, tiny little bit of extra work there. And then we’re going to put this together in a nine patch. So we’re going to put two white squares and a colored square. Then the middle row is going to have white, a color and a white like this. And our bottom row will start with the color and end with two whites. So we’re basically going to sew these together in rows. We’re going to sew one, one, two, three rows and then we’re sew the rows together. So I have this one already done here. Super easy. Just straight seam sewing. And, and I’m thinking maybe you want to see me sew a row together. So we’ll just do that really quick here.
All your rows are going to be the same. You just want to lay it out to make sure you know where you’re going and then sew those rows together. So I am going to, what I generally do when I sew a quarter of an inch is I measure where my needle starts with and, where my needle comes down into the hole and measure over a quarter to make sure I have a quarter of an inch. There are lines on your sewing machine but mostly I make sure that my needle is lined up so that I can use the edge of my presser foot because that makes the most sense in my brain. Now on these nine patch blocks you just want to remember that every row you’re going to press your seams going, one row is going to go one way, the other row is going to go the other and the other row is going to go the other way. You know what I’m thinking I’m just going to go ahead and sew this whole thing up so you can see how it works. Because we might have somebody out there who is trying this for the very first time. Alright so this one the colored square gets a white on either side. Sometimes I forget that everybody doesn’t know, can’t read my mind. Alright here we go. I got asked a question recently about why I don’t backstitch or do backstitch at the beginning of a row. And I don’t usually because all rows are enclosed in another row so you don’t have to backstitch. Somebody asked me, one day I backstitched on a square and somebody asked me why I did that because I don’t usually do that. And actually it’s just a habit, it’s just a habit because I used to be a clothing sewer. And so sometimes I forget and I just backstitch. It doesn’t hurt a thing. It doesn’t make any difference in the world. It was just a crazy old habit. Alright so let’s iron these. Move this star block down here. I’ve got so much stuff spread around over here. I really am a messy creator. You know if you ever get to come a see my studio. The only reason it’s tidy at all is because I have an assistant who helps me. And she kind of picks up after me. When I asked her if she was ok with cleaning up after me she said she had a two year old so it worked. And that is exactly how I feel sometimes. Can somebody just clean up after me? I’m a messy creator. Alright. So now we’re going to put this together, this way, this way and this way.
Alright so look at this block over here and you’ll see it’s exactly opposite. Does it matter? No because you can just flip the block, rotate it and it’s going to be the same. So we’re just going to go ahead and sew it together. You just want to make sure that as you sew them that one of your blocks, that your two top and bottom blocks are on opposite corners of that middle. And then we can turn it any direction that we want. And again I’m watching my seams so that they nest which means one seam is going one direction and one’s going the other. I’m caught right here on my foot. There we go. And then we’ll add this top one. And again we just have to make sure that this goes the opposite so it runs in a line. Then we’re going to sew a quarter of an inch right down the side. Make sure your seams nest up. So I always get started a few inches. It gives me a little anchoring. And then I make those other seams go the way I want to. And I generally sew to that point and then I lock up my next seam. And I can feel if there’s any fabric in between. Now if you have any trouble getting those seams to line up, you can pin them. Alrighty, let’s press this open. And this is our first block. And I’ll show you where it goes in the quilt. So you can see right here, these corners right here, this is this block. It’s interesting to see. See look where this goes right here. So it’s always a little interesting to me when you see a whole quilt together and you don’t realize where that block is going to fit. So it’s going to go on all four corners and we’re just going to turn them so they go in like this. So for each block you need four of these big blocks, that’s for each block. Alright.
So now we have these together, and I have a little pile of them so I can show you how to lay it out later. And then the next block is all made up of half square triangles. So let me show you how we did that. What we did and again our blocks are going to end up 4 ½. So for this you leave the five inch square whole. And you put a five inch square background square on it. And you have a drawn line side to side. Now we’re going to sew a quarter of an inch on either side of that line. And when we cut these apart they’ll be 4 ½. So we’re going to go and just make sure again that you know where you quarter of an inch is. And if you line it up with your needle, if you line your needle up. So some machines, I guess I better explain this. Some machines have a little button where you can move your needle back and forth. And that’s what I do. I use my, I move my needle so that my needle lines up with the edge of my foot so I always, no matter what foot it is, I can use this edge. Now there are quarter of an inch feet out there and all kinds of things to help you. And that’s great. But I just make mine line up with the edge of my presser foot and that works for me. Alright. So now we’ve sewn on either side of this line. And I’m going to go ahead and take my little ruler, lay it on here corner to corner and make that cut. And then we’re going to press these open. Alright I’m going to go ahead and set my seams. Setting the seams just relaxes the thread. I don’t know why but it really helps it lay nicer.
Alright so now we have our two flying geese. Now let’s take a look at our block and see how these are going to go because this is our big block right here. These are our corner blocks. And we’re going to make this block right here which comes on all four sides right here like this, see? And so these are just flying geese but they’re sewn with the white sides together just like this. So we’re going to take two of these and I’m going to mix these up. I should have another here that has a single. And we’re going to put these two colors together like this. So we are going, we are sewing the white fabrics together, laying them right on top of each other and sewing a quarter of an inch down the side. Alright now we’re going to press these open. And it’s going to give us a unit that looks just like this. Just like this. So what we’re going to do is we’re going to sew three of those together and make this unit right here. We’re going to make four of those. So we have them right here, one, two, three, four. We’ve done that four times. Then our little center block, the way it comes together is this block right here.
So the center block is made like this so basically it’s the same two blocks, our same two half square triangles right here like this. And we’re putting them together like this. And that’s our little center block, our one little center block. Exactly the same as the flying geese just put together like this. So let me show you how this thing assembles. So we’re going to have one big block right here. And you’ll notice on our block out here our colors go from out to in, ok? Right here out to in. Here this is actually, I touched this here but this is the sashing row. So it goes from out to in, out to in on all four sides. So we’re going to put this like this. And we’re going to put one of these flying geese units right in the middle. And our flying geese units are all going to run toward the center. So see how they come this way toward the center, ok? Now this is one row and then our middle row is going to be this one that’s right here like this. And then we’re going to put two more of our flying geese units in this way just like that. Got that row. We’re going to push it up a little bit and then our bottom row down here does the same thing where we’re going to have this one going in and this one going in over here. And then our last flying geese unit right here. I have so many pieces. Alright here’s where that one is, just like that. And that makes our block. So it’s just this easy nine patch, the little half square triangles flying geese blocks and this makes our block. Then we put them together with a giant sashing.
So here’s our big, our big piece of sashing right here along the edges. Look how big that is. So measure the size of your block, this is the size of your sashing. And we’re adding another 4 ½ inch corner in our block of solid. So as the block comes out here see how the sashing makes it look like this one now has four because we put our sashing block in. And our cornerstone. The cornerstone and the sashing are both 4 ½ inches wide. So this is going to have to be 4 ½ inches square. You just put a big one on there and we’ve got four big blocks. And it just makes this amazing quilt. I think it looks awesome. So our little quilt is called Starlet. So we’re calling this one Star Crossed. And we hope you enjoyed this tutorial from the MSQC.
& Progress on Social