
Sew This Soft Cuddle® Heart Pillow
by Liz Gubernatis
If you’ve ever stopped to touch the softest, silky-smooth Cuddle® Luxe fabrics, you know how comforting and sweet a pillow can be. Thanks to Shannon Fabrics, we have a heart-shaped pillow tutorial to share with you - and it’s easier than you might imagine to stitch together. We’ve got all the tips and tricks to make this project beautiful and oh-so-snuggleable!
Project Size: Approximately 16” x 20”
Supplies Needed
Suggested Notions
Working with Cuddle® to make these super soft, stuffed pillows is easier with a few extra tools. We recommend these:
Felt tip marker or ballpoint pen
Rotary cutter and mat
Craft knife
Fabric clips
Walking foot
Before We Begin - some Cuddle® Basics
These are the top ten tips for working with Cuddle® minky fabrics. Unless indicated otherwise, we’re using these tips to construct this heart pillow. Note the seam allowance, pinning and cutting hints, in particular, and be sure to lengthen your stitch and use polyester thread in top and bobbin. Here are the tips:
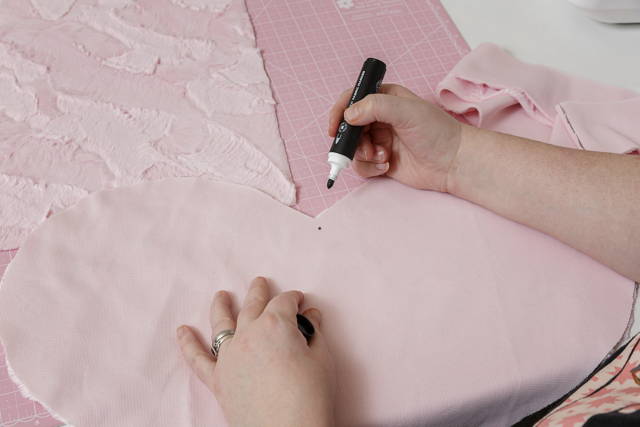
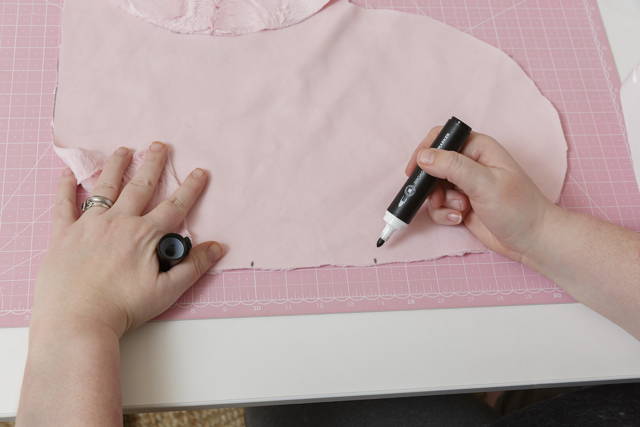
1. Mark measurements on the reverse side of fabric with a felt tip marker or ballpoint pen.
2. Cut with a rotary cutter, craft knife, or micro-serrated scissors.
3. To manage your “confetti'' just shake cut pieces or put in a no-heat dryer with a damp washcloth for a few minutes to remove loose fibers.
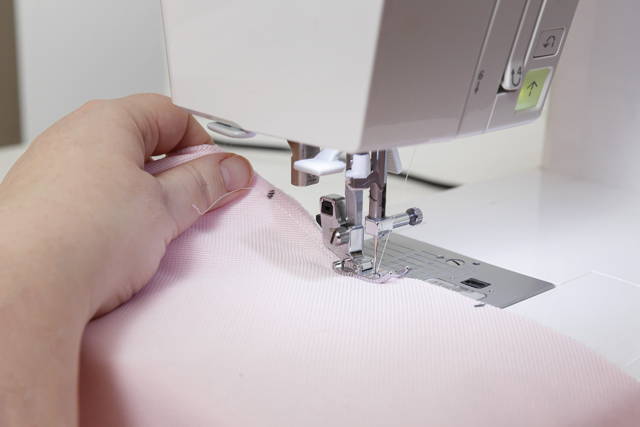
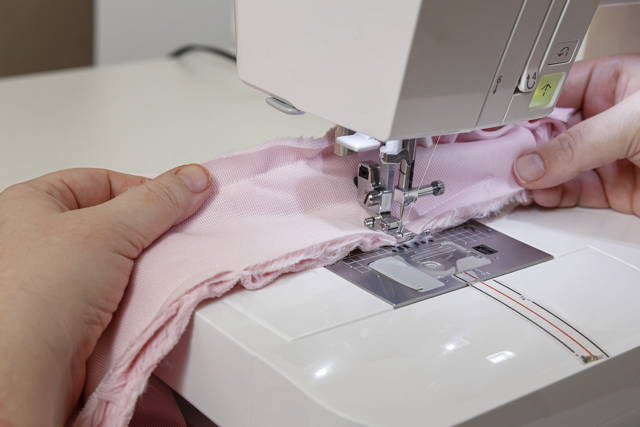
4. Sew with polyester thread in the top and the bobbin.
5. Reduce presser foot pressure when sewing multiple layers. (*For this project, two layers shouldn’t need any adjustments, but it’s a good rule of thumb.)
6. Increase stitch length to 3–4 mm.
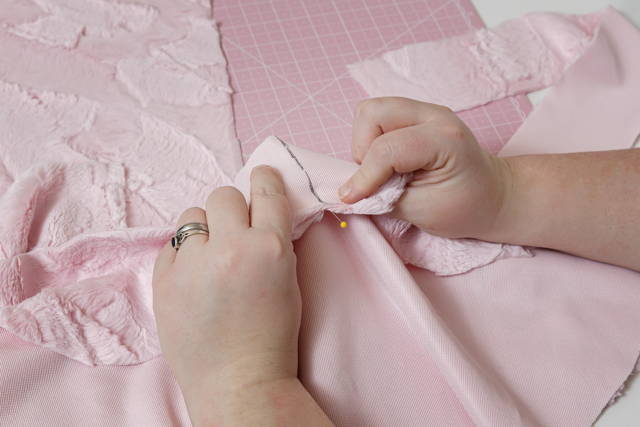
7. Double pin by using 2 rows of pins— the first row every 1½" along the seam line and a second row 1" to the left and parallel to the cut edge.
8. Backstitch at beginning and end of seams.
9. Seam allowances are ½".
10. Use an even-feed or walking foot, if possible. It makes a difference!
Project Instructions
Cut
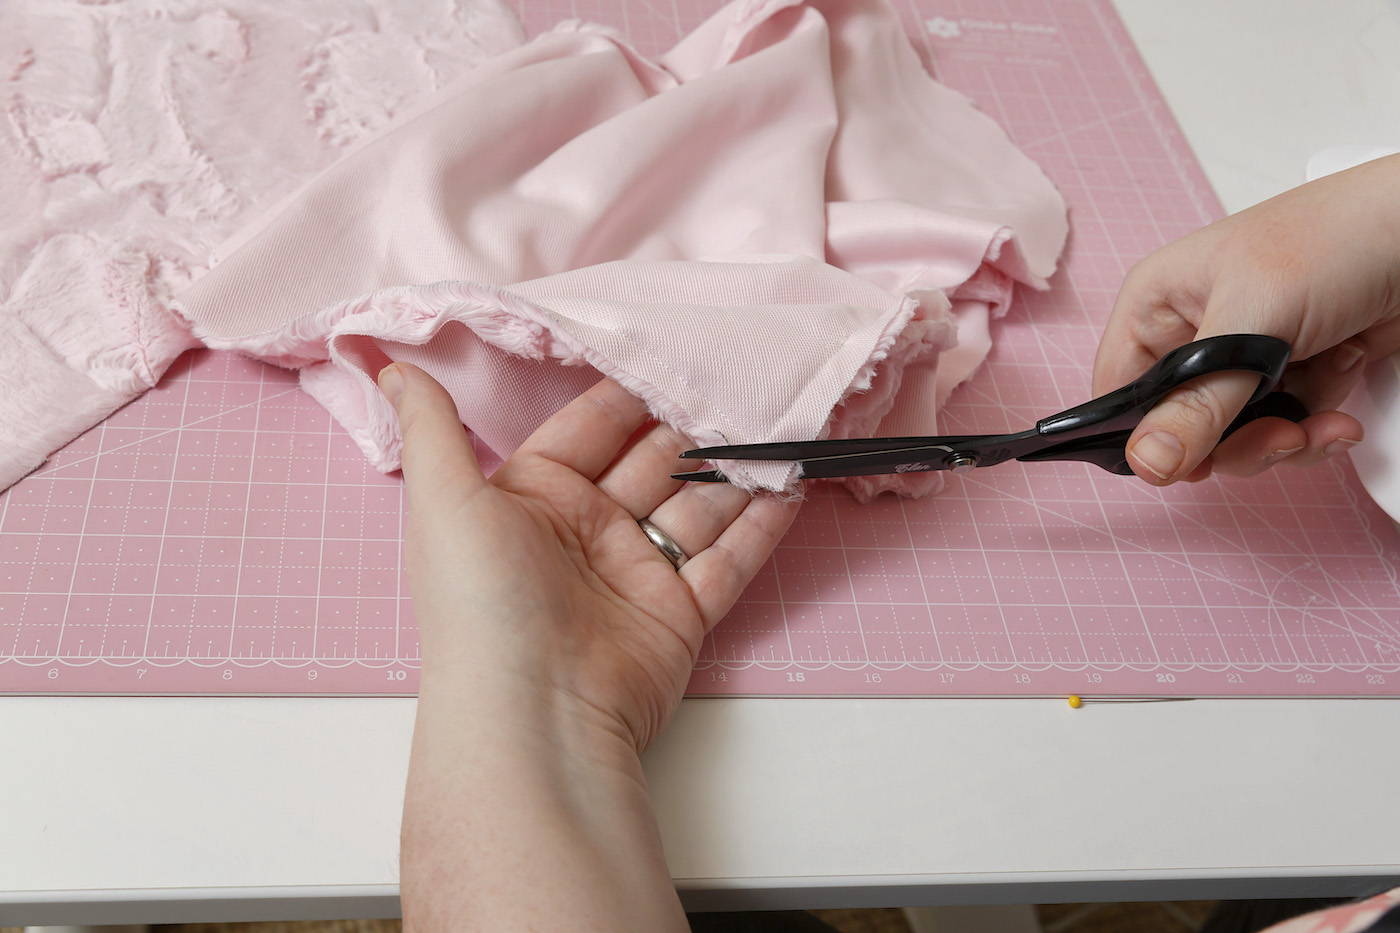
Step 1
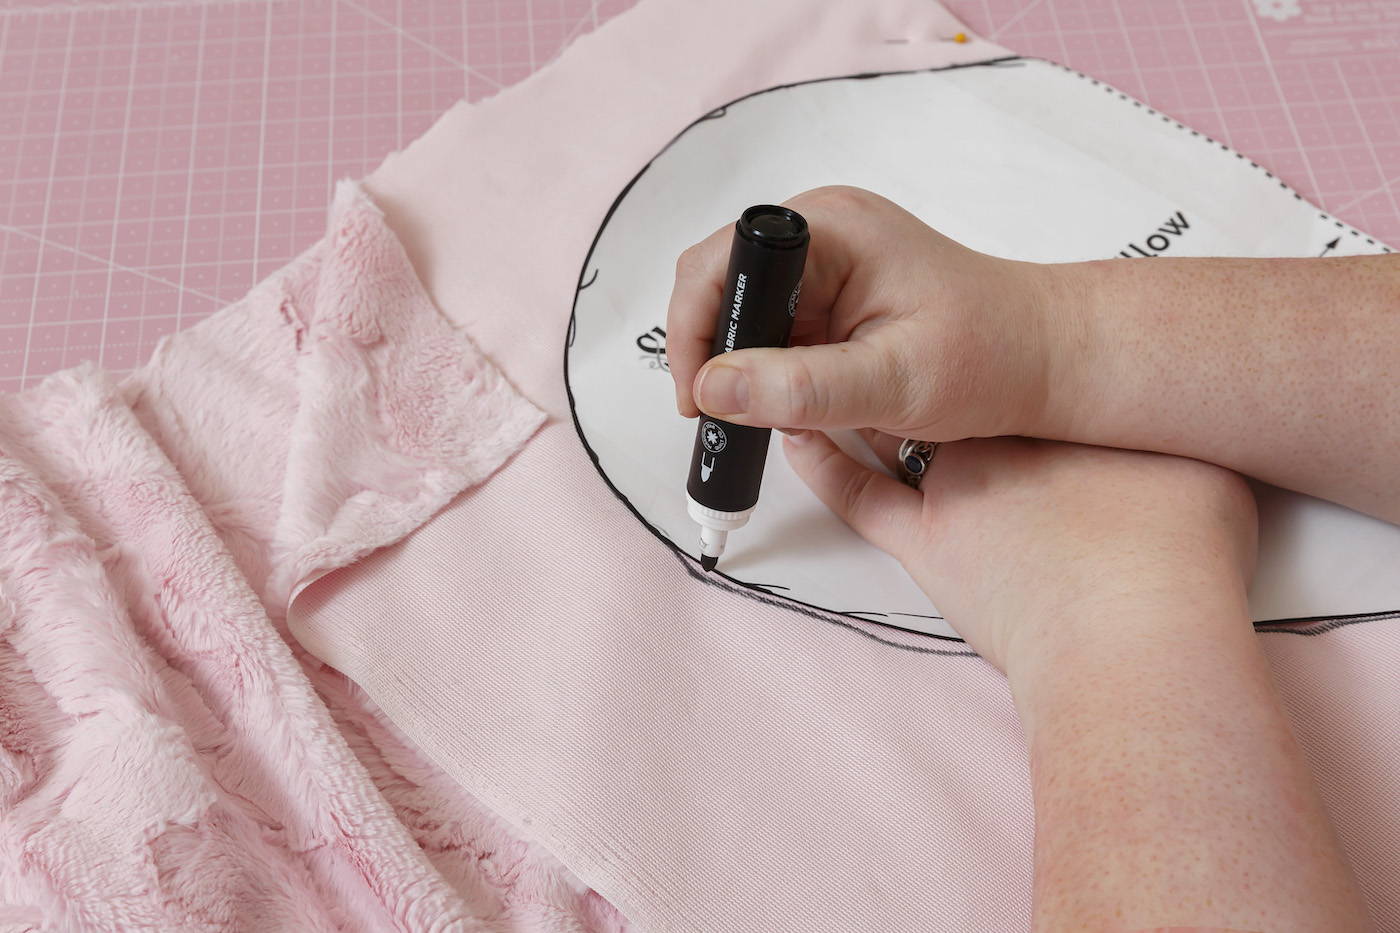
Trace 2 of the template on the wrong side of the Cuddle®.
Note: Have the nap run down from the top.
Step 2
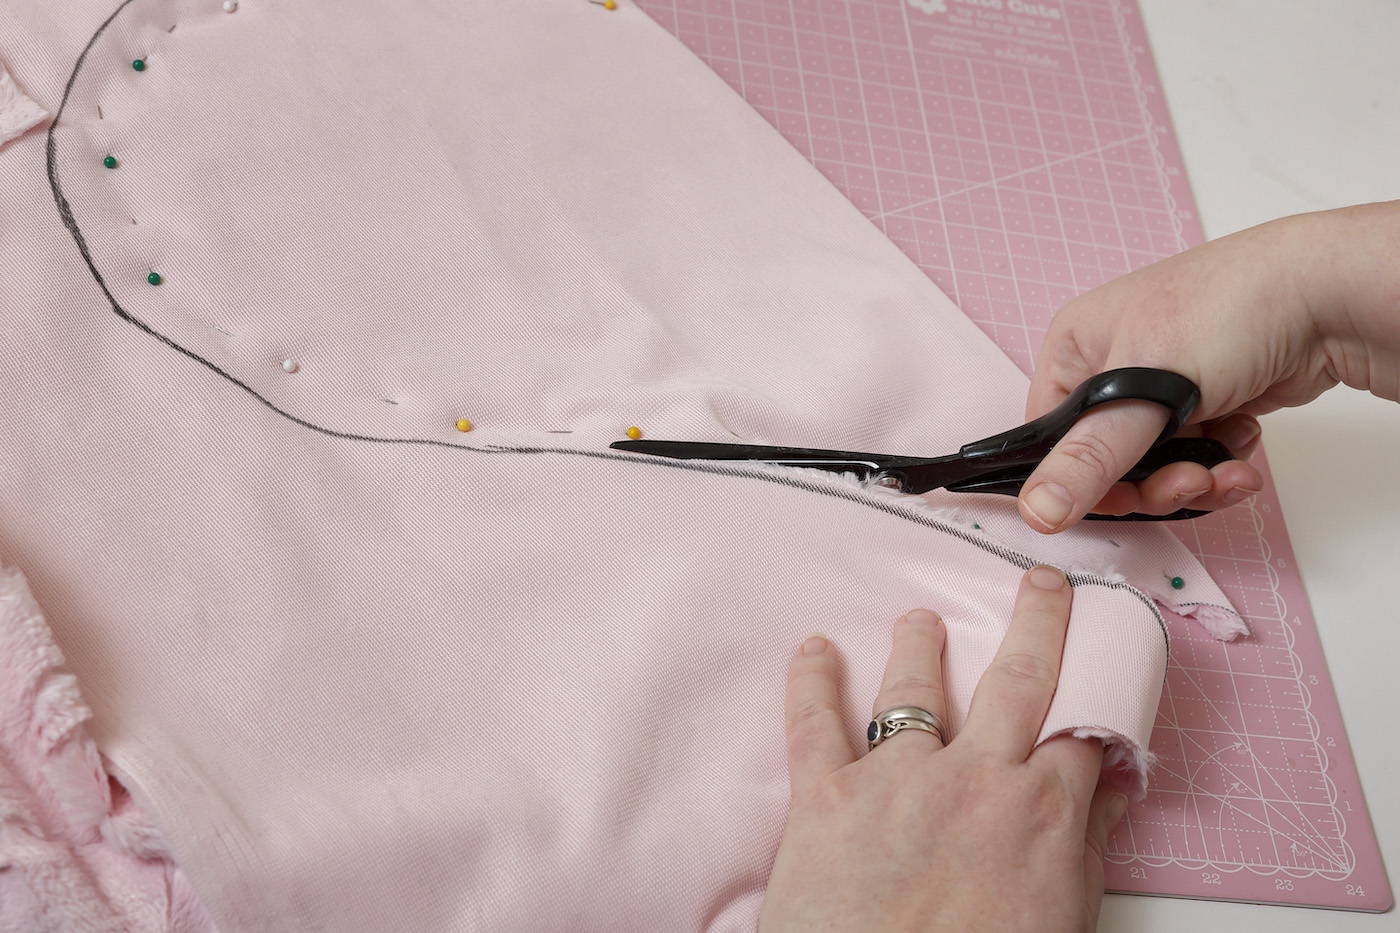
Cut out the Heart Front and Back.
Step 3
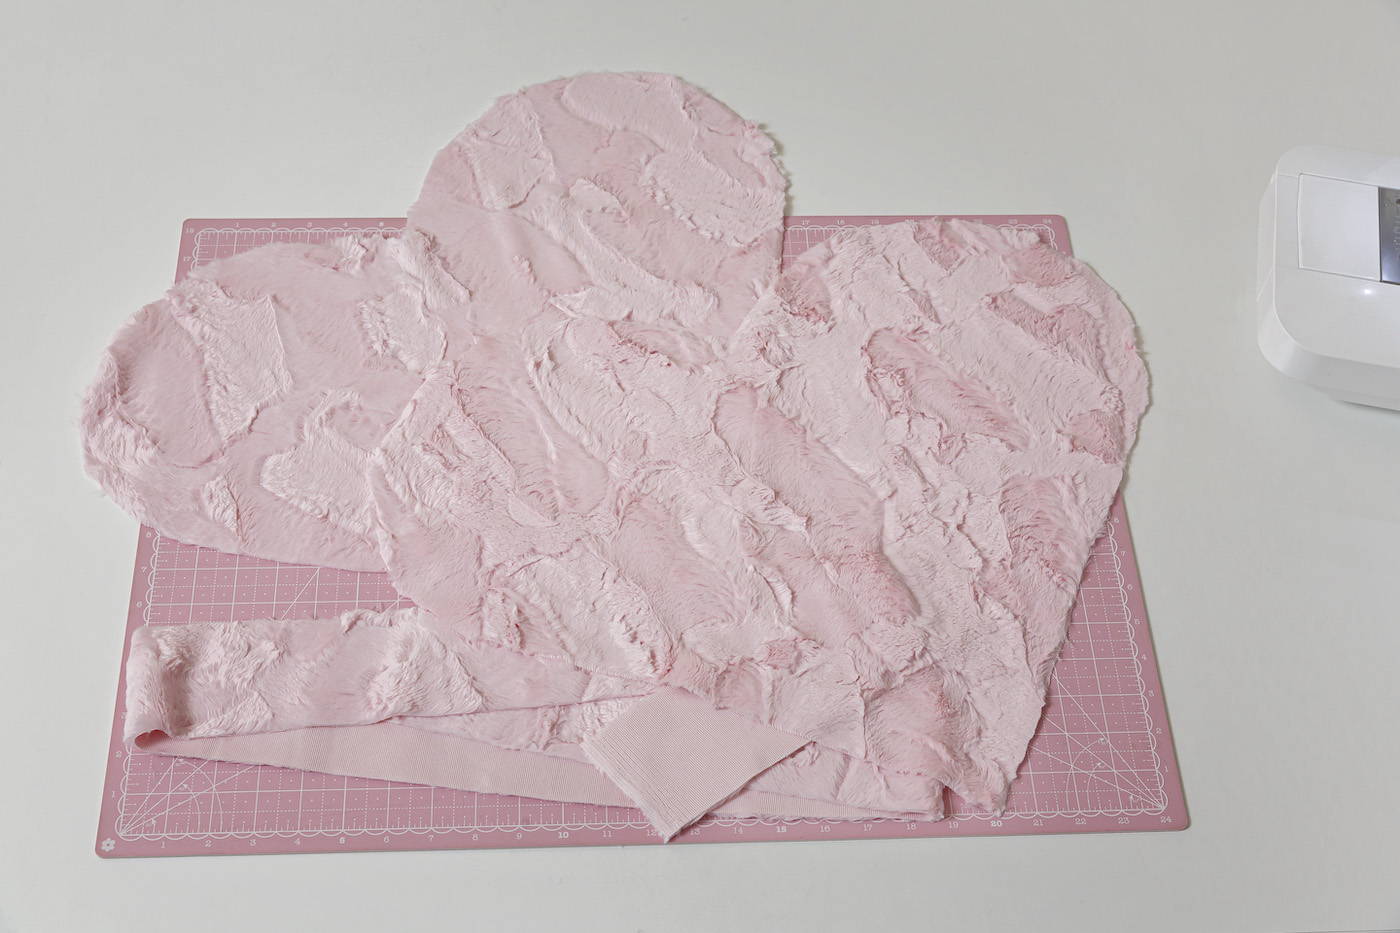
Cut 1 (3" x wof*) strip for Band.
Sew
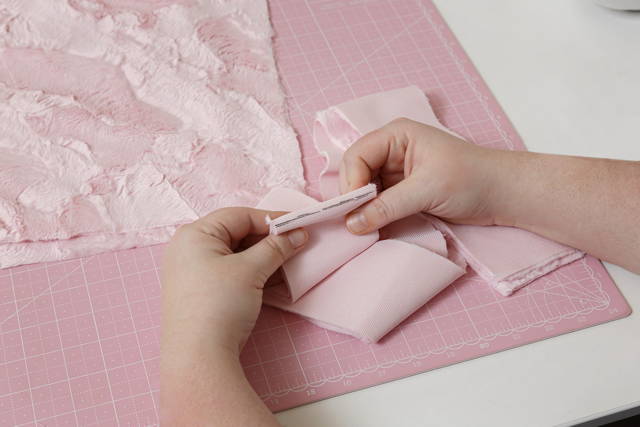
Step 1
Fold the Band in half. Mark the fold.
Step 2
On the wrong side of the Front, make a mark ½" in from the top heart point to guide placement of the Band.
Step 3
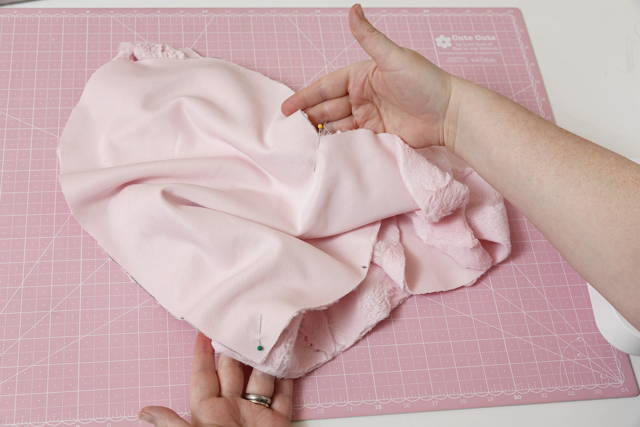
With nap going away from the Front and right sides together, pin the center mark of the Band to the top mark on the Front.
Step 4
Pin from the top indent around the left curve until 5" from the bottom point.
Step 5
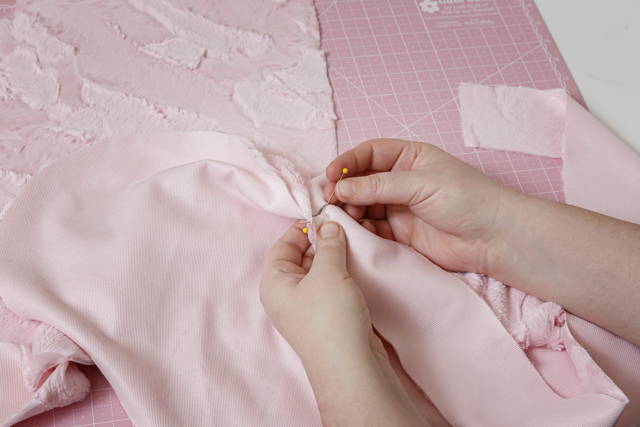
Next, pin from the top point to 2" past the bottom point.
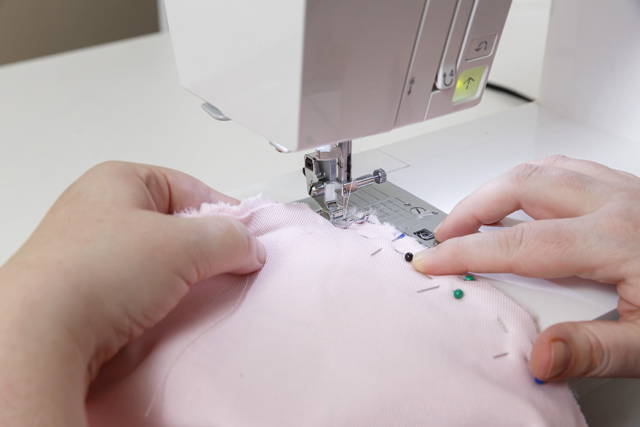
Step 6
Sew slowly around the Heart, leaving the last few inches open.
Note: Pivot with the needle down at the indent and bottom point.
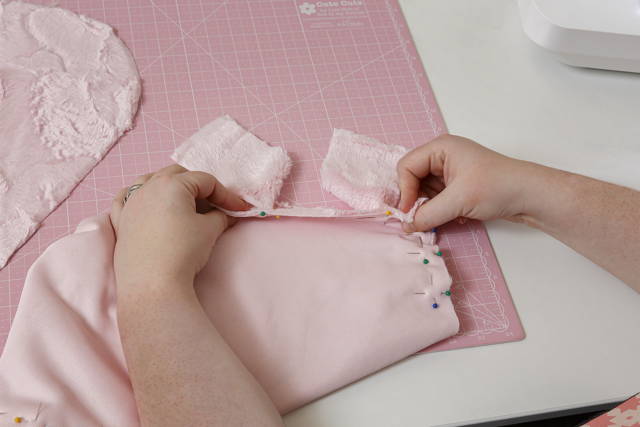
Step 7
Pin the last inches of the Band to meet. Mark the ends at that point. Sew the Band with a straight seam.
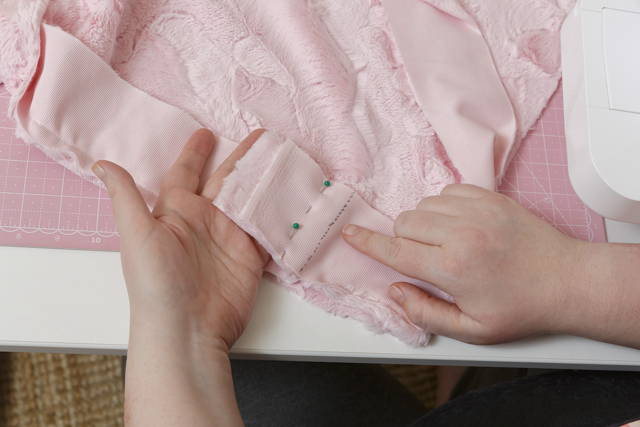

Step 8
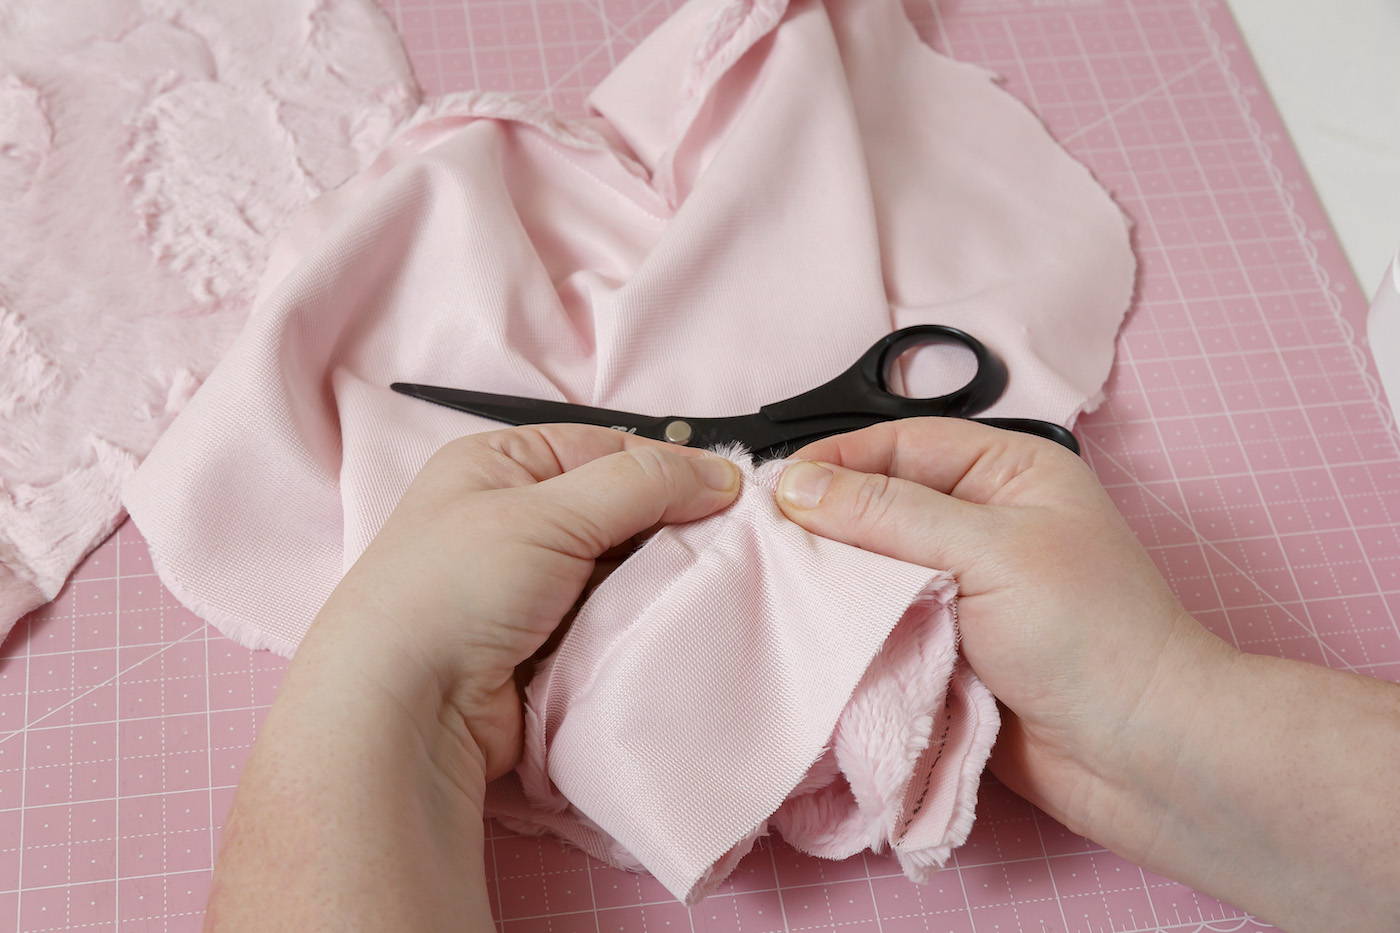
After checking that the band fits smoothly in the remaining space, trim the seam allowance.
Step 9
Sew the final section of Band to the Heart Front.
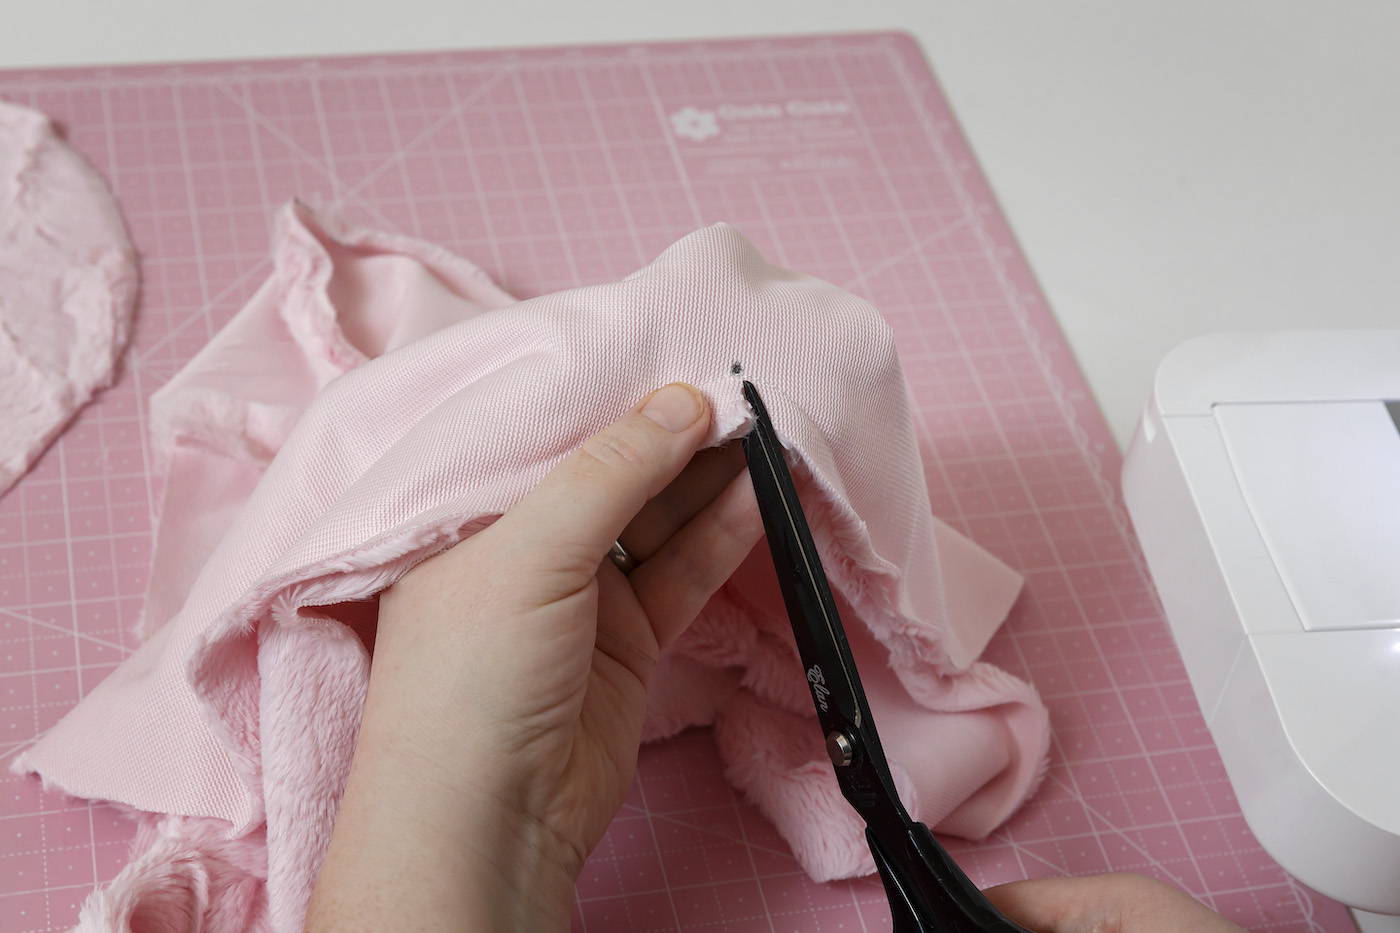
Tip: Cut a small notch at the heart point to give the seam room to relax. At the top indent, make a small snip.
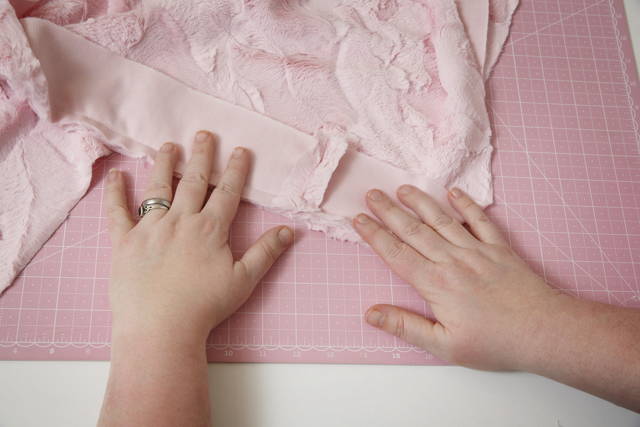
Step 10
On the wrong side of the Back, mark a 4" gap for turning.
Step 11
Staystitch between the marks.
Note: Staystitch a matching 4" gap on the Band also. Staystitching means sewing a line of straight stitches inside the eventual seam which will prevent stretching when we go to turn the pillow so that our heart doesn’t bulge when we go to sew the final opening closed.
Step 12
With the nap going in the same direction as the Front, pin the Band to the Back.
Note: To prevent the Band from stretching, first pin the center mark of the Band to the top indent of the Back. Next pin the bottom point of the Heart Back. Once these points are in place, fill in the spaces.
Step 13
Sew Band to the Back, leaving the 4" gap open. Pivot at marked points to create an L-Pivot.
Note: The L-pivot secures the seam ends when the pillow is turned right side out and helps the seam allowance turn in for hand sewing.
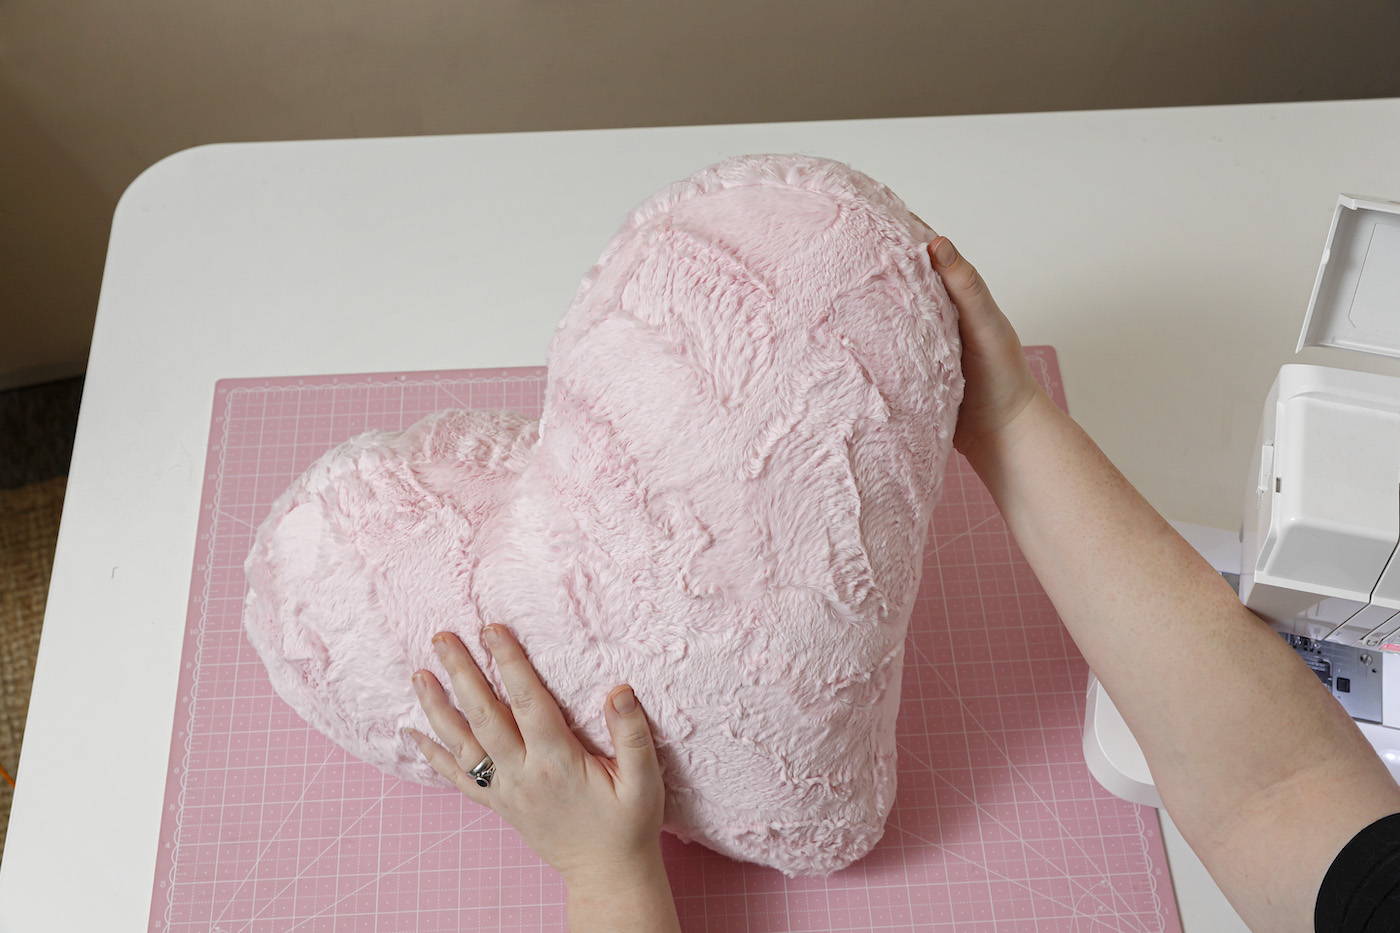
Step 14
Turn the pillow right side out. Stuff to desired fullness.
Note: The L-pivot secures the seam ends when the pillow is turned right side out and helps the seam allowance turn in for hand sewing.
Step 15
Pin the turning gap closed. Hand sew using a ladder stitch.
Ladder Stitch: Using polyester thread and hand-sewing needle, catch one side of the opening, then the other. Tighten every few stitches.
Now all that’s left is to snuggle into your new Cuddle® pillow. SEW much to love! Which colors, prints, and snuggly Cuddle® will you choose? Check out all the options at Missouri Star and show us YOUR Cuddle® Heart Pillow. #msqcshowandtell
To see a video tutorial from Shannon Fabrics, which includes adding a “Conversation Heart” applique to this project, visit their website. Thank you Shannon Fabrics for sharing this darling pattern!