Card Trick Quilt Tutorial
Jenny Doan
Card Trick Quilt Tutorial
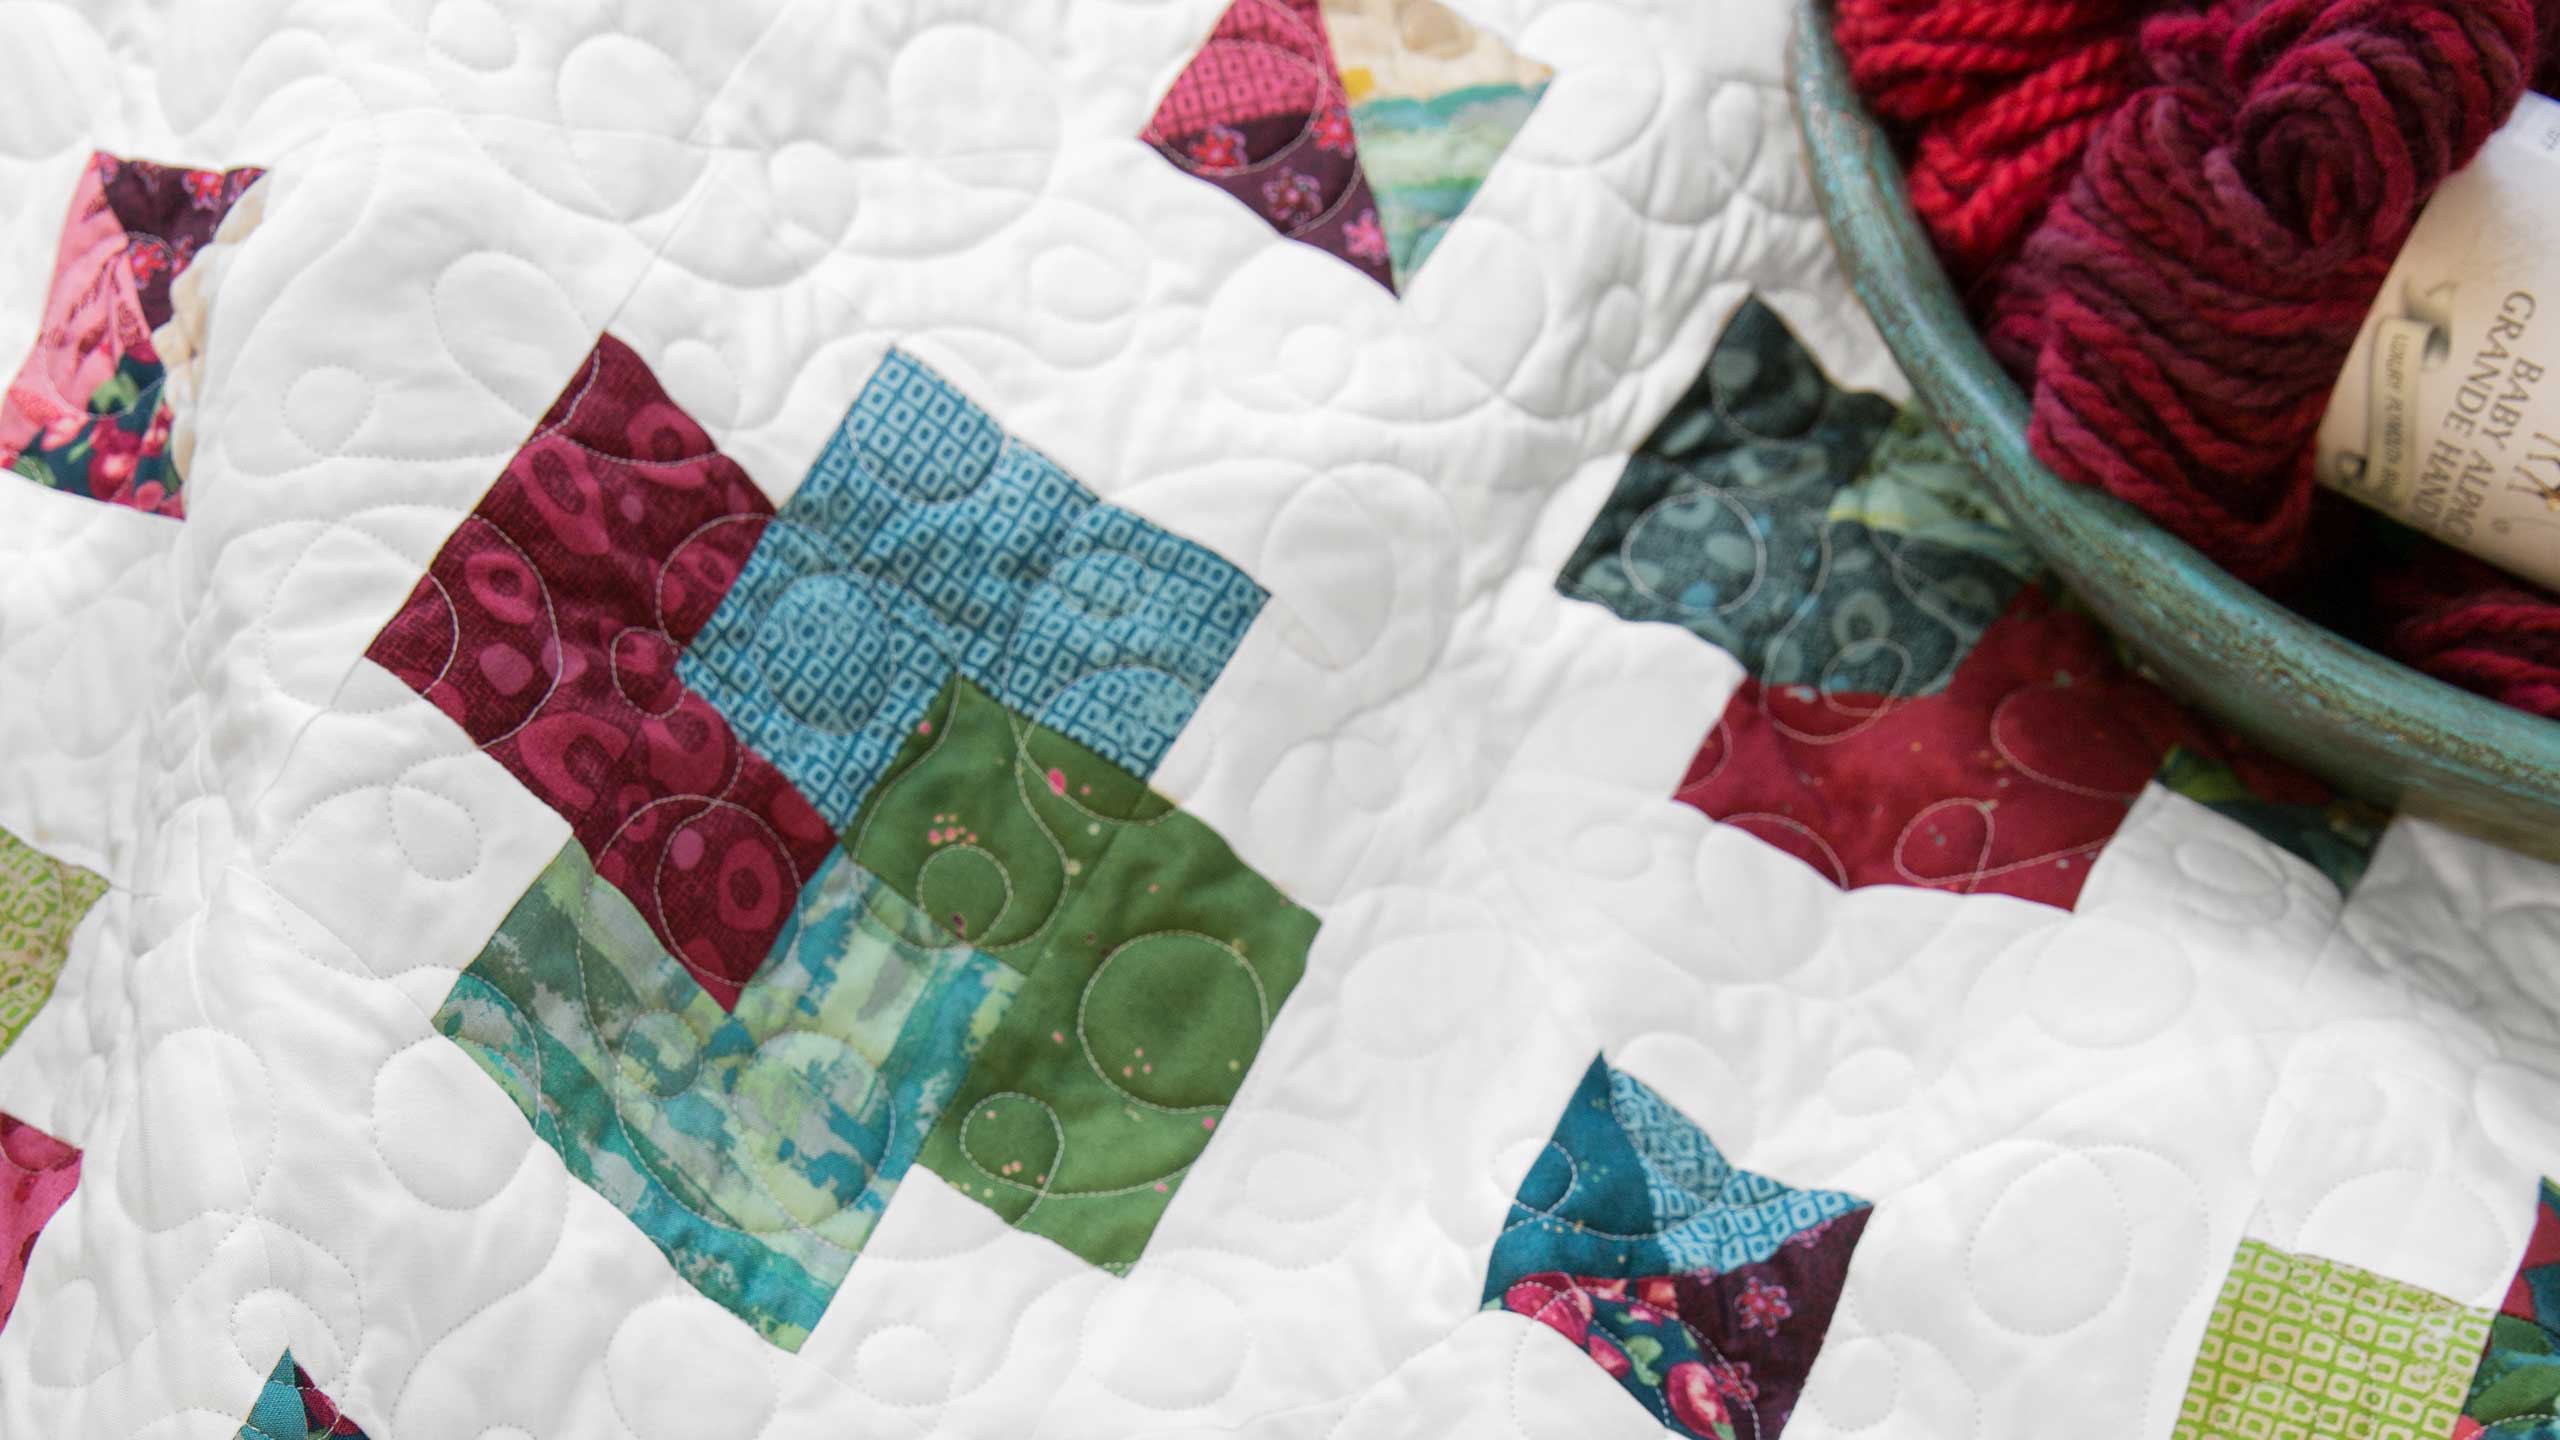
Jenny demonstrates an easy way to sew a difficult old fashioned block, the card trick. She used a "Twilight Tones" jelly roll by Nancy Rink for Marcus Fabrics.
**** NOTE- Jenny misspoke on the tutorial. Rather than cutting ALL of the print strips into (6) 4 1/2" rectangles and (6) 2 1/2" squares, the directions say to cut 28 print strips into those increments and to cut each of 11 print strips into (16) 2 1/2" squares. That way there are the correct amount of 2 1/2" squares for snowballing the corners and for making the blocks.
- 1 roll x 2.5" Strips (Jelly Rolls) - Print
- 4¾ yards x Background Fabric
- 1¾ yards x Outer Border Fabric
- ¾ yard x Backing Fabric (or 2¾ yds. - 108" wide)


Finish your masterpiece and let us give it the finishing touch it deserves.
Subscribe to MSQC on YouTube
Hundreds of FREE tutorials and a new one from Jenny launches every Friday.
video transcript
Hi everybody, it’s Jenny from the MSQC. And I have a really fun project for you today. I’m really excited to show you this because people have been asking me for a long time, is there an easy way to do the Card Trick block? This is an old fashioned block called the Card Trick block and I think we’ve come up with it. So let’s take a look at this quilt behind me. Isn’t this gorgeous? It’s just so pretty. We’ve added a little bit of extra flare with this secondary block right here. And I just love it. I can’t wait to show you. So to make this make this quilt what you’re going to need is one roll of 2 ½ strips. And we have used Twilight Tones by Nancy Ring for Marcus Fabrics. And you’re also going to need some background fabric. This is white fabric here. And for that you’re going to need 4 yards. And then your outer border here, this is 1 ¾ yards and it’s a little five inch border. For your backing we used 108 backing and we used 2 ¾ yards. And you can see it’s just a pretty part of the fabric line that we’ve used back here. Now this makes a really big quilt because of the amount of background fabric and the strip set, it makes a quilt that is 83 by 94. So it’s a pretty good size quilt. And I love a big quilt. I love a bed quilt. So let me show you how to do this.
The first thing we’re going to do is we’re going to get our strips. And I have some strips here. And these are obviously have already been cut on. But from each strip you’re going to want to cut six 4 ½ inch blocks and six 2 ½ inch blocks. Now you’re going to get out of each strip, you’re actually going to get six blocks. But it’s actually a quarter of the block. So this is the block we’re talking about here. Let me get this one right here. And so you have your 4 ½ inch piece here and your 2 ½ inch piece. And you need four of those to make one block. So, so again out of each strip we’re going to cut four, I mean sorry, six 4 ½ inch pieces. And six 2 ½ inch pieces. And I’m going to just match up some of these and cut one set so I can show you how to make one block. And actually I’m going to get enough for two because these are all folded in half. But that’s alright. Alright so here we go. We’re counting, one, two, three, 4 ½. And we’re going to cut right here. And I’m going to set those aside and then we’re going to cut one set of 2 ½. And this is just for me to make this block to show you. You’ll want to go ahead and cut all your strips. Alright I’m going to set these over here. Now you want to match every strip, every 4 ½ inch rectangle with a 2 ½ inch square. You want to keep those together so that when you are ready to put your quilt together you don’t have to go hunting for your pieces. So I’m going to put those together, one of these together like this and then we’ve got this one over here. Alright, now normally I would just go through my whole pile and just make that happen. I actually think I’m going to look for a green one over here and see if I can find a nice green block. Instead of three blues I’ll have a little bit more color in here. Alrighty, there we go. Alright so I’m going to pull that one and I’m going to have these four right here.
Alright now the first thing we’re going to do is we’re going to make a four patch. So you’re going to take your four squares, your four 2 ½ inch squares. You’re going to decide how you want them. And I’m going to mix mine up like this. And we’re going to sew those together. So let’s go to the sewing machine and do that. And I’m just, you just lay them right sides together and sew a quarter of an inch down the side. And I’m going to grab these other two, fold them over and sew the quarter of an inch. Now I’m going to open these up, leave them connected, open them up and just lay them on top of each other. And make my middles match. Make one seam go one direction and one seam go the other. Alright, now we’re going to press this open. You want your center to be pretty good because this is one of those blocks that’s an illusion block. And so, you know, what it ends up looking like is a little different than what it is. Now what you’re going to do is you’re going to take two of your outer pieces and you’re going to match them up here. So I’m putting the red by here and the green over here. Just like that. Alright? And we’re going to sew those onto our square. And I’m just going to line this up here, sew it down the side. And one more over here. Alrighty. Now I’m going to press these open. And I’m just going to roll them back.
Alright now what we’re going to do is we’re going to take these two pieces and we’re going to put them over here. But before we sew them down we’re going to add a 2 ½ inch square of the background white to either side. So you’re going to need four 2 ½ inch squares for each block that we’re making. So we’ve got one here and one here like this. And we’re going to sew these two pieces together like this. So let’s go sew this one over here. And we’re just going to put a white square on either side of our 4 ½ inch rectangle. And I’m going to grab this one too and just kind of chain piece them through. And then I’m going to sew a white to the other side. Alright once you get these done you’re going to press them open. And I’m just going to roll that back and roll this one back and do the same to this other piece. And then we’re going to add it, this one to this side and that one to that side, just like this. So you’re going to lay them on and match the seams. And we’re going to sew that together. Alrighty. So when you go to add this on just make sure that your little seam on the corner nests up really nice. And now I’ll put it on the other side. Again I like to take those few little anchoring stitches and then make sure that my seams are lined up. And when you push one seam one way and then the other, I can feel with my finger that there’s no room in between. Alright, let me press this out. There we go. Nice flat block.
Now this is the Card Trick block. Traditionally the Card Trick block is made with half square triangles and quarter square triangles. And it’s really quite a bit of work. But the trick is we have to turn this on point so it actually looks like the Card Trick. So what we’re going to do is we’re going to take our background fabric and we’re going to cut it into seven inch squares because we’re going to now set this block on point. Which means that now it’s going to sit on the point of its block. And so what I want to do is I want to take a seven inch square and I’m going to snowball the corners with my other 2 ½ inch block. So let me just do that. You can draw the line like that or you can iron it and sew side to side. I’m going to put one on each corner, on two diagonal corners, only two corners. Not each corner but only two corners. So we’re going to sew right here. Side to side, then I’m going to flip this to the other side and sew side to side. You’re going to need two of these for each, for each square, two of these blocks because what we’re going to do is we’re going to trim these off like this. We’re going to iron them out over here, press them out. And press them out. And then we’re going to cut our, excuse me. We’re going to cut our block diagonally just like this. So lay your ruler corner to corner and just cut like this. You’re going to need four of these and we’re going to attach them to all four sides. So I have another one over here that I already did. And I’m going to go ahead and cut that. Now what I like to do for a little bit of accuracy is I like to fold them and get a little crease right here so that I know exactly where the middle is. And I’m going to do that to all four of these and this one here. And then you have to do that to your block as well. So fold it in half. And with your fingernail you can crease both sides. And then this one as well. You just need a little mark so you can see where the center is.
Alright so now what we’re going to do is we’re going to line up our center marks. And we’re going to put one on all four sides of our block like this. Just like that. So how we’re going to do that. The first thing we’re going to do is we’re going to attach the two sides. And we’ll go to the sewing machine and do that. And once the sides are attached then we’re going to put the top and bottom on. So I’m going to line up, make sure my marks match up here. And then I look over here as well and make sure there’s even amounts sticking off the block on either side. We’re going to sew a quarter of an inch down. And we’re going to add one on this side too. And this is going to give us that secondary block. So let me look over here. Pretty even. Alright now let’s iron these open. Be careful though, don’t press out your little creases that you made on your little center blocks. Alright now we’re going to attach these to the sides, the other sides to finish our block. And now you should notice that your squares, let me show you over here. You should notice there’s not very much hangover on those squares. And so we’re going to sew a quarter of an inch down this side. And we’re going to add this one as well. Alrighty, now I’m going to press these back. And you’ve got some pretty good bunny ears on those corners so if you want to trim those off you can. What I generally do is I take a look at my block and usually it’s a little wonky out here on the sides. So then I’m just going to trim it up. I’m not actually squaring it up. I’m just lining my ruler up with my corner blocks and trimming off that little bit that, you know is going to keep it from being absolutely perfect. And you can actually square up your block any size you want. But I like this method. You know when you go to set a block on point there’s all kinds of formulas and it’s so much work to figure out. I must have trimmed that one already. Oh here’s the one I haven’t trimmed. It’s so much work to figure out what size block you need. And basically what I did was I looked at the size of my block. And I’ll show you that here in just a second. So I looked at the size of my block right here. And it is one, two, three, four, five, six, seven, eight and a half. And I just went down an inch or an inch and a half to seven. So whatever size your block was I just subtracted an inch and a half and went down to seven and that’s the size I cut diagonally for my blocks because this is the block you get when you’re all done, snowballed in the corners and we’re ready to put it together.
Now let me show you how that happens. We’re going to put four of these together so you can see how this lines up here in the middle. And it gives you this secondary little block right there. So you’re just going to sew them block to block. Oop, let’s turn that one. We don’t want the same fabric in there. You’re just going to sew them block to block together like this and then together like this. And you’re going to do that to your whole quilt. So let’s take a look at how many blocks we have here. We have one, two, three, four, five, six, and one, two, three, four, five, six, seven, down. So we’ve made 42 of these great big blocks that are just awesome. And we have hopefully made the Card Trick block a little easier for you. So we hope you enjoyed this tutorial from the MSQC.
& Progress on Social