Night Sky Quilt Tutorial
Jenny Doan
Night Sky Quilt Tutorial
- 1 x 10" Precut Fabric Squares (Layer Cakes) - Print
- 1 x 10" Precut Fabric Squares (Layer Cakes) - Solid
- ½ yard x Quilt Fabric for Inner Border
- 1¼ yards x Quilt Fabric for Outer Border
- ¾ yard x Quilt Fabric for Binding
- 5 yards x Quilt Backing Fabric


Finish your masterpiece and let us give it the finishing touch it deserves.
Subscribe to MSQC on YouTube
Hundreds of FREE tutorials and a new one from Jenny launches every Friday.
video transcript
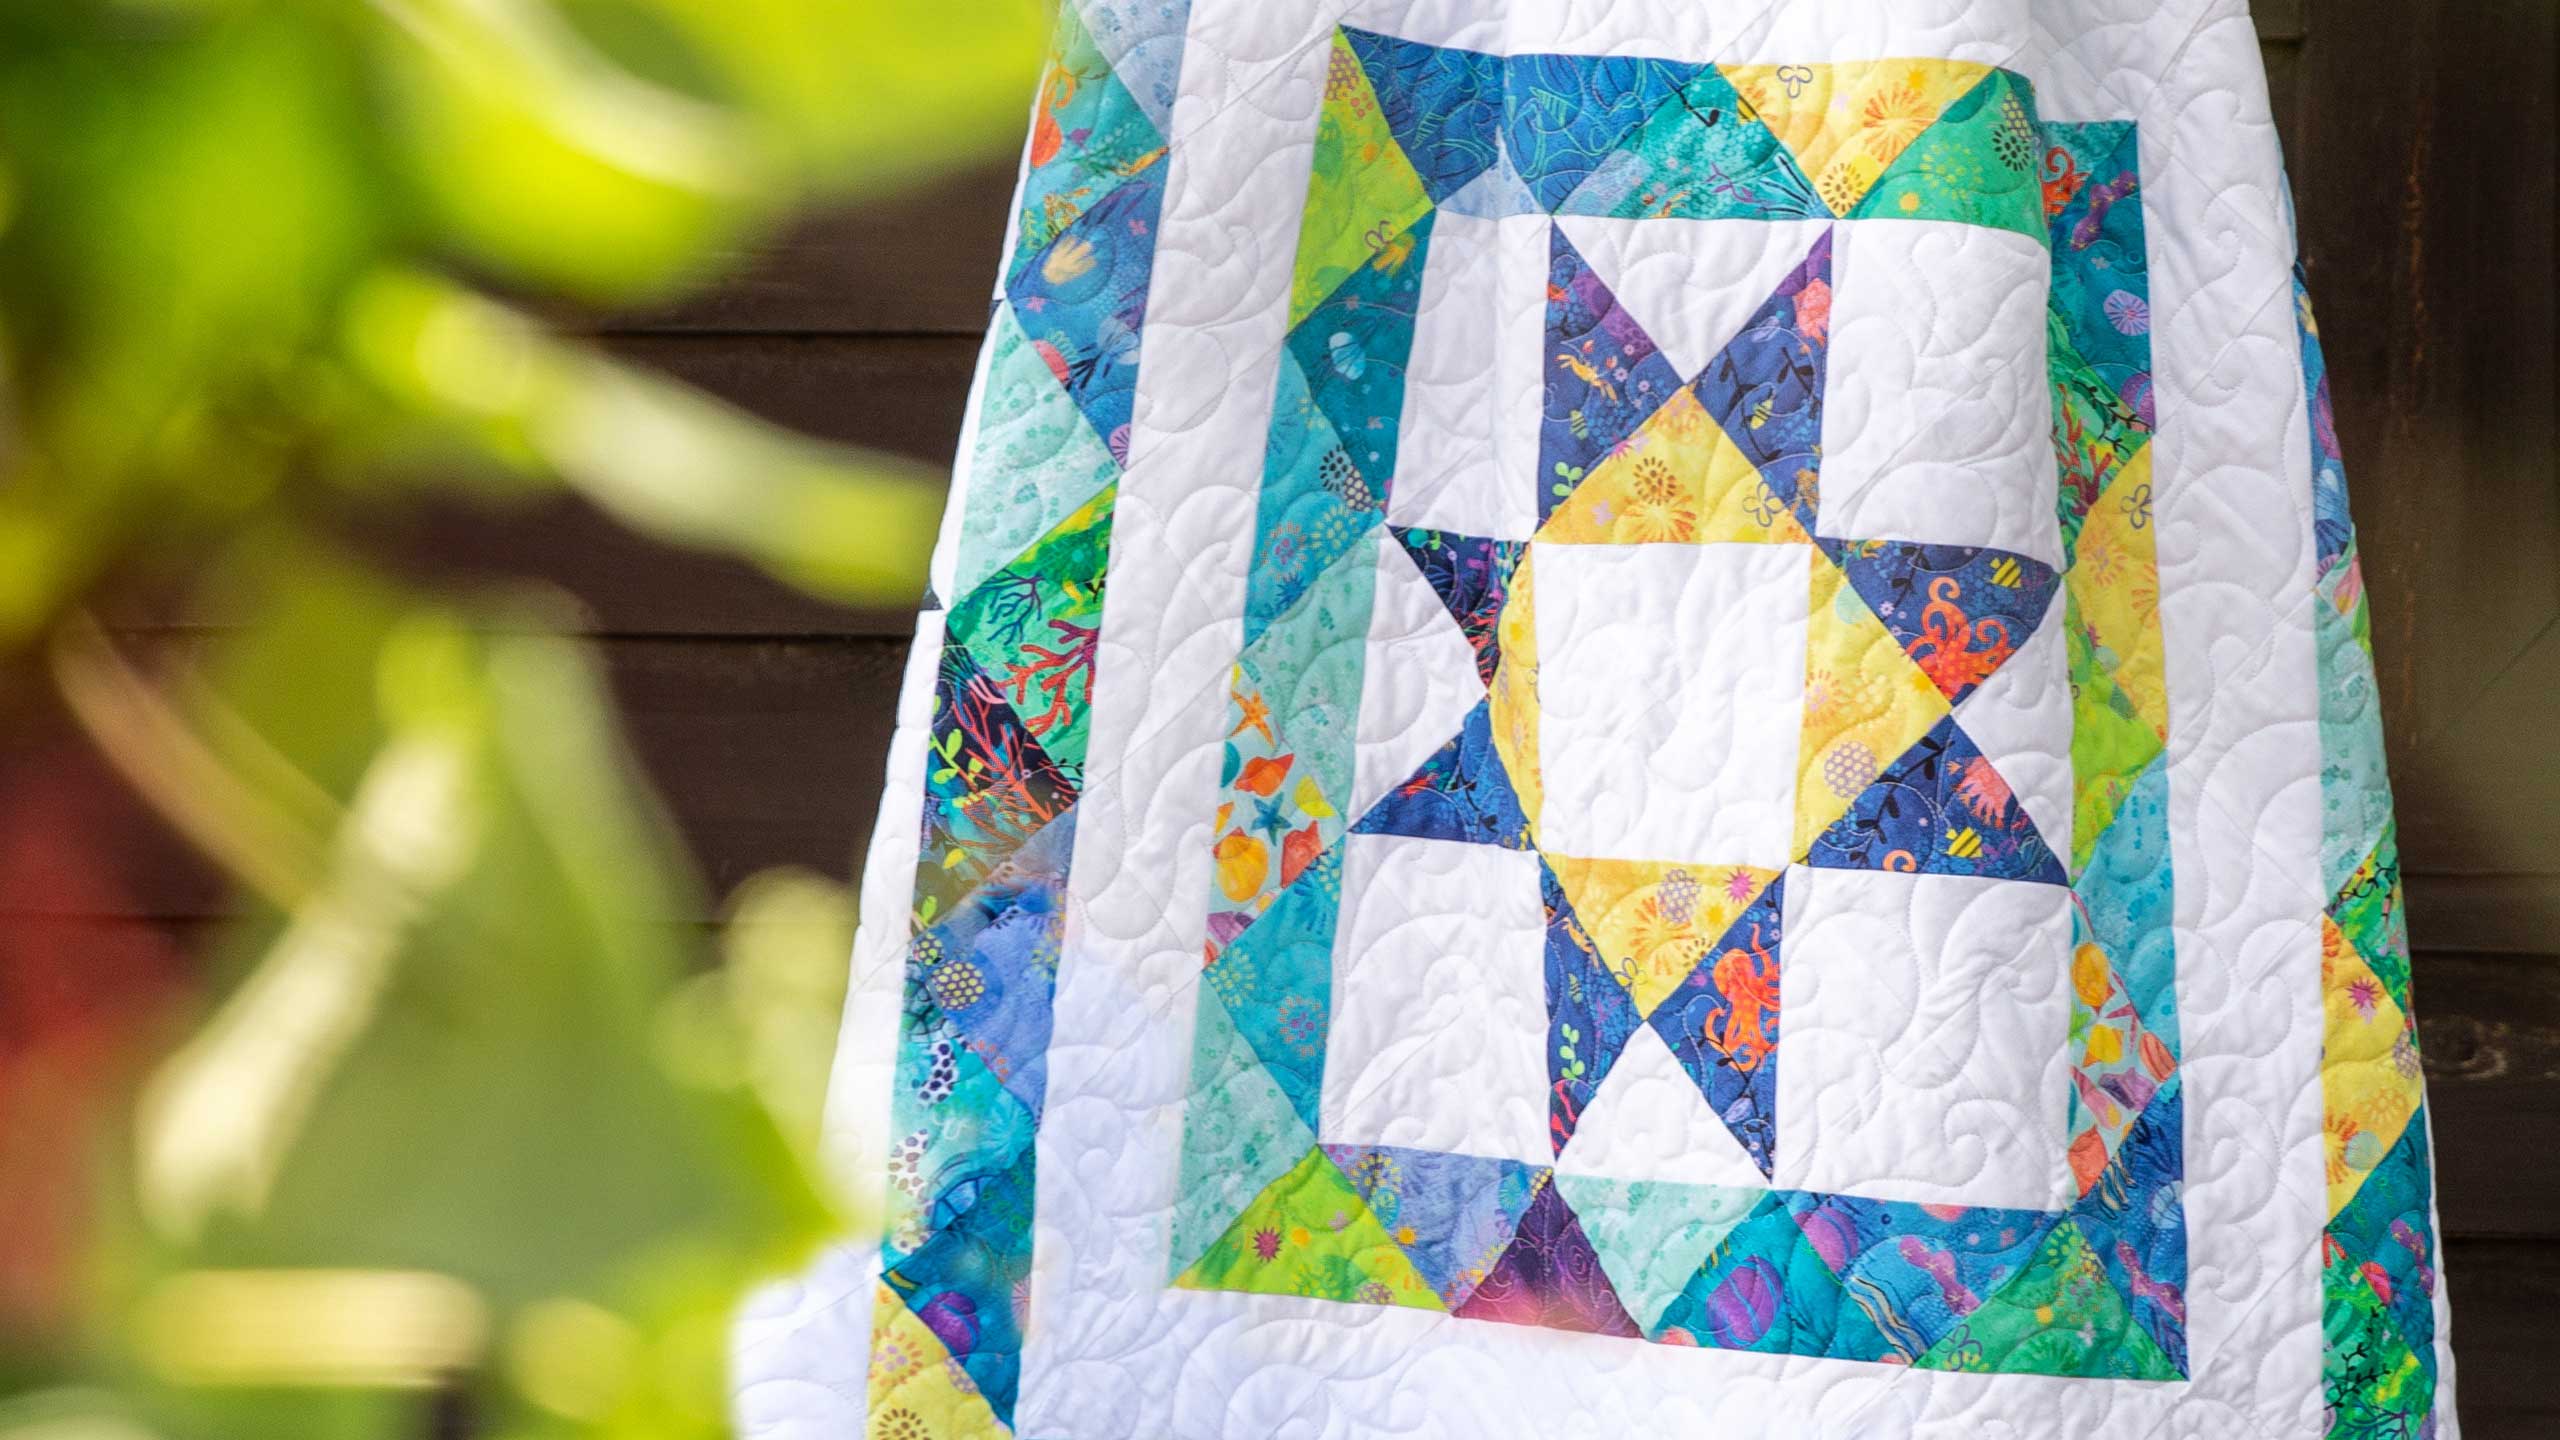
Hi everybody, it’s Jenny from the MSQC. And I’ve got a fun project for you today. Take a look at this quilt behind me. Isn’t this fun? Now this is a half square triangle quilt only. So once you master the half square triangles you’ve mastered this. So I have this trunk show and it’s called a half square triangle trunk show. And half square triangles are one of my favorites because there’s so many things you can do with them. And I show how to make a star in the trunk show. And then I show this little quilt where I made the star and then I bordered around it like this. I’m just going to put it up here so you can see it better. They wanted a tutorial on it. They wanted to see it. So of course I couldn’t do a tutorial on just one star. So I had to do a tutorial on five stars. So there are five stars on here. And we’re going to make those first. So to make this quilt what you’re going to need is one packet of ten inch squares. And we have used Octopus Garden by Amy Shimler Stafford for Robert Kaufman. And you’re going to need some background fabric as well. And we also used a packet of ten inch squares, just plain white. You’re going to need this inner border right here, this little white inner border that frames our quilt, you’re going to need a half a yard for that. This outer border out here is a six inch border. And you are going to need a yard and a quarter for that. This border in here is your leftover triangles that you’re making as you go along. You’re going to have some leftover. And of course I can’t leave them out. Take a look at this back. Isn’t this fun fabric. It’s just a cute back and you’re going to need five yards for that.
So we’re going to use the easy eight method for this tutorial. What you’re going to need is a ruler. And we’re going to lay our ruler corner to corner and draw a line on both directions. So we’ve got a line here. And that one didn’t go quite to the corner here so I’m going to kind of trace it again right here. So I’m just going to, my fabric just kind of slid over so you want to just make sure that it goes right into that corner. Now what we’re going to do is we are going to lay our fabrics right sides together. So this is my little, look how cute this is, the little turtles. I’m going to lay them right sides together. And I just had a squirrel moment where I got caught up in the fabric. Anyway we going to sew on both sides of these lines. And we’re going to go over to the sewing machine. And you just want to set your, to make sure you’re sewing a quarter of an inch on each side of the line. And we’re just going to go ahead and sew down here. When we get to the end we’re just going to pivot. We’re just going to come around and sew the other direction like this. Trim our thread and then we’re going to sew the other way as well. Alright and here is our last side. Okie doke. Alright.
So now what we’re going to do is we are going to go ahead and I’m going to cut this in half both directions. So we’re actually going to cut this four times. And you want to look at your ruler because our ruler is five inches we can lay it right along the edge. And we’re just going to cut it in half this way. And then we’re going to cut it in half this way. So vertically and horizontally. Then we’re going to cut it diagonally both directions. So we’re going to go corner to corner again. And this time we’re going to cut and then we’re going to cut this way as well. Corner to corner. Alright so now we have eight half square triangles right there like that. You’re going to want to square them to 4 ½. They should be pretty close. But we’re going to want to square them. So what we’re going to do is I’m using the clearly perfect slotted trimmer. Use a ruler that makes sense to your brain. People who square blocks, there’s all kinds of things out there and this one makes sense to my brain. So I’m going to put my seam line, my stitch line on their stitch line. And then I’m going to cut both sides like this, one, two like this. And then you can come in these little slots right here and you can cut and that takes off your dog ears. And we have a perfectly trimmed 4 ½ inch triangle just like that. So I really love that ruler. So then you press this open and you’ve got a perfect little half square triangle. Now you’re going to do this to all of yours. And make sure they’re all 4 ½ inches. And I have some already cut here.
Now we’re going to make five stars so I want to show you how to lay out a star. And the first thing we’re going to do is we’re going to take a look at our star. Now because I’m so angley challenged I make up a star and then I’m going to sit it there and I’m going to make all of mine like that. So the center block is four colors. And the whites are to the inside just like this. So this is our center of our star. Then we’re going to add the legs. And the legs are going to go together so the white comes to the middle . And we’re going to do those on all four sides like this. White to the middle. I have all these little mantras that I say. White to the middle, white to the middle because it helps me not get lost. Oh there we go. Because literally I can’t actually see the design until I’m like done and then I’m like, oh there’s that star. So, white to the middle and white to the middle. And then you’re going to put your corner pieces in. Your corner pieces can be anything you want them to be because that goes into the scrappy outline of the block. So we have, we have these little turtle ones that we just cut. And so I’m going to put four of those in. You do it so the white goes into the center and the color goes out just like this.
So once you get your star block all laid out together, I went ahead and sewed mine together which meant I sewed rows of them together just like this. And you’ll go ahead and sew them together. And let me show you where they fit. So this is the star block right here. And you’re going to have one over on this corner and one over on this corner, one in the center and then one in the two bottom corners as well. Now right in between those star blocks you can see right here this is a row of chevrons that come up. Now the easiest way to do that is to make a block that fits in there. So we’ve got this block right here that’s going to fit in there. And it’s the same number of squares so what we’re going to do is we’re just going to turn these and I’m going to show you how to lay that together. So here is our, here is the middle part. And we’re going to now go from row to rows. So I’m going to turn this in and this up. This is the easiest for me. And you’ll have a diagram that you can follow as well that helps you put these blocks together. Now because I used two colors on my star block this one is a little bit different because I still have. So because I used two colors on my star block I’m still using those same two colors. But you can scrap it up like this. You know see how this one is all scrappy and all different. So let me go ahead and finish putting this together. Alright so there’s our second row. So here’s our third row. We’re going down up, down up so that’s good. And then this one we’re going up and then these two come together. Color comes together like this and then this one comes up over here. Now I want you to look at this block because this is, you can see the borders. See and this is like a giant chevron block. It makes the colored borders, you have the white borders in between. And it’s actually going to sit right in here between your two star blocks. And it’s going, this one is the same as the one on the one on the bottom. These side ones are the same block but it’s just reversed. So it starts how this one starts with the white in the middle . This reverse block is going to start with the color in the middle. And once you get your rows sewn together and by rows I mean, your star your block and your star, there’s a sashing strip that’s going to go right across the middle here that’s going to bring the whole quilt together and that’s this one right here.
And so let me show you how this goes in there. And again we’re just dealing with straight half square triangles. It’s just how we turn them and how we place them. So here’s the sashing strip right here and this is how it fits in the quilt. And it’s just going to bring the whole thing together. Once you get your center done you’re going to add a little 2 ½ inch border. And then you’re going to add this great border here. So this is made still with the half square triangles from the thing. And these are sewn together with all the triangles going the same direction. And this is traditionally called a sawtooth border. So it’s an old traditional pattern that we’ve put with some new fun. And of course, then you’re going to add your outer border out there. This makes a quilt that is like 71 by 79 so it’s a pretty good size quilt. And I’m calling it Night Sky because that is one of my favorite things in the world is that night sky with all those bright stars. And we hope you enjoyed this tutorial from the MSQC.
& Progress on Social