Pins & Paws Cat Quilt Tutorial
Jenny Doan
Pins & Paws Cat Quilt Tutorial
- 1 pack x 10" Precut Fabric Squares (Layer Cakes) - Print
- 1/2 yard x Solid Background Fabric
- 1-1/2 yards x Light Background Fabric
- 1-1/4 yards x Outer Border Fabric
- 4-3/4 yards x Quilt Backing Fabric


Finish your masterpiece and let us give it the finishing touch it deserves.
Subscribe to MSQC on YouTube
Hundreds of FREE tutorials and a new one from Jenny launches every Friday.
video transcript
Hi everybody, it’s Jenny from the MSQC. And I am so excited about today’s project. Let’s take a look at this fun quilt behind me. Isn’t this great? Look at our kitties. They’re so cute. I just love them. Some of them have light backgrounds, some of them have dark. Some of them are facing each other, and some are away. Just like all the cats that we know. They’re, they’re just a little big obstinate. And we have to take that into consideration. I get so much mail from quilts with a cat sitting on it. Isn’t that bizarre? Everytime I lay a quilt out on the floor, guess what happens? The pets, they want to sit right in the middle of it. And so I just thought we’d have fun doing this cat quilt. I have a cat at my house named Elsa. Yes after the princess and she thinks she is a princess. She is just a darling cat. And I just love this quilt. I think she’s going to love it as well.
So this is a fun block to make. To make this quilt, what you’re going to need is one packet of ten inch squares. And you’re going to need some background fabric. Now we again, we have a light background and that’s this white here. The yardage also includes this first border and that’s a yard and a half. On our darker background right here, because some of our blocks didn’t pop with the white, we decided to throw in a different background. And that is, for that we need a half a yard. So it’s not too much fabric. Our border out here, this is a 5 ½ inch border. So for this size quilt it’s 1 ¼ yards. And the quilt is going to end up being 68 by 77. Now the fabric we used is called Sew! Sew! And every Sew, it’s S E W with an exclamation point and it’s by Benartex for Kanvas Studios. And I love anything with sewing notions. And I thought sewing and cats was just the perfect combination.
Ok so to make this quilt we’re going to take one of our ten inch squares. And it’s almost like which one do we pick. We’re going to start with this button block though. And we’re going to cut it directly in half. So we’re going to take our ruler and lay it right along the edge of our square and cut it right in half. Just like that. Now we’re going to put these in two separate piles. You’re going to probably want to do this to your whole pack. I’m just going to do one at a time to show you. Out of one, one of these five by ten inch rectangles, rectangles, look I said rec-tails, just like it’s already a cat. Alright so on one of the five by ten inch rectangles you’re going to cut a half an inch off. So we’re just going to take that off right here. That’s just our little waste right there. It’s just going to go away. We set that aside. Out of the next piece you’re going to cut a three inch piece. So three by five. Just like that. And that’s going to be, that’s going to be our head up here. And then for our ears we need two 2 ½ inch squares. So we’re going to cut these 2 ½ inch squares. I cut a 2 ½ inch strip and cut that in half and it gives me two squares. Now we need our background pieces. Now out of your background you’re going to cut a, I just cut a five inch strip and something and cut my pieces out of that. And so I need one five inch square like this. And then I need one five by 2 ½ inch rectangle and one 2 ½ inch square. And so that’s for each block you’re going to need that.
So first thing we’re going to do is we’re going to take this 2 ½ inch square and we are going to put that on the body of the cat. We’re going to fold, fold our little strip or iron it or draw the line or whatever you want and so that we have a little sew line. And I’m just going to iron this so I get a little sew line. We’re going to put it up in the top right corner. And we’re going to sew right across there. And that’s going to make the tail part of our kitty. His tail is curled up under him. He’s sleeping. So we have to make that back of him like that. Alrighty. So I’m going to trim this off now. And iron this back. Here we’re trimming. And then we’re just going to roll this back. There we go. That makes our kitty body right there.
Now for the head we’re going to take our three by five inch strip. And we’re going to attach that to our 2 ½ inch strip but first we have to do the ears. So our ears are going to be these 2 ½ inch squares that we cut out of the printed fabric. We’re going to put those on each side of this. And you have to make sure that your ears are going to right way. So this, we’re going to sew this from the outside in like this. And we’re going to sew one of these. And I guess it really doesn’t matter because you guess you could just flip it over. But we’re going, we’re going to, I’m going to do it this way because I get angley, you know I get things all out of whack angley so I have to keep, keep my brain going in the right direction. Alright so here’s my first ear right here. I’m going to press that down. Here’s my first ear. Now the second ear, we’re going to do the same thing with. We’re going to put him on right here. Sew on our sew line right across. This is such a cute little, little quilt, whoops. My fabric went down in. Let’s get that out. Sometimes our sewing machines just do that. They just grab that fabric and take it down in there with them. A lot of people use those little things called leaders and enders that keeps that from happening. It’s just a little square of fabric that you start and stop on. Alrighty. There we go on that. I think I really just had to slow down to get that, to get that so it didn’t grab in there. I’m going to trim this one off and iron that back.
Alright so now we want to make sure that this looks like ears. So we’re going to make sure when we put this, attach this block to this that our ears are going up the right direction. You know if we do it this way it’s not going to work. So I’ve got to do it this way. And we’re going to sew a quarter of an inch right down there. And this is going to make our kitty head. Alrighty. So let’s press this up. There we go. Now all we have to do is sew this to this block here and then attach it to our body. And just like that we’re going to be done. This is so fun. This was such a fun quilt to make. Alrighty. So now, let me iron this back. And we want to put this on here just like that. Look at it. Here she is. There’s our little kitty. And we’re going to sew a quarter of an inch across here and our block is going to be done. Alright now press it open. I have a little seam that’s turning here so I want to flip this over and make sure it’s laying down. Make it go the way I want it to. Alrighty, there’s your block. That’s it. That fast you get this cute little kitty block.
Now I want to point something out to you because some of our kitties are going the opposite direction. When you do that you’re just going to sew that on the other side and something a square on the other side of her body as well and that will put them in the opposite direction. Let’s take a look at this quilt behind me. Alright so you’re going to want to follow this diagram if you want to put yours together just like ours. Of course you know that’s left up to your own judgment. But ours we had these light squares, we backed them with the dark. So we just kind of mixed those in here and there. But watch the diagram. These kitties are facing each other. Then all these are in the row the same way. These go the opposite way. So some are going to be opposite and some are going to be going the other direction. And some are going to have the dark background and some are going to have the light. So you’ll just want to watch this diagram and if you want to make yours just like ours then you can.
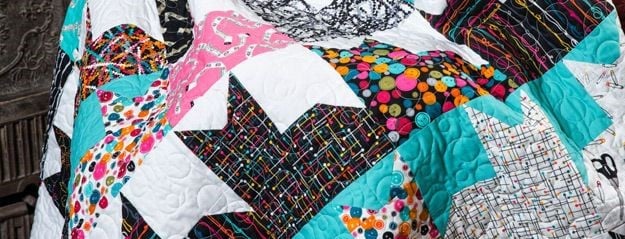
Let’s take a look at the back. The back on this I love. I love sewing fabric. Look at this. Isn’t that the cutest stuff? I love writing. I love you know those little sewing machines. I love this. So for the back it takes 4 ¾ yards on that backing. And it just makes the most perfect quilt. Now we really struggled with names for this one. There were so many things that we thought we could call it. We settled on Pins & Paws. And we hope you enjoyed this tutorial on our Pins & Paws quilt from the MSQC.
& Progress on Social