Jumping Jacks Quilt Tutorial
Jenny Doan
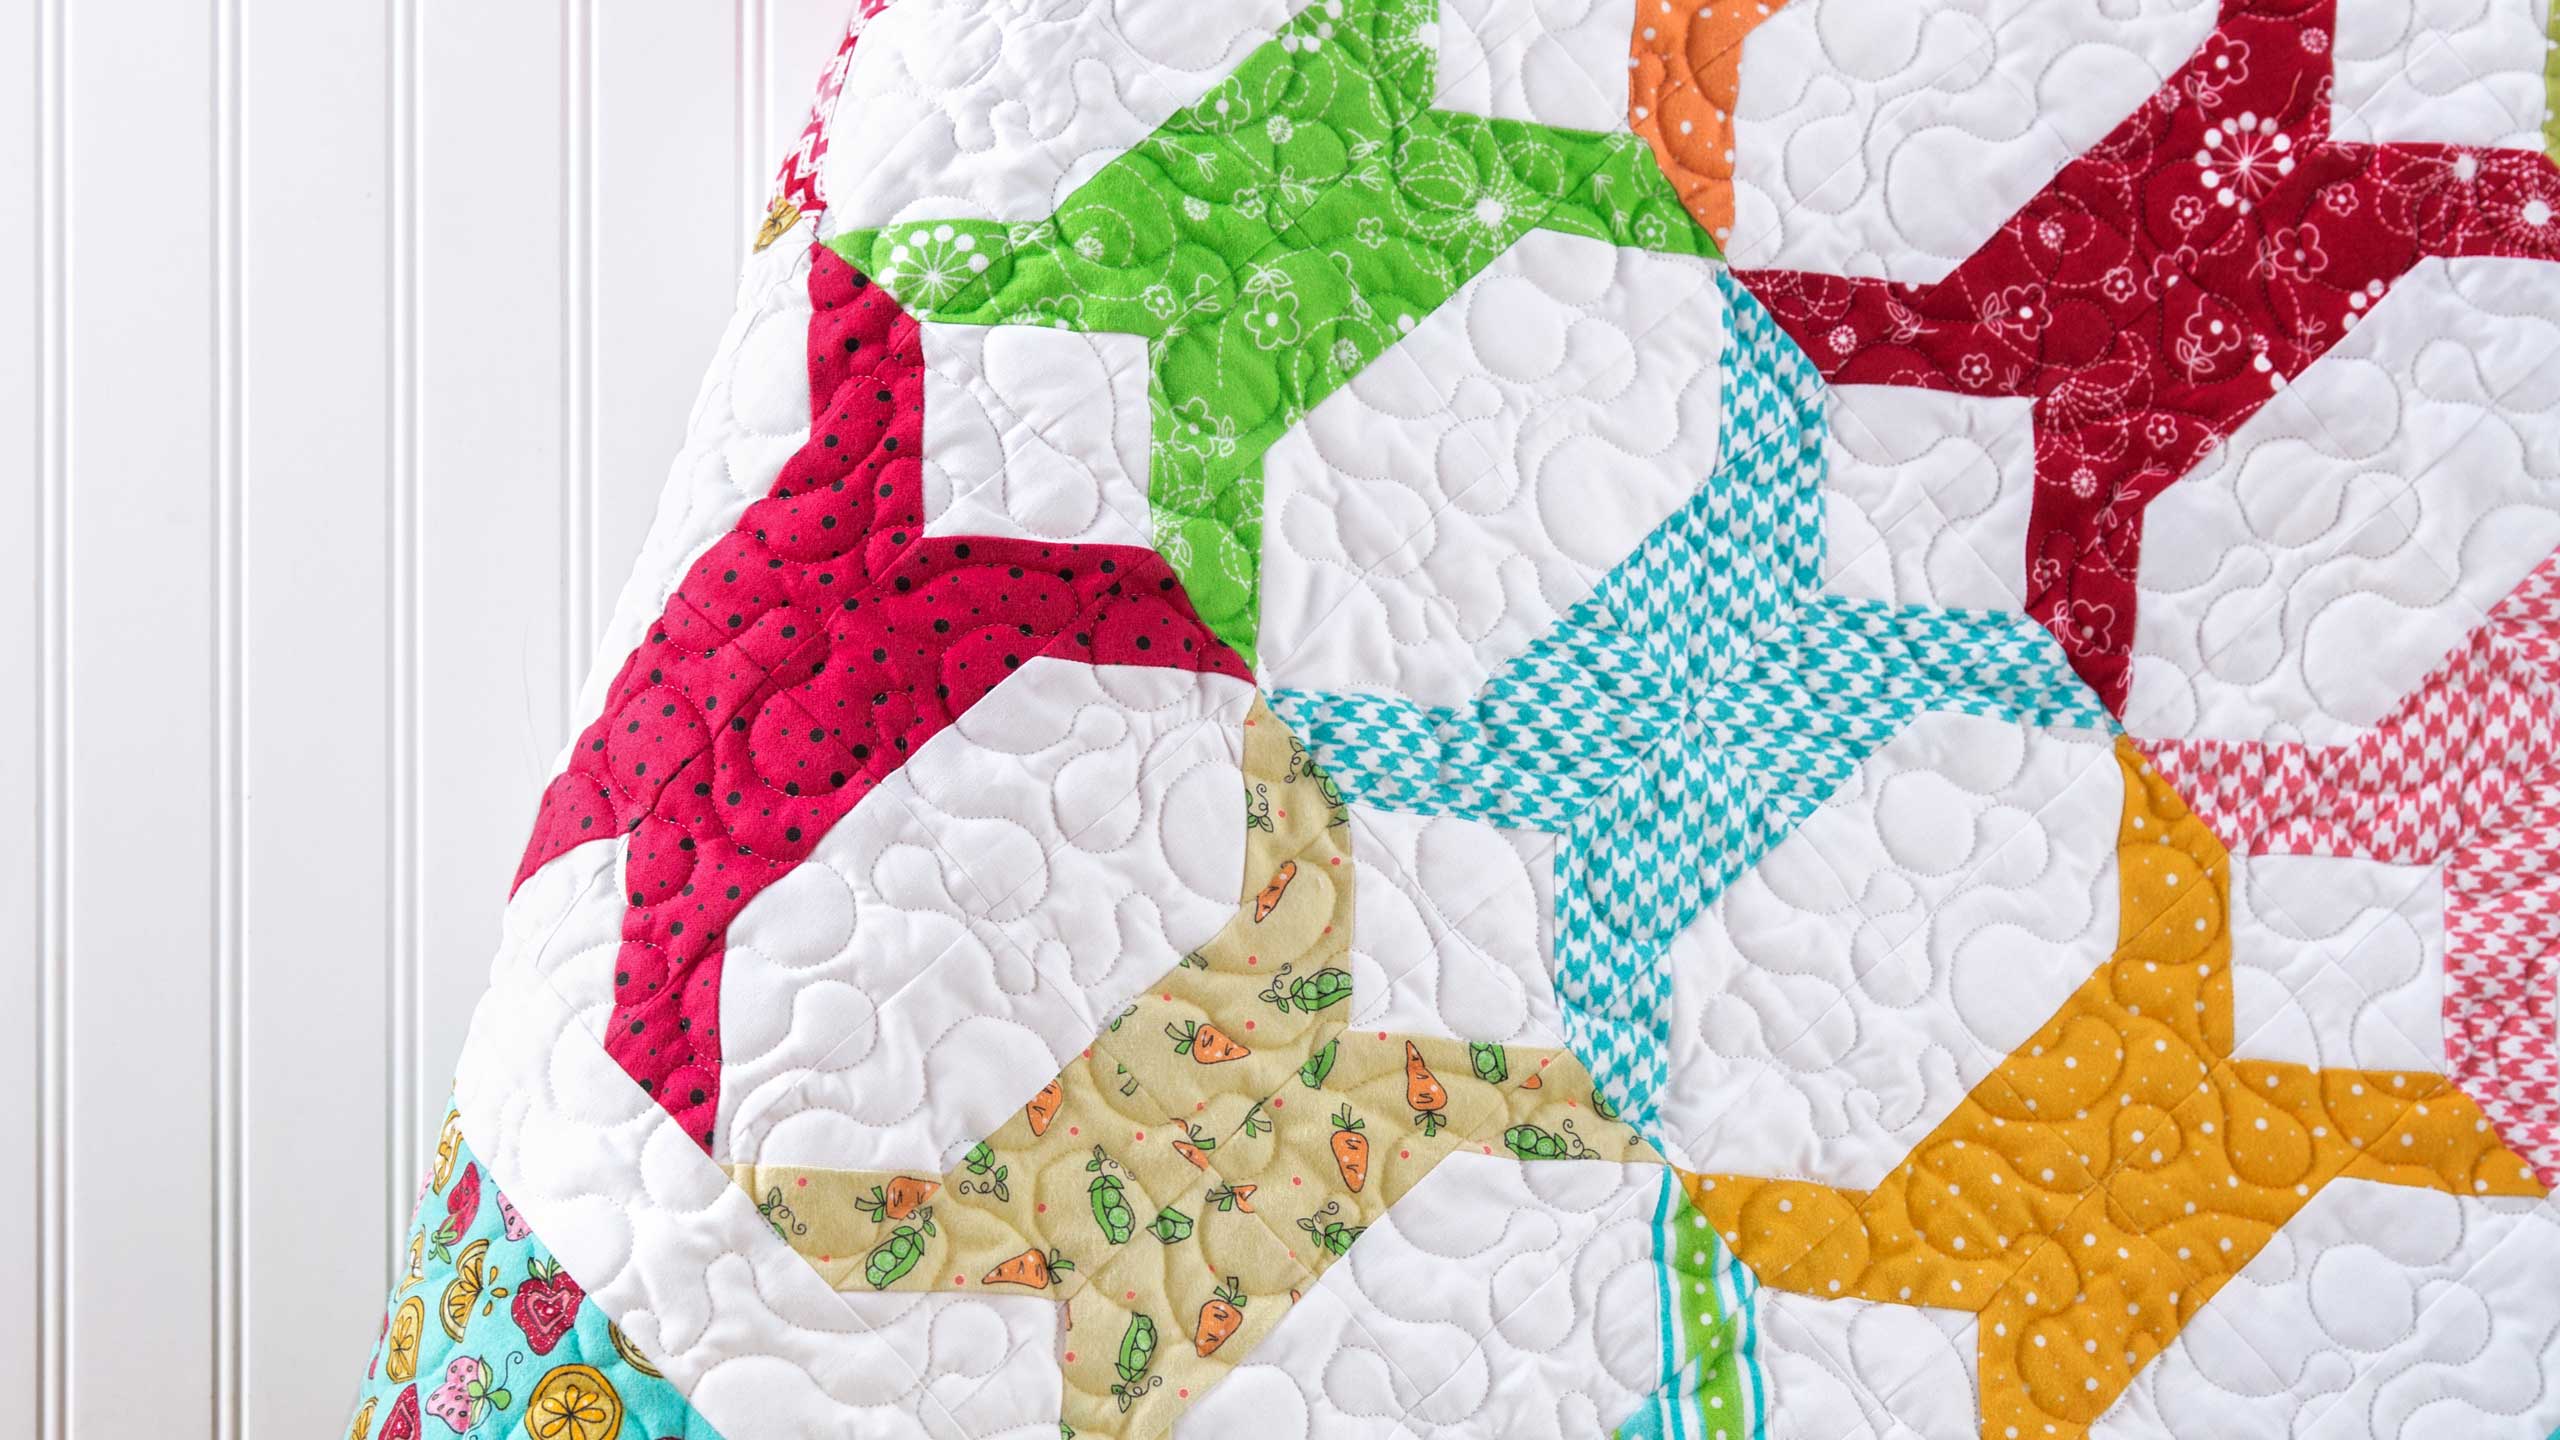
Jumping Jacks Quilt Tutorial
- 2 packs x 5" Precut Fabric Squares (Charm Packs) - Matching
- 2 packs x 5" Precut Fabric Squares (Charm Packs) - Background
- ½ yard x Inner Border Fabric
- 1 yard x Outer Border Fabric
- ¾ yard x Fabric for Binding
- 3½ yards x Quilt Backing Fabric


Finish your masterpiece and let us give it the finishing touch it deserves.
Subscribe to MSQC on YouTube
Hundreds of FREE tutorials and a new one from Jenny launches every Friday.
video transcript
Hi everybody, it’s Jenny from the MSQC. And I’ve got a great project for you today. Let’s take a look at this quilt behind me. Isn’t this a fun quilt? This is a fun little block and you’re going to love how I made it. I’m calling it Jumping Jack because it looks like you’re doing the jumping jacks. Remember doing those when you were kids. We used to have PE. We even had to dress out in PE clothes. It’s a whole new world out there now. So to make this quilt what you’re going to need is two packs of printed five inch squares. And we are using Little Sprouts Too by Kimberbell Designs for Maywood Studios. And it is flannel. So it’s real soft and cuddly and flannel. For your background squares you’re going to little squares of white. And we’ve just used a Kona solid in there. And five inch squares again. And you’re going to need two packs of print and two packs of solid. For this inner border right here, this little 2 ½ inch inner border you’re going to need a half a yard. And it’s going to be six 2 ½ inch cuts. Your outer border is going to be one yard and it’s going to be six 5 inch strips. And one the back we’ve put more flannel to make this really cuddly. And this is a little tiny print of a little florals with yellow on it. It’s so cute. And you’re going to need 3 ½ yards to back this. And that’s just because of the length and the width. It’s going to make a quilt that is 55 by 69 so it’s a great quilt for a crib or a baby size.
Alright so let’s talk about how we’re going to do this because this is really, really fun. This is the block we’re shooting for. And it’s made out of four charms that are the same. Now you’ll notice that we’re using flannel and a regular quilting cotton on here. Now there’s two things that happen that we have to worry about. One is the shrinkage factor. So with flannel, flannel does tend to shrink a little more and you do not want to pre wash your pre cuts. So what you’re looking for with flannel is you’re looking for a tighter weave. The tighter your flannel is woven, the less it shrinks. So you want to kind of hold it up to the light and see if you can see light peeking through. If you can’t then it’s a tighter weave and it will shrink less. So that’s what we’re looking for with the flannel. The other thing I think that’s cool about using a flannel with a cotton is the texture difference. You know babies love that texture and the different feeling and I mean it just, I just think that’s a really fun things. I’m really happy that we did that.
So let me show you how to make this block. So we’re going to take one printed square and one flannel square and I’m going to iron or draw a line diagonally corner to corner. And that’s going to be my sew line. So can you see that line? You know you can always take a little pen and draw it too. I’ll do that real quick just so you can see what I’m talking about here. Out of this five inch square we’re going to make two half square triangles. And there I’ve drawn a little line. And now I’m just going to go over to the sewing machine and I’m going to sew a quarter of an inch on either side of that line. Alright so we’re over here. I’m going to line my presser foot up with my line because I know that it’s a quarter of an inch. You’ll want to measure and make sure yours is a quarter of an inch . What we’re shooting for here is two blocks that are going to be 4 ½. Now my blocks are going to probably end up a little bit bigger and we’ll have to square them down. So now I’m just going to cut on this line. And we’re going to head over to the ironing board and press these down. I like to press right on the seam line, relaxes my fabric and then I’m just going to iron that back. And I’m going to do the same thing over here. I’m going to set this on here, give that a shot of steam and just roll this back. There we go. Alright.
Now half of our blocks, it take four blocks to make this. And half of our blocks have to go one direction and half go the other. So what I’m going to do here is I’m going to turn my two 4 ½ inch triangles like this. And actually first I’ve got to square them up. I got ahead of myself a little bit. So we’ve got to make sure they’re 4 ½. Oh this one is really close. Barely, barely off over here. Alright so that one is pretty good. And let me check this one. I’m using a block lock ruler that has the little center line that’s kind of shaved so it just locks into that seam. It makes it easy.That one was a little bit bigger. It is important that they’re 4 ½. So now we’re going to set these so they, they’re running different directions. This is going to be opposite directions. So what we’re going to do is we’re going to take this block right here and it’s 4 ½ now and we’re going to divide that in half because we are going to make one cut right down the side. So we’re going to, half of 4 ½ is 2 ¼ . So I’m going to come in 2 ¼ and we’re going to cut right down the middle here. Then what we’re going to do is we’re going to take this piece here and we’re going to put it over on this side. It just looks like a little boot like that, isn’t that cool? And then we’re going to do the same thing on this. We’re going to come over and we’re going to cut that 4 ½, 2 ¼. And then we’re just going to swap this around so it makes a little boot. So we want our boots to go out like this. Our little feet to go out to the sides. So that’s why we have to cut one one way and one the other way. And so we’re going to sew these together right here, these little edges. And we’re just going to sew a quarter of an inch right down the side. But make sure you’ve got them together as a boot. I might have should have called this the Italy quilt because it’s got that little boot look to it. But to me it just looked like jumping jacks. Now I”m going to grab that other one and sew it down as well. And you’re going to make four of those. Alright so now I’m going to press these open. Oop better relax that a little bit. And then this one too. Alright.
So here’s two and I have two made over here. And they’re going to go this way. So you see how that little block is going to go together. Now we’re going to put it together just like a four patch. So we’re going to sew these two and these two. And we’ll go to the sewing machine. And we’ll just chain piece these together. There we go. And then you’ll see, because of the way I chain pieced these together they’re ready to put right together as a block right now. I don’t even have to clip them apart. I’m just going to fold them over and sew them down. Now I am feeling for my seams. And because the flannel is a little bit more bulky you’re going to want to make sure that your seams kind of nest up and lay one of your seams going that way and one going this way. And that will make for lesser bulk in your seams. There we go. Now we get to press this open. Wasn’t that easy and quick? From a little half square triangle. I love half square triangles, they’re so versatile. They’re so, so many things you can do. Alrighty. Let me clip some of these threads off of here.
And then we get to put our quilt together. Now this quilt is put together just in rows. There’s no sashing. And let’s see what we’ve got here. We have one, two, three, four, five, six, by one, two, three, four, five, six, seven. Six by seven, 42. And so you’re just going to sew them together like this. And watch how these come together. And it’s going to make this little diamond thing in the middle. And you’re just going to sew them together just like that.. When you do your next row on the next one you’re going to do the same thing. You’re just going to line them up.
Isn’t that so cute? It’s just from such an easy block, the half square triangle that we’ve cut in half and just moved the piece to the other side so it makes a little boot shape. So again I’m calling it Jumping Jacks. I just think it’s a darling quilt. Really easy project. And we hope you enjoyed this tutorial on the Jumping Jack quilt from the MSQC.
& Progress on Social