



How to Make a Jelly Roll Rug: Supplies, Steps & Tips
⚡ Quick Answer
- What you need: one jelly roll (2 1/2" strips) and one 50-yard pack of 2 1/2" precut batting strips
- How it works: wrap a fabric strip around a batting strip to make a long tube, then coil the tube and zigzag the coils together as you go
- The tool that saves your sanity: the Fabric Tube Maker — it wraps fabric around batting for you so you are not folding by hand for hours
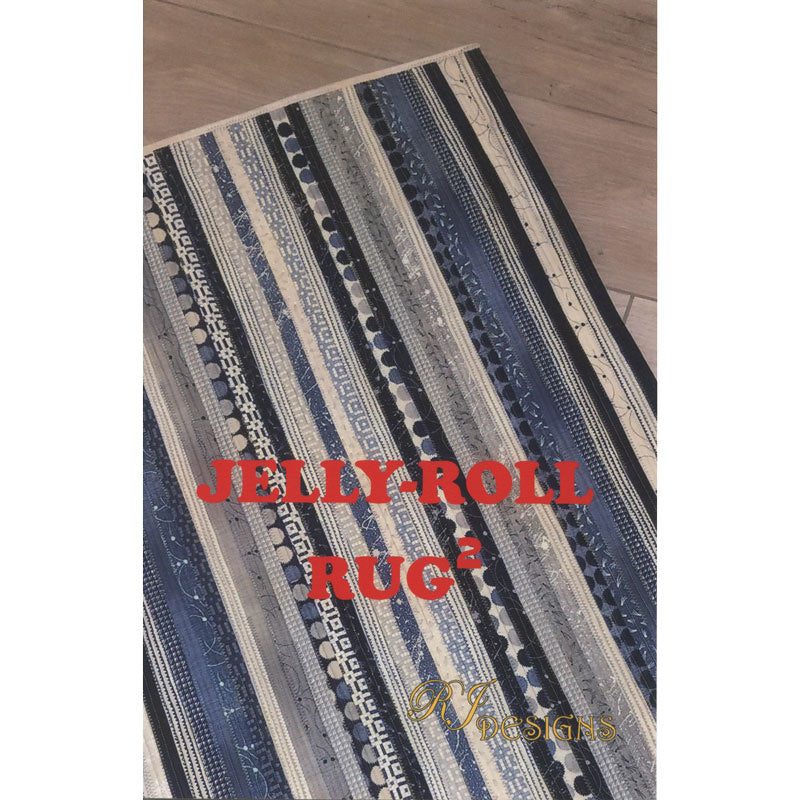
- Two versions: Jenny's oval and round rugs, or the Jelly Roll Rug 2 pattern — a 32" x 42" rectangle with straight seams and no tight curves
- Time: a weekend project. Beginner friendly, but it is a lot of zigzagging
The jelly roll rug is one of those projects that seems like a magic trick the first time you see it. A stack of 2 1/2" strips goes in, and a sturdy, washable, genuinely useful rug comes out — no quilting, no binding, no borders.
It is also the single best use for a jelly roll you love but cannot decide what to do with. Here is exactly how it goes together, plus the tips that separate a flat rug from a taco-shaped one.
Key Takeaways
- ➤One jelly roll, one pack of batting strips. That is the whole materials list. A 50-yard roll of 2 1/2" precut batting is sized for exactly this project.
- ➤The tube maker is not optional-ish. Wrapping fabric around batting by hand for forty strips is the reason unfinished jelly roll rugs sit in closets. The tool feeds it for you.
- ➤Go slow on the coil. The rug takes its shape in the first few rounds. If the center is not flat, nothing after it will be.
- ➤A wide zigzag and a walking foot. You are sewing through several layers of batting and fabric — give the machine a fresh, sturdy needle and let the feed dogs do the work.
- ➤It is machine washable. Cotton fabric, cotton batting, no binding to come loose. Wash cold, tumble low, and it comes out looking better than it went in.
What You Need
| Supply | Why | Notes |
|---|---|---|
| One jelly roll (2 1/2" strips) | The outside of the rug — all the color you will see | A 40-strip roll is the standard. Prints with lots of movement hide seams beautifully |
| Bosal Katahdin 2 1/2" precut batting, 50 yards | The body and grip of the rug | Precut so you skip cutting 50 yards of batting into strips yourself |
| Fabric Tube Maker | Wraps fabric around the batting as it feeds | The difference between an afternoon and a very long week |
| Jelly Roll Rug 2 pattern | The rectangular version — 32" x 42", straight seams only | Uses one jelly roll. Good first choice if tight curves worry you |
💡 Pro Tip: Pick a jelly roll where the strips read as a family rather than as forty separate fabrics. Because the strips spiral, individual prints get chopped into short segments — a cohesive roll looks intentional, while a wildly mixed one can read as noise.

How a Jelly Roll Rug Goes Together
1. Join your strips. Sew the jelly roll strips end to end at a 45° angle and press the seams open. Diagonal joins keep the bulk from stacking up in one spot as you coil.
2. Wrap the batting. Feed a batting strip and your fabric strip through the tube maker together. The fabric folds around the batting, and you stitch it closed as it comes out the other side. You now have a long, soft rope.
3. Start the center. For an oval rug, fold the beginning of the tube back on itself to make a straight starting spine, then begin wrapping around it. For a round rug, coil it tight from the very first turn. This is the part worth taking slowly.
4. Zigzag the coils together. Butt each new round up against the previous one and zigzag across the join with a wide stitch. Keep the rug flat on the machine bed — do not let it hang off the table, because the weight will pull your stitching crooked.
5. Finish the tail. Taper the end of the tube and stitch it down flat against the outer round so it disappears into the edge.
▶️ Watch it done: Make a Jelly Roll Rug with Jenny Doan — full video tutorial
Jenny makes both an oval and a large round version in the Jelly Roll Rug tutorial, which also includes a layout PDF you can print.

The Three Things That Go Wrong
- The rug cups or ruffles. Cupping means you pulled the tube too tight on the turns; ruffling means you eased in too much. Both are fixed the same way — slow down, keep even tension, and check it flat on the floor every few rounds instead of at the end.
- Skipped stitches. You are sewing through a lot of loft. Put in a fresh needle, lengthen the stitch slightly, and slow the machine down.
- Wrestling the weight. A finished rug is heavy. Set up a table to the left of your machine to carry the bulk so the part you are stitching stays flat and unstretched.
💡 Pro Tip: Lay the rug on the floor after the first four or five rounds and look at it from standing height. If the center is flat and even now, the rest will follow. If it is domed, unpick a round — it is five minutes now or a wasted weekend later.
Which Version Should You Make?

Free video tutorial
Jenny's Oval & Round Rugs
The classic coiled shapes — an oval for a kitchen or entryway and a big round rug for a bedroom. Free tutorial with a printable layout PDF. See the tutorial
Pattern — easier build
Jelly Roll Rug 2
A 32" x 42" rectangle with straight seams and no stitching around tight curves. Same one jelly roll, gentler learning curve. See the tutorial

The essential tool
Fabric Tube Maker
Wraps your fabric strip around the batting strip as it feeds so you can stitch straight down the middle. Buy it before you start, not halfway through. See the tutorial
Where to Put It (And How to Wash It)
These rugs land best in spots where a cotton rug makes sense: a kitchen, a bedside, a sewing room, an entry that stays dry. They have a real grip and a bit of cushion, and unlike a quilt, they are made to be walked on.
To clean, wash cold on a gentle cycle and tumble dry on low. Cotton batting will shrink a little the first time, which tightens the coils and makes the rug feel denser — that is a feature, not a problem. Lay it flat to finish drying if it comes out even a little wavy.
Frequently Asked Questions
How many jelly rolls does a jelly roll rug take?
One 40-strip jelly roll plus one 50-yard pack of 2 1/2" precut batting strips makes a standard rug. Jenny's larger round version uses more — check the tutorial's supply list before you buy.
Do I have to use precut batting strips?
No, but you would be cutting 50 yards of batting into 2 1/2" strips by hand. The precut roll exists precisely so you can skip that.
Can I make a jelly roll rug without a tube maker?
You can fold and press the fabric around the batting yourself, and plenty of people have. It is slow and hard on your hands, and it is the most common reason these projects stall.
What stitch should I use to join the coils?
A wide zigzag that reaches across the join into both rounds. Test on a scrap tube first — you want it to catch both sides securely without bunching.
Is a jelly roll rug machine washable?
Yes. Cotton fabric and cotton batting, no binding to come loose. Wash cold, tumble low, and expect slight shrinkage the first time.
Which version is easier for a first attempt?
The Jelly Roll Rug 2 pattern — it is a rectangle built with straight seams, so you never have to steer the bulk of the rug around a tight curve.
Fair warning: nobody makes just one. The first rug teaches you the tension, and by the second you are eyeing every jelly roll in the shop differently.