


Kite Season Quilt Tutorial
Jenny Doan
Kite Season Quilt Tutorial
- 1 pack x 10" Precut Fabric Squares (Layer Cakes) - Print
- 1 pack x 10" Precut Fabric Squares (Layer Cakes) - Background
- ¾ yard x Inner Border Fabric
- 1¾ yards x Outer Border Fabric
- ¾ yard x Quilt Fabric for Binding
- 8 yards x Quilt Backing Fabric (or 3yds. 108" wide quilt backing)
Featured products Get the Supplies Featured in this Tutorial


Finish your masterpiece and let us give it the finishing touch it deserves.
Subscribe to MSQC on YouTube
Hundreds of FREE tutorials and a new one from Jenny launches every Friday.
video transcript
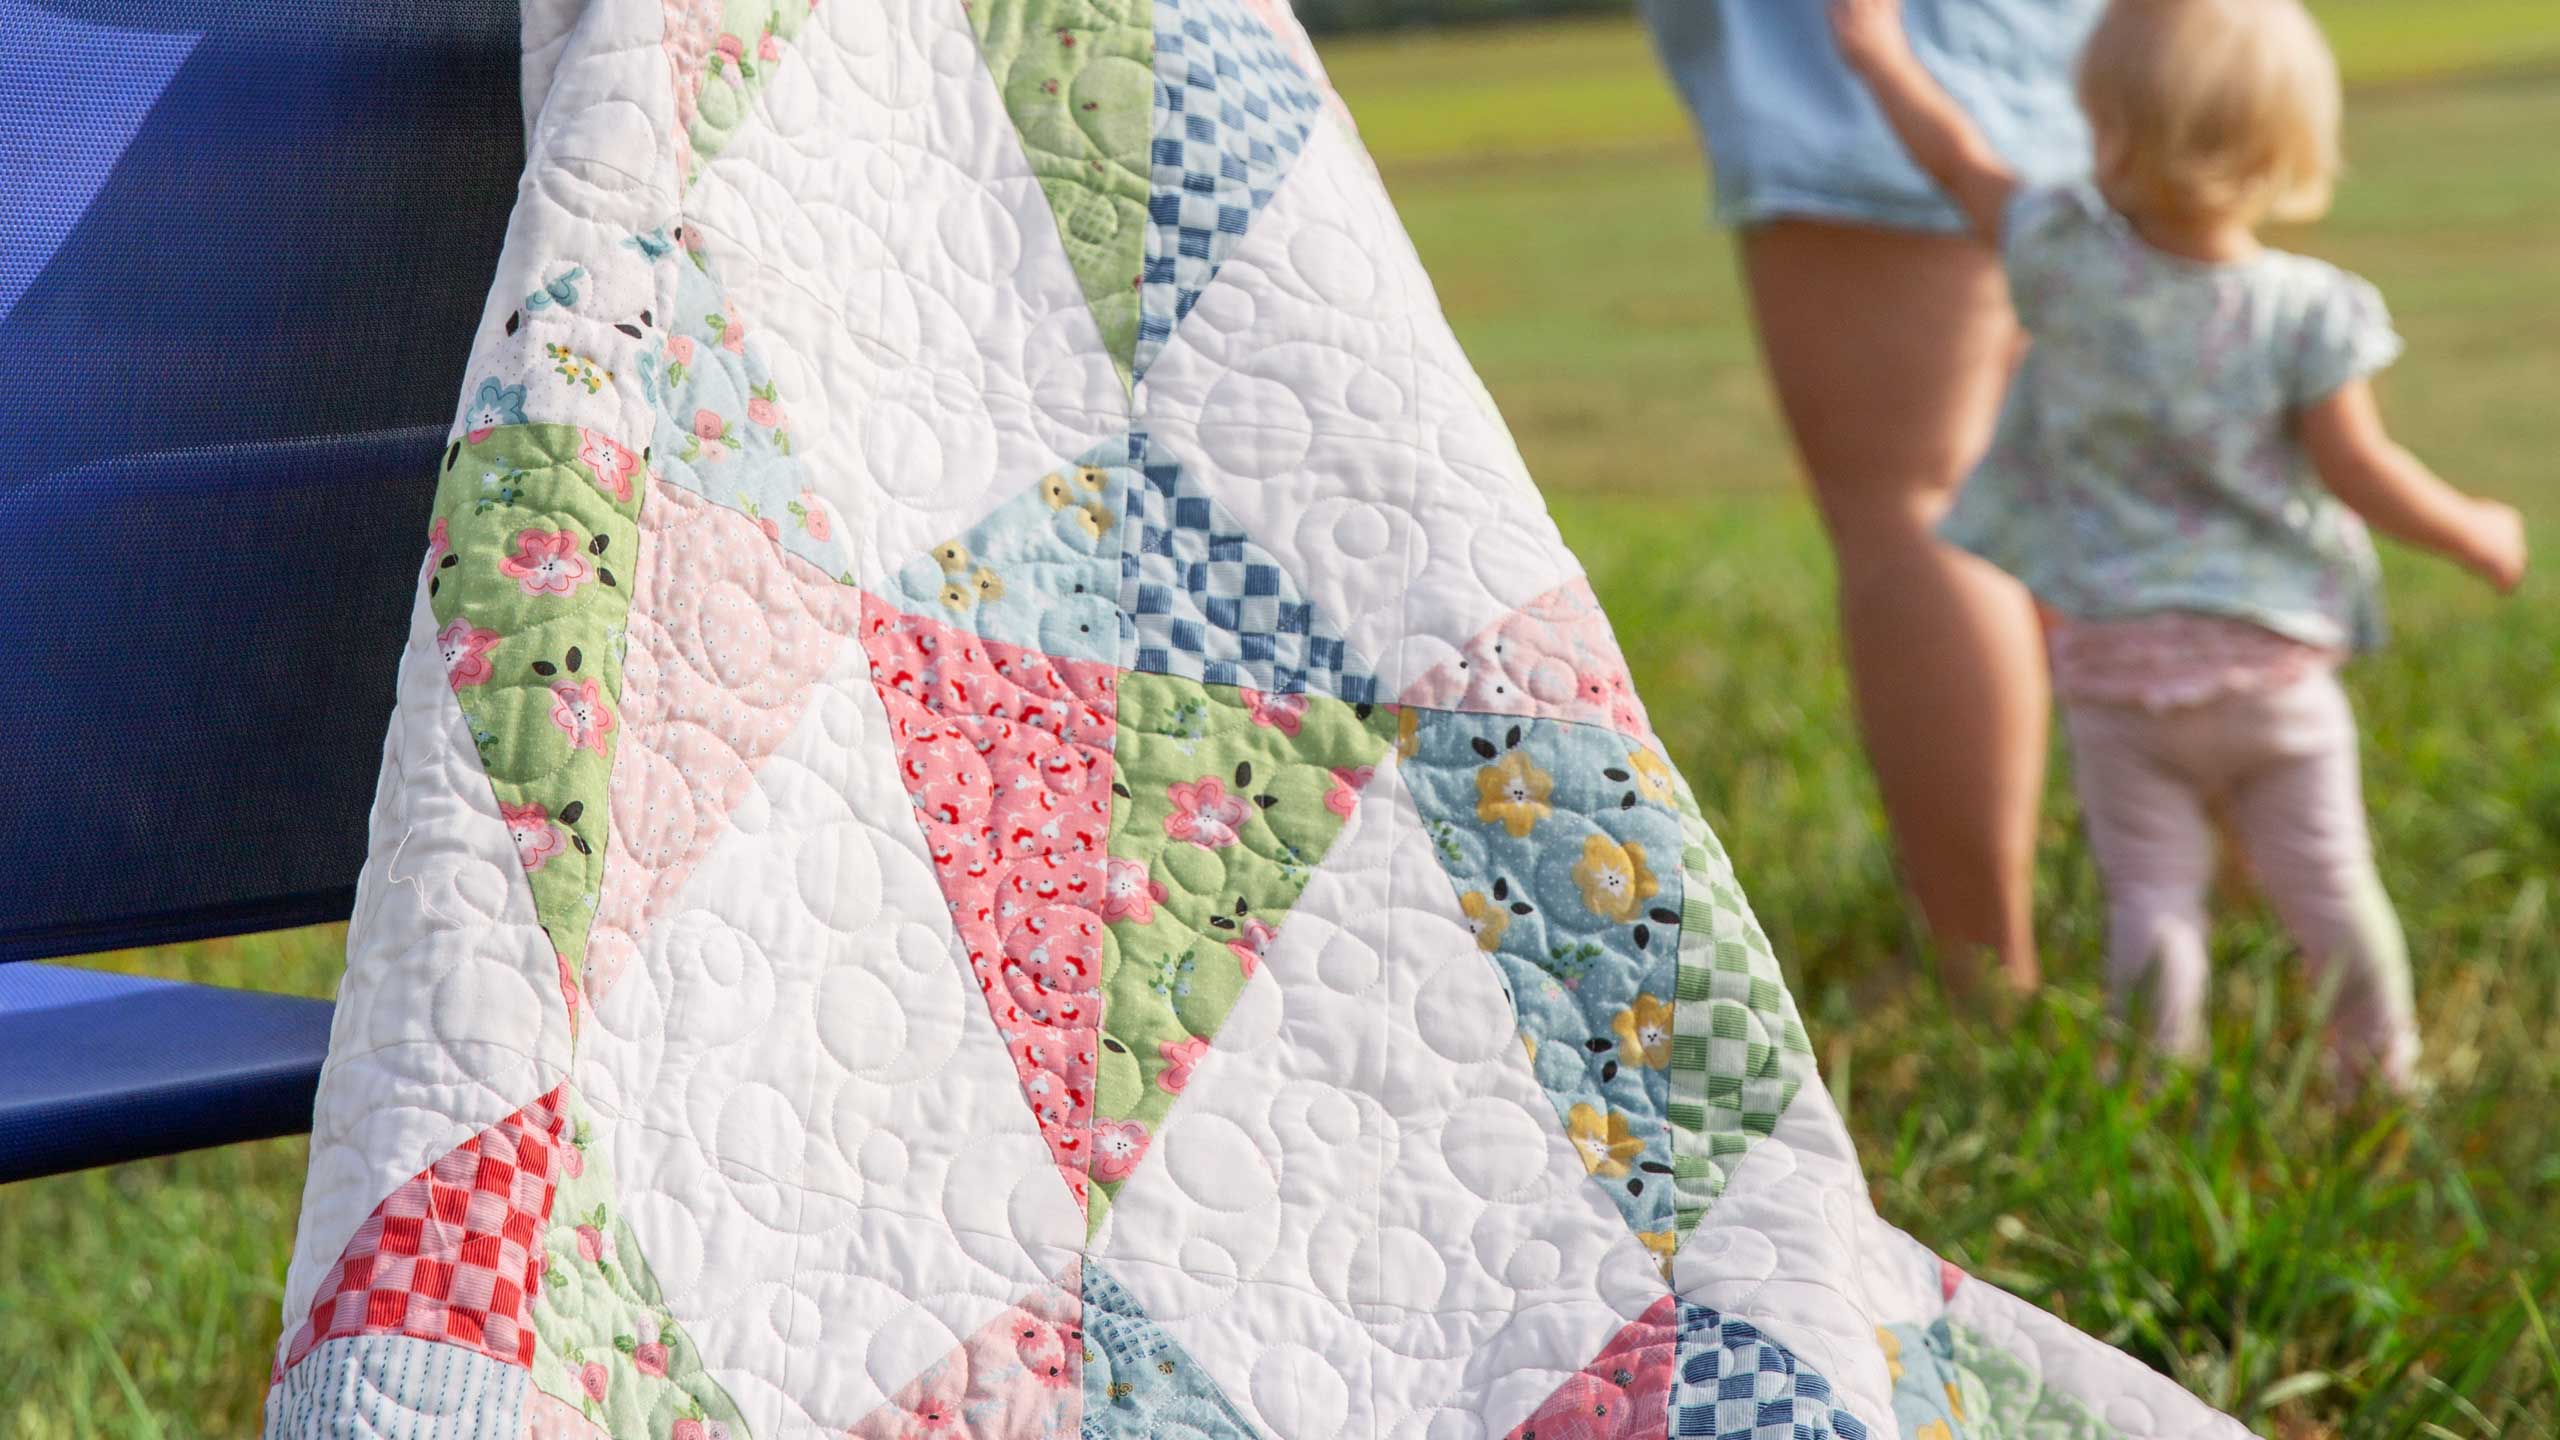
Hi everybody, it’s Jenny from the MSQC. And I’ve got a fun project for you today. Let’s take a look at this quilt behind me. Isn’t this great? We’re calling this Kite Season, of course because these are kites. And they’re just darling and I can’t wait to show you how to do it. So to make this quilt what you’re going to need is one pack of ten inch printed squares and one pack of a background fabric. For the printed squares we’ve used Date Night by Heidi Staples for Riley Blake Designs. Our background here is just this creamy white. You’re going to want to use whatever goes with your fabric. For your first inner border you’re going to need ¾ of a yard. And for your outer border, we have a nice big six inch border here. And we used 1 ¾ yards. Now on our backing right here, this is our backing. Isn’t that cute? We actually used eight yards of this which seems like a lot but this is a giant quilt. This quilt is like 88 by 94 so almost, I mean it’s just huge. It’s like 90 by 95 and so it’s just a great big quilt. It’s 88 by 94. Anyway let me show you how to make this because this is really fun.
What we’re going to use to make this is we’re going to make some half square triangles for the top right here. These are our half square triangles. And these are our half square rectangles down here. So I’ll refresh you on how to do that. So what we’re going to do is we’re going to start with one square of print fabric and one square of solid like this. And I’m going to then cut it in half. And in the pattern it gives you all the numbers of how many you need of each. And I’m just going to show you this one block but I can’t remember all those numbers. So what we’re going to do is we’re going to have one of these is going to be our half square rectangle. And we’re going to take this fabric, we’re going to work on the half square rectangles first because you’re going to get two from each side but they’re both going to be going the same direction. So you’ll need to cut some going this way and some going this way. Or not cut but draw the line. So we’re going to start this first one with our line going this direction. And I’m just going to draw a line corner to corner on this long diagonal rectangle. So let’s go here. And you’re going to do some of your lines are going to go this way and some are going to go this way. And that’s just so you have the two sides that are coming together to form the kite.
Alright so when you’re ready to put this on your rectangle what you’re going to do is you’re going to lay your line corner to corner across your rectangle like this. So this one is going to sit at an angle. If you try to put it on this way and they’re straight, you don’t want that because you’ll end up with little mountains. So remember you’re going to go across the block like this, match your line corner to corner. Then we’re going to stitch a quarter of an inch on either side of this. So let’s go here. We’ll do that. And what I’m going to do is I’m just going to put my presser foot right along the edge and sew down here. And then we’re going to flip this around and sew up the other side. Alright. So now what we’re going to do is we’re going to cut on the line we’ve drawn. So we’re going to lay our ruler again corner to corner. And we not use our pen but our rotary cutter which I left open, bad habit. Alright so we’ve cut that and now we have these two pieces. We’re going to press those open. Let me just lay this stuff over here. And I”m going to lay my dark color on the top, set the seam and roll this back. And see how that gives you that nice rectangle. And we’re going to do the same thing on this side and then we’re going to press this back as well. And give it a little shot of steam. Now you see how they’re both going the same way. So this half of our kite goes this way. You’ll want to do half and half so that the other ones go the other direction. And I have one here going the other direction like this. So that makes the bottom half of our kite. Now for the top half of our kite you’re just going to make half square triangles.
So we can do that right here with this little piece. And this is a half of an easy eight square. So basically what we can do is we can either cut these in half and draw two lines and sew on either side or we can leave them connected. And I’m going to draw these lines and show you what I did here because this is just, it’s just leaving them together. And it just makes it a little bit quicker. So what I’m doing is I drew a line right down the middle and then I’m drawing a line diagonally corner to corner from that center line. And again this is just half of the easy eight. For some of them you’ll want to do the easy eight. But I just wanted my tops to be all scrapy and mixed up so I did them kind of half and half. Alright so now we’re going to sew a quarter of an inch on either side of this line. And I”m going to go up here like this to the top and then just come over and go down the other side like that. Then I’m going to flip around and go on the inside of that line like this to the line and then flip around and come down this side. Alright so basically for these you can do the easy eight, you can cut them into fourths and draw the line because you’ll see right now as I make this cut right here, basically we had two charms that we drew the line and sewed on either side. So that’s just kind of a little, quicker way of doing this when you’re using half blocks. But you’ll notice that if you do, if you do your half blocks you’ll get two bottoms and you’ll get four tops. So you get twice as many tops as bottoms so you’ll have to make sure that you get more bottoms than tops to even it out. And all those numbers are in the pattern. And when I sew these, literally I just go along and sew so I’m not sure what I’m going to end up with until at the very end. And that’s why we have these great technical writers that actually figure it all out and write it down for us. Alright. So our little fabric tails over here, our kite sides should be about 4 ½ inches wide, once we took that seam. Let’s look at them. And mine are pretty close. And these should also be 4 ½ inches wide. And mine are pretty close. Some are a little bit bigger. And so you can square these if you want. On mine I actually waited until my whole block was done before I squared it. But if you’re going for perfection here you can actually just square these which I’m just laying my seam line on their seam line and trimming both sides. And that’s going to give me, that’s going to give me a nice 4 ½ inch square, already squared. So again I’ll do one of these like this so I have a couple.
Now because because I used half for the bottom and half for the little tops they’re the same. And I don’t want them to be the same so I have other ones over here that are already done. And we’re going to use those. Let me iron that one. He got a little wrinkly. So what I’m going to do here is I’m going to take this bottom right here and sew it to this top. So 4 ½ match those up, sew them on there. And if this one, see how this one is a little off, that’s not going to matter because we’re going to square those up. And you’ll see this is a really forgiving pattern because we’re not too worried about the points on this. Alright so that’s this one. I’ll press it open. And then I’m going to look at this green one and I”m going to decide, I have a green down here on the bottom and what can go on the top. And I think this one will work well on the top. So we’ll put this on here like this. And again just sew a quarter of an inch, sew these two pieces together like this and right across the top. Alright now we’re going to iron these open and then we’re going to sew these two together. And you want to make sure that you match this seam. This is the seam you want to worry about. So we’re going to turn these over. And we’re going to make sure that one seam is going one direction, one’s going the other so they’re nested up. I can feel with my fingers there’s no room in between. And we’re just going to sew a quarter of an inch right down the side. I’m going to line these up together here. Alright. Now we’re going to press this open. So I’m going to set that seam like that. And then just kind of roll it back, give it a lot of room here. And I’m going to steam this and make it nice as flat. Now one of the good things about these blocks is that they tend to kind of look, they can get a little wonky, just a little wonky. But we’re going to square them up.
So we’re going to square this to 8 ½. And so I’m just looking at my lines here. And I’m going to sew this up right here. So your middle line, you want your middle line here. If you’re going to have, this is just the way I do it because that’s how my math brain works. So if this is going to be 8 ½ I’m going to want 4 ¼ on each side. Is that right math guys? Ok, good. All of a sudden I was like, wait a minute. So 4 ¼ . So I’m going to come over here to the quarter and I’m going to measure out 4 ¼ and I’m going to look at my side right here. So I’m going to lay my ruler this way, come out 4 ¼ from that middle seam and I”m going to trim this up. And see I have almost none up here because I squared this top block. But my bottom block needs a little bit of trimming. So we’re going 4 ¼ from the middle on both sides just like that. Trim that up and then the length of our block is going to be 13 ½. Now on the 13 ½ what I do is I just kind of, this top part right here, I just kind of trim this up so it’s nice and straight. And so I’m just going to lay that right across and make sure my middle line meets up. I’m going to take as much of the, or leave as much of this fabric up here as I can like this. And so I’m barely taking any off. And then anything extra I’ll take off the bottom. So let’s count here, I’ve got 13 ½ one, two, three, four, five, six, seven, eight, nine, ten, eleven, twelve, thirteen and a half. And it’s almost perfect. So we’re going to go a half an inch here and just trim off this bottom so all your blocks get squared up to 13 ½. And this is your finished block like that. Isn’t that cute?
And so it just makes this cute little kite shape. And then when you go to put them together you’re going to just put them together. Now you’ll notice right here, take a good look at this because when we sew these blocks together we are losing this point. And I want to point that out on the quilt right here. So don’t stress over this because a lot of times people are like, oh but I’m losing my point. So don’t stress because we’ve lost the points here. But we’ve kept most of our bottom points like this and most of our top points as well, some of those we lost as well. But it gives the kite shape and it retains, you still know what it is and it retains that. So this is one of those blocks that just isn’t too fussy but it’s a lot of fun and really cute. And we hope you enjoyed this tutorial on the Kite Season block from the MSQC.
& Progress on Social