Disappearing Double Pinwheel Quilt Tutorial
Jenny Doan
Disappearing Double Pinwheel Quilt Tutorial
- 1 Pack x 10" Precut Fabric Squares (Layer Cakes) - Print
- 1 Pack x 10" Precut Fabric Squares (Layer Cakes) - Solid
- 3/4 Yard x Quilt Fabric for Inner Border
- 1 3/4 Yards x Quilt Fabric for Outer Border
- 3/4 Yard x Quilt Fabric for Binding
- 8 1/2 Yards x Quilt Backing Fabric


Finish your masterpiece and let us give it the finishing touch it deserves.
Subscribe to MSQC on YouTube
Hundreds of FREE tutorials and a new one from Jenny launches every Friday.
video transcript
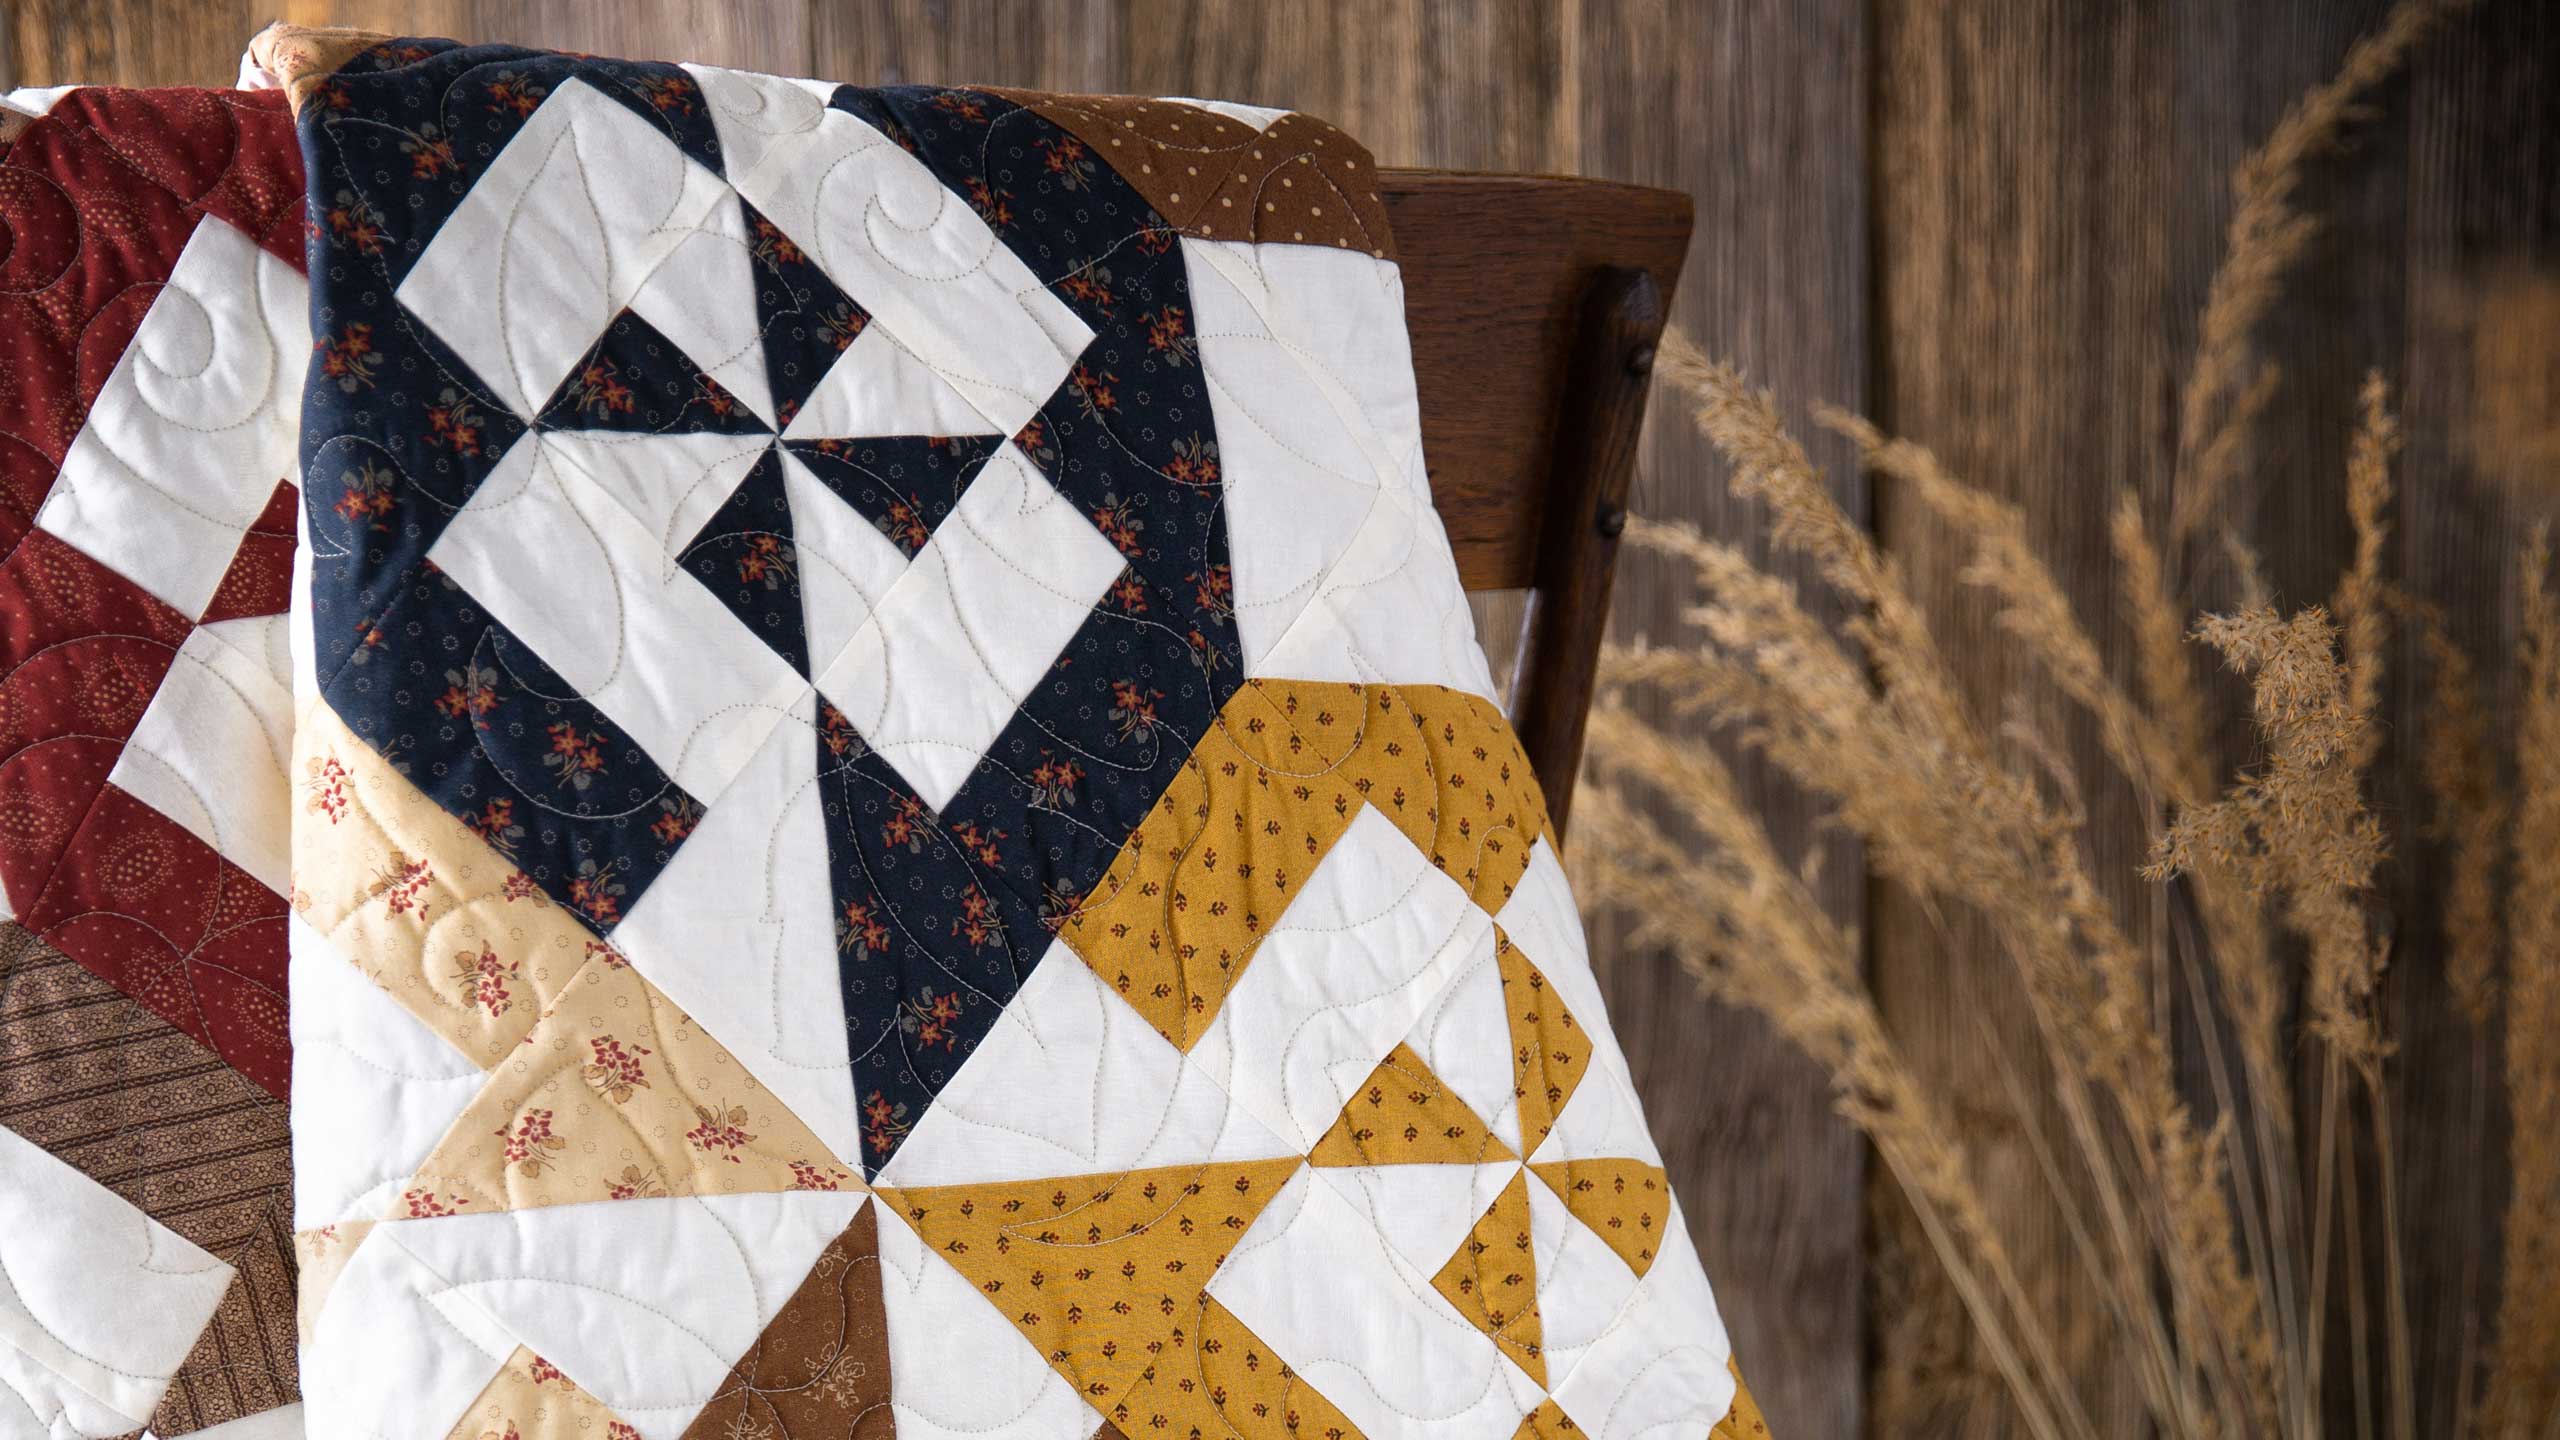
Hi everybody, it’s Jenny from the MSQC. And I’ve got a fun project for you today. Now if you follow me at all you know I like to cut stuff up. And that’s what this is about. Let’s take a look at this quilt behind me. Isn’t this great? This is another one of our disappearing pinwheel blocks. So if you’ve never seen one of those you’re in for a treat and if you’ve seen a bunch, this is another way to do it that just makes it really fun. We’re calling this the Disappearing Double Pinwheel because when you put the block together it makes a secondary pinwheel as well as the little one that was planned. So that’s really fun. So to make this quilt what you’re going to need is one packet of ten-inch squares. And we have used Hickory Road by Jo Morton for Moda. And you’re going to need one packet of a background square. So there are 42 ten inch squares in these packs. And you’re going to need a pack of the background square because each one of our layer cake squares is going to be paired with a background square. So you’re also going to need a little bit of border yardage. This inner border is ¾ of a yard. And this outer border out here, let’s see, it’s a big six-inch border. And you’re going to need 1 ¾ yard. For your backing, you’re going to need 8 ½ yards. That’s a lot of backing but this is a big quilt. Now if you’re going to use a wide back on this you’re just going to need around three yards because this makes a big quilt. It’s 81 by 92. So let me show you how we do this because this is so much fun. And again if you’ve never seen any of these disappearing blocks you just need to look them up because they’re going to change your world. It’s just so fun.
So what we’re going to do is we’re going to a background piece and a colored piece right like this, a colored piece. We’re going to put them right sides together. And I have these two actually ready to go. I’ve actually sewn one side because what we’re going to do is we’re going to sew all the way around the outside of this square, a quarter of an inch. And, and we’re just going to come over here and line up our presser foot and do that. So I’m just going to sew down like that right off the edge, turn it and do all four sides. And one more. So now what we’ve done is sewn our quarter of an inch and to be honest the quarter of an inch isn’t totally important. What’s important is that you’re consistent on all four sides. What we’re going to do now is I’m going to heat up my iron. And I’m going to cut this diagonally both directions. So we’re going to go line our ruler corner to corner like this and then we’re going to cut this as well. So diagonally both directions just like that. Then we’re going to press these open and this is going to give us four half square triangles. So this is a cool method to make half square triangles for all those half square triangle projects. And I’m just going to line these up and press them open. There’s three and this is four. And I probably should have been setting my seam the whole time. We’ll get one right, right? There we go. Setting the seam just relaxes the thread, that’s all it does.
Alright so now we’re going to put this together in a pinwheel. And a pinwheel always goes light, dark, light, dark, light, dark, light, dark with all seams to the center. So we’re going to go here. And, and that little mantra helps me so much because look at that otherwise I get all turned around. Light, dark, light, dark, all seams to the center. So now what we’re going to do is we’re going to take these two up here and these two right here and we’re going to sew those together a quarter of an inch right down the side. And we’re going to do one more set right here, right, we’re going to keep them hooked together too because that will help us put our block together. Alright. So now what we’re going to do is we’re going to check to make sure these are going the right direction still and they are. But you know what I want to show you something first. I want to show you how, how to get that perfect point in the center of your pinwheel. So right here you’ll notice these two threads crossing right here. You see those? So what we’re going to do is when we sew a quarter of an inch down here, as long as we stay on that cross or to this side of it, to the seam side of it, you’re never going to lose that point because your point is right in here. So you just don’t want, if you sew across here you’re going to lose your point. So right here where those threads cross that’s your wake up call about, you know, don’t go there. You know don’t, go right on the cross or on the seam side of it. Now, to be honest, I have actually sewn my seam like this and then just veered out a little bit to make sure that I got the point in there. And then pressed the heck out of it. So you know there are several ways to do this and that’s not probably the best way but I want those points to be in there. So we’re going to go over here to the sewing machine and we’re going to sew a quarter of an inch down this side. And I’m going to lift this up now and make sure that these two seams are nested together. And then I’m going to watch for where my criss-cross is and I’m going to sew right across there and then I’m going to come down the other side. Alright now let’s look at this and see how we did. Oh good. It worked, look at that point in there. That’s a pretty good point. I’m happy with that. And so now we’re going to iron this, make sure that it’s nice and flat. Now I like to iron from the front. And then if it, if there’s any like seams going the way that I don’t like, which you can see. So this seam I can see right here is going to be a little rumply on the back. So I’m going to flip that over and I’m going to make that seam lay the way I want it to. And this one too. This one can go this way. And sometimes you just need a little shot of steam to help it. If this centerpiece part right here feels too bulky to you, you can iron that open. Mine I think feels ok.
So once you get your pinwheel made you’re going to want to measure it because of your seam allowance yours could measure a little different than mine. Mine measures 12 ¾ and you’re going to divide that by three. So I whipped out my phone calculator, divided 12 ¾ by three. And it’s 4 ¼. So now I know every block I want to be 4 ¼. And I can measure from the outside in and it will work. But my outsides aren’t always this perfect so I like to measure from the center seam which means we have to divide that measurement in half and it’s 2 ⅛. But what I want you to do is make sure you measure your, your block and then you’re going to divide that by three and then half that measurement again if you’re going to cut from the center. So now what I’m going to do is I’m going to cut 2 ⅛ inches from that center seam on all four sides of the center seam. So we’re going to make our first cut here. We’re going to turn our ruler and do this. And I usually do this on a rotating mat. I don’t know why I don’t have one up here today. But it just, we’re just going to go ahead and work our way around this square. And I’m going to make sure my ruler is on here. Oh, you know what, this is a really good point. If you kind of have a wonky center seam you can actually cut this far and adjust your ruler to make sure that it stays on the 2 ⅛ because all these squares are going to function independently of each other.
So once you get all your cuts made you’re ready to put things together. And this is where the fun begins because there’s so many different ways to set them together. Recently we had a guild who wrote in and they said look at all the ways we set this together. And this is one of the ways they showed us. And so that’s really fun to me. This is the block we’re working on today. And let me show you how this fits into the quilt. When you put it into the quilt it’s going to go in just like that. You see how that fits in there. And you’re really just going to sew them together and then just by sewing them together it makes another pinwheel. So what we’re going to do is we’re going to look at this the way it’s set. And we’re going to turn this one down. Our bar block is up. So one of the things when I start doing row sewing, what I do is I know that all my bar blocks have to go out like this. You know when I look at the block I see that right away. So all the bar blocks go out from that center pinwheel. These corner ones are going to go, this one is going to go out and this one is going to go in. They’re both facing the same direction. These are both going to face the other direction. And that makes your block just like that. So then you’re just going to sew these rows together, these rows together and these rows together. And it just makes this little block.
So let me show you how to set these together because it goes together super easily. Once you get your blocks done you’re just going to do the same thing I just did 42 times. And then we’re going to set these together. And, and of course, there is more than one setting on this. But this makes it really fun. So let’s look at the quilt. Let’s see how these are laid together. Ok so see this right here, see this V. This lets me know that I’m going to turn my blocks. My blocks are going to go together opposite. So right here they’re going the same direction. I’m going to turn this until the V lines up. And so that’s how they’re going to go together. Every other one is going to be turned like that. So then we’re going to do this right here. And this one is going to come down like this right here. And that’s the beginning of your pinwheel. So you’re going to have your V at the top, your V at the bottom. This is, I have to have all those little things in my head so that I know I’m laying it out right. And so you’re just going to do that like this. And there’s your next, your next little V right there. Now the fun thing about this is it’s six across by seven down so it makes a really good size quilt. And this is just another disappearing pinwheel. And we hope you enjoyed this tutorial on the Disappearing Double Pinwheel from the MSQC.
& Progress on Social