Sundance Cupcake Quilt Tutorial
Jenny Doan
Sundance Cupcake Quilt Tutorial
- 1 pack x 5" Precut Fabric Squares (Charm Packs) - Print
- 1 pack x 5" Precut Fabric Squares (Charm Packs) - Background
- ¼ yard x Inner Border Fabric
- ¾ yard x Outer Border Fabric
- ½ yard x Quilt Fabric for Binding
- 2½ yards x Quilt Fabric for Backing
- 1 x Moda Cupcake Mix Recipe Foundation Paper Pattern #4


Finish your masterpiece and let us give it the finishing touch it deserves.
Subscribe to MSQC on YouTube
Hundreds of FREE tutorials and a new one from Jenny launches every Friday.
video transcript
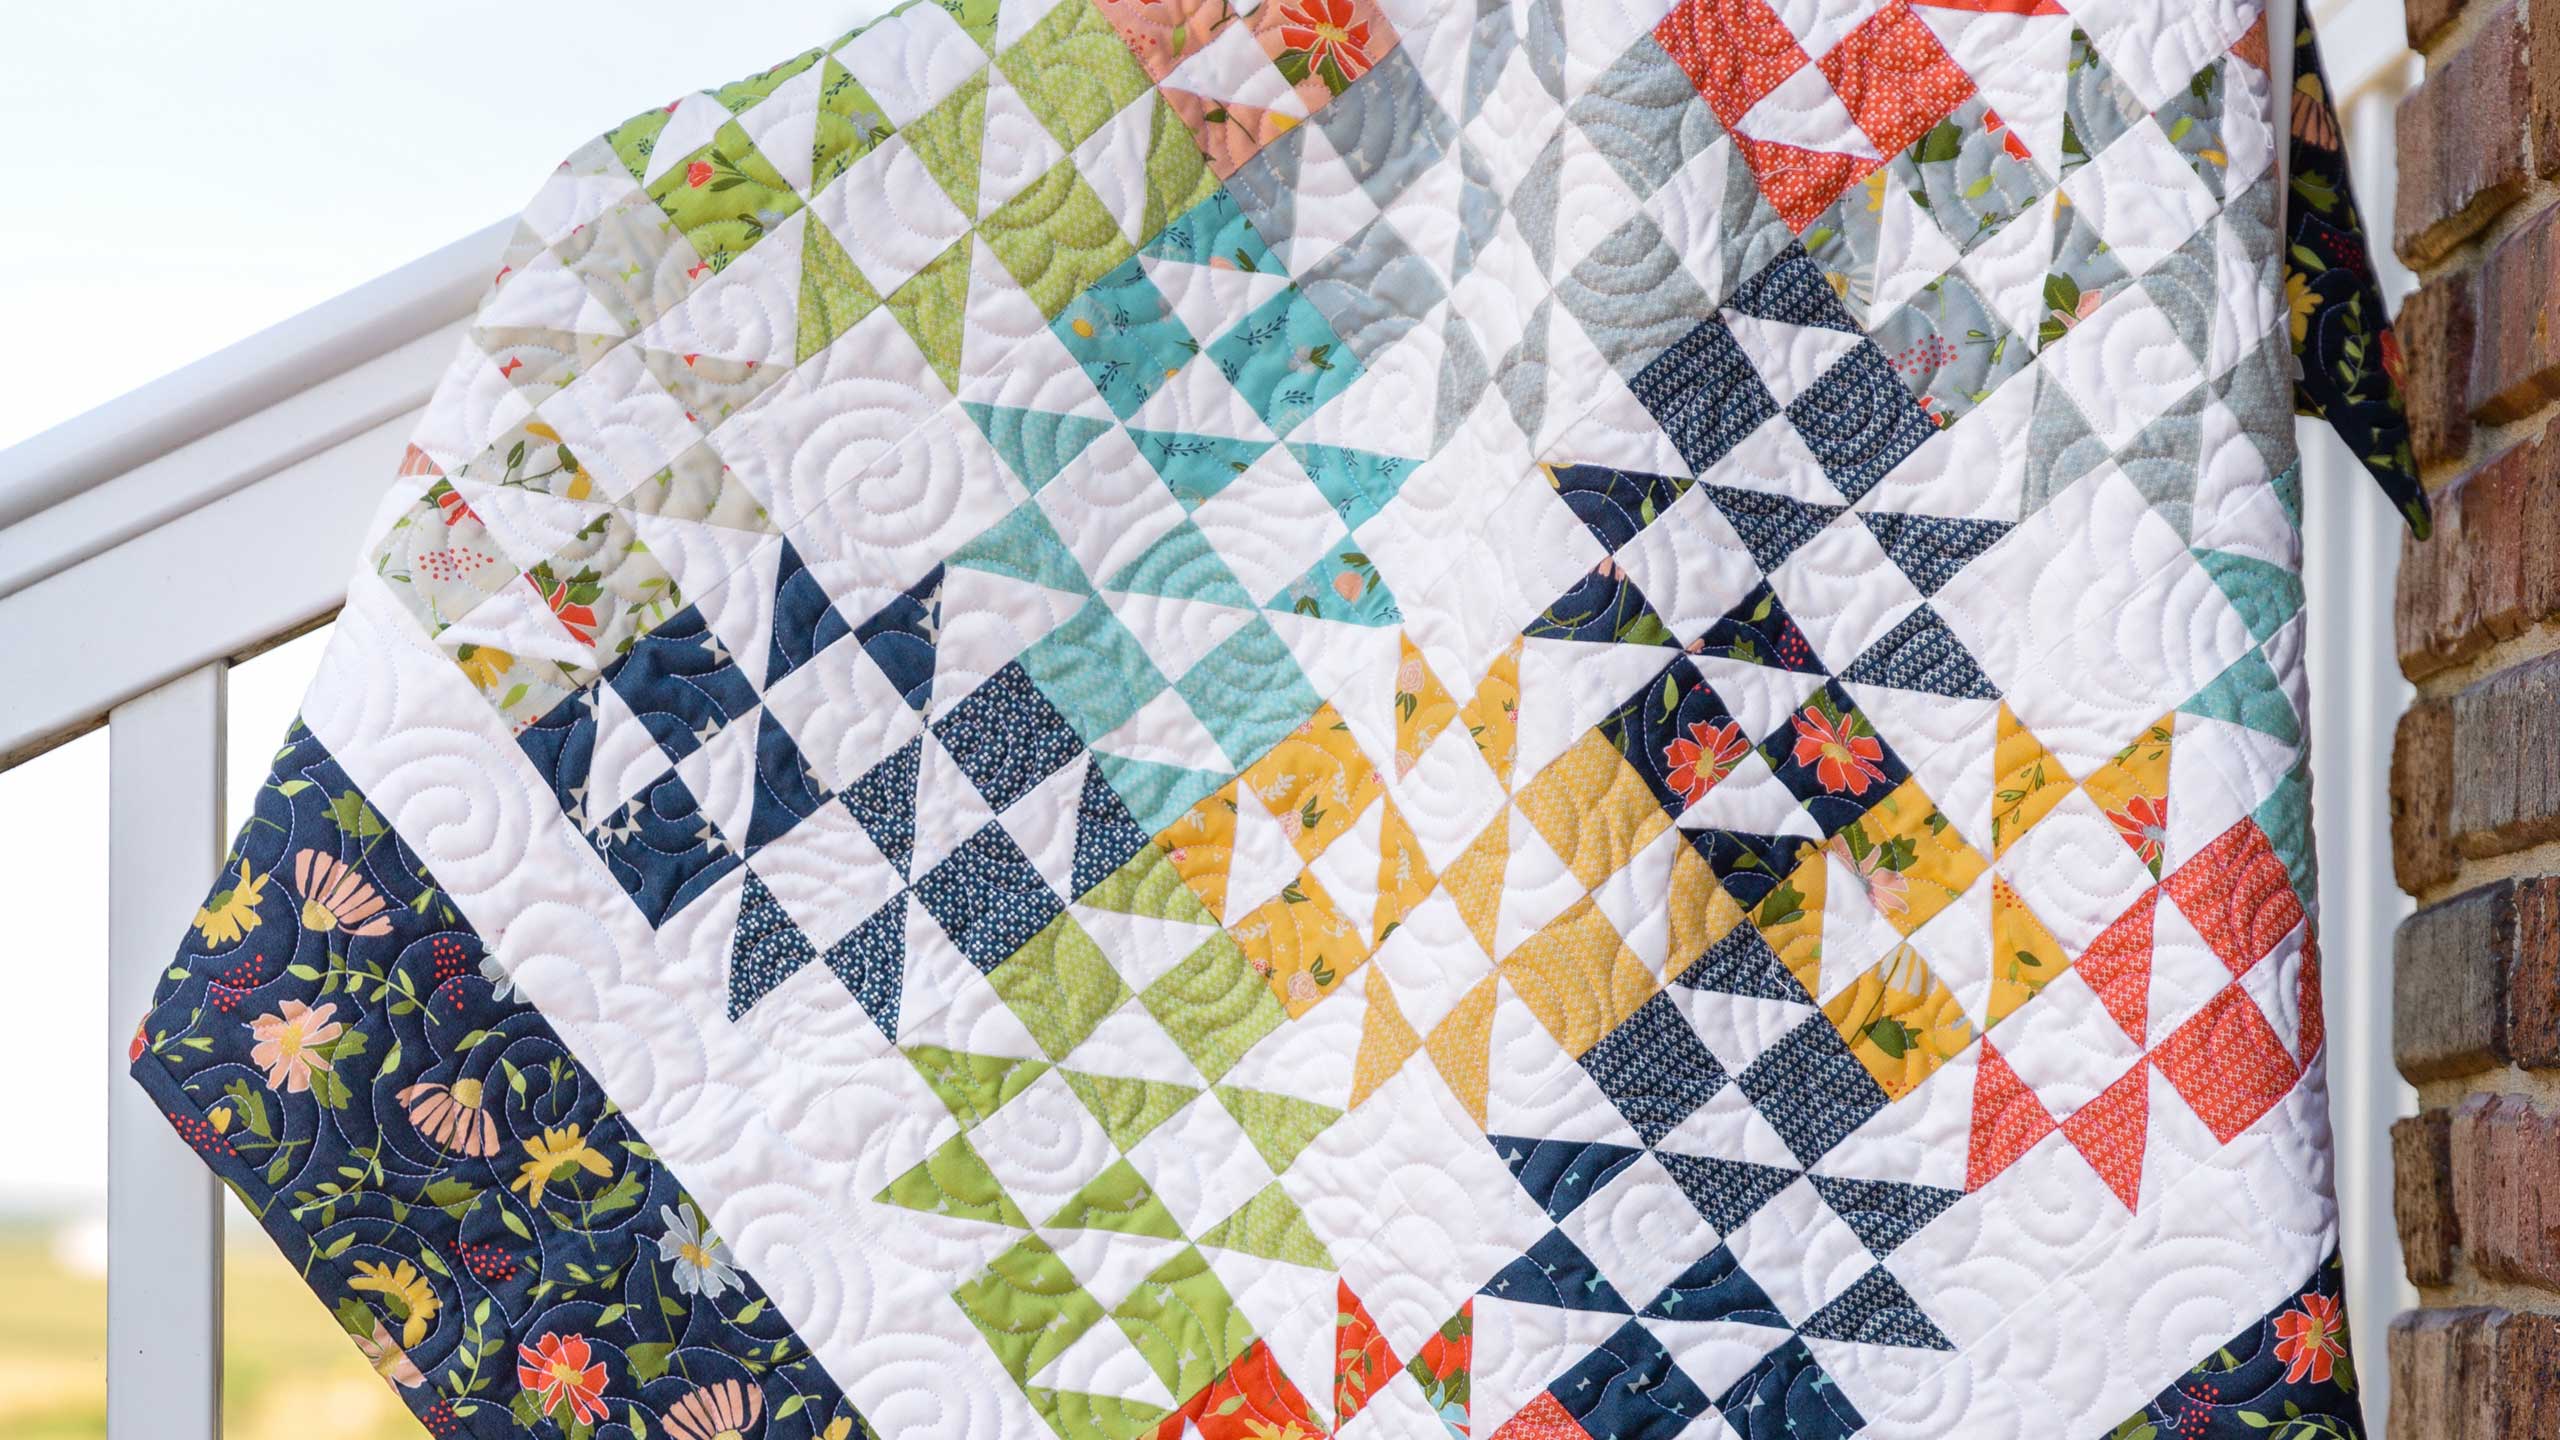
Hi everybody, it’s Jenny from the MSQC. And I’ve got a great project for you today. Take a look at this quilt behind me. Isn’t this darling? Love the colors, love the fabric. So to make this quilt what you’re going to need is one packet of five inch squares. And we have used Clover Hollow by Sheri & Chelsie of A Quilting Life for Moda. You’re also going to need one packet of a background or a solid. You’re going to need a little inner border. We have a little inner border out here. And you’re just going to need a tiny bit because this is a tiny little quilt. So a ¼ yard of this. And for this outer border out here, this is a little five inch border. And you’re going to need ¾ of a yard. Your backing, you’re going to need 2 ½ yards for your backing. And look how pretty that is. I love that little quilting motif on there, so pretty. So we made this quilt using these cupcake mixes. The little cupcake mixes are made specifically for the charm packs. And it makes making smaller blocks much easier. So this is how it looks. This is Cupcake Mix Recipe number four. Now there are big cake mixes for the layer cakes but these little ones are just for the charms. So it shows on here you can make all these different blocks. And this is how it looks inside. So for this block, right here, this is the block we’re working at. And each half of this block right here, it takes two papers.
So we’re going to take out two of these papers like this. And we are going to stack them on two of our squares. So I”m going to pull a couple of these out like this. And we’re going to put our right sides together, our colored fabric, our white fabric, our background color and our little cupcake mix like this. Now let me do it with this other one first before I get going here. We do this one, we’ll do them both at the same time just like that. Now here’s a few tips for you. You’ll want to use some flat head pins. And if you put the flat head pin right in the middle of this right here. So this actually says right here, cut two two inch squares. And you’re going to cut on the solid lines. Wherever there’s a solid line that’s where you’re going to cut. And you’re going to sew on the stitch line. So the only stitch line we’re going to sew on on this is this one right here. And all the rest of these pieces just get cut out. And so if you use these flat pins and put them right in the square so that, in the middle of the square so that nothing sticks out on the edge because you don’t want to, you know, you don’t want to cut that off. And it will keep it from moving and you’ll be able to lay your ruler flat on there. So let me get this one on there as well. Sometimes these are hard to pick up. There we go. Put that right in the middle. Make sure it doesn’t touch any of those outer lines. And this keeps everything together so that you can sew. And then when you get those cut out it’s already pinned together.
Alright so let me show you how to do this. Here’s another tip. You’re going to want to use, you’re going to want to cut out on these outside lines right here, you’re going to want to cut those out before, before you cut anything else. But first we have to sew. So what we’re going to do right here, see this little star? That’s where you start. And it gives you little arrows to go down here and then come back up the other side. So we’re going to do that on both of our blocks. And just follow the little stitch line. Make sure that your stitches, your stitch line matches up with their stitch line. And then we’re going to come around the other side. For some reason these make me so much braver. You know I always shy away from those tiny little pieces. But this, this just makes it seem easy to me. I just think that, it was Carrie Nelson who came up with this idea. And gosh I just think that these are genius. And there are a whole bunch of them. There’s a lot of different ones. Alright once you get these sewn together and that’s our only sew line.
Then we’re going to cut them apart. And so what you want to do is lay your ruler right over there. So over here there’s a little, it’s a stitching line and that has the little dashes and the cutting line is the solid. So we’re going to cut on all the solid lines. And it’s easiest to cut this little outside edge first. Otherwise you’re cutting tiny, tiny pieces off of tiny pieces. And so we’re going to cut these outer lines first. And one more. And then we’re going to cut, we’re going to cut it directly in half like this. And actually which lines you cut it doesn’t matter when you cut them. It just, you know, that’s kind of up to you. And so now this has a straight line down the center so we’re going to cut that, cut on the straight line. And then our little squares here that have the pins in them are already pinned together. Oop let me cut this piece off. They’re already pinned together and there’s a straight line around here. So we have to trim that edge as well. So we’re going to trim this. And we’re going to trim this. Very little waste on these. And then one more line over here.
Alright now we can take these apart and put this block together. And so we’re going to open it up and we’re going to have these two pieces right here. We’ll have a white square and a colored square. And then these we need to pull our paper off. And because we’ve sewn through it it’s already perforated so it just comes really easy. And we’re going to put those over here, dark side down so we can iron to the dark side. All four of those. And I’m just always so surprised at how exact and perfect this comes out. It actually makes me feel like a really good quilter. Alright one more. And I kind of chewed that one up there we go. Alright so now I”m going to set the seam on all these. And I have them laying all with the dark side up. And then I’m just going to roll these back. What’s cool about quilting is every seam fits in another seam. So it will all be enclosed.
Alright so let’s look at how to put these together. So one of these, here’s our block that we’re working on right here. And it takes two blocks, two papers to make a whole block. So this one is going to go, we’re going to put this one together with this print fabric, I’m sorry the print fabric facing out and then we have a solid square. And then we have a solid square down here and this one coming together like this. So this is this side. The other one is going to be exactly the same except it’s going to be, it’s going to have the white squares on it. So the white square goes up, over here, and like this. Just like that. So they’re kind of like night and day blocks, they’re opposites. And so then you’re just going to sew this together as a four patch. So let’s do that. And do your quarter of an inch seam. And one more here. And I’m going to go ahead and do one block at a time because they’re so tiny. You know I”m not really a tiny lover but this is just really fun. It makes me feel really accomplished. Alright here we go. Sew this together. Line that up. Nest my seams. Alright now let’s sew this other one over here. And I”m just going to grab this one. Lay them right sides together. And this one. And I’m going to fold them right back on each other right where they are so that I don’t get them out of, out of place. And then we’re going to sew these together. And I’m going to open them up and make sure they’re in the right places still and they are. It comes together like a little hourglass in the middle.
Alright now we’re going to press these open. And then we’re going to sew these two squares together. And this is going to make half our block. Alright so I have a half a block sewn together here already. So this one is going to go up here like this. And let’s make sure that we have this going the right way. So I’m going to acclimate my block to the one I’m sewing together here. And it’s going to go here and this is going to go here like that. Alright so let me sew these two together. And we’ll press this open. Oh my goodness those little pieces are so cute. Alright so now this is going to go, make sure I have them turned right. So there we go right together like that. We’ll sew this down. And this makes our little block. There we go. My thread came undone. I’m going nice and slow. I know that surprises you, right? Alright now let’s press this open. Look how cute this is. Oh my gosh.
So once you get your block all pressed look how cute it looks. It’s just darling. And there’s lots of ways to set this out. And the way that made the most sense in my brain was actually to put these together like a four patch. So I”m matching up my whole white blocks in the middle like this and make this kind of star block for me. So that’s the way I put these together. I did whole block, whole block, three, four of those and then a half row on the bottom just to give it a little bit of length. But you can obviously set it together any way you want. But it just makes me feel so accomplished and so proud of myself because these are little and they look good. So we hope you enjoyed this tutorial on the Sundance quilt from the MSQC.
& Progress on Social